Tiered Tomato Cage Christmas Trees
This tutorial shows how to make a tomato Christmas tree. Three different trees using the same sized cage.
A couple years ago I shared how I made my tomato cage Christmas tree. Well this year I decided to take it a step further and make tiered tomato cage Christmas trees using three tomato cages of the same size.
I also wanted to make them easier to anchor into the ground, so I adapted my original version. Think of it as perfecting the art of crafting a tomato cage Christmas tree.
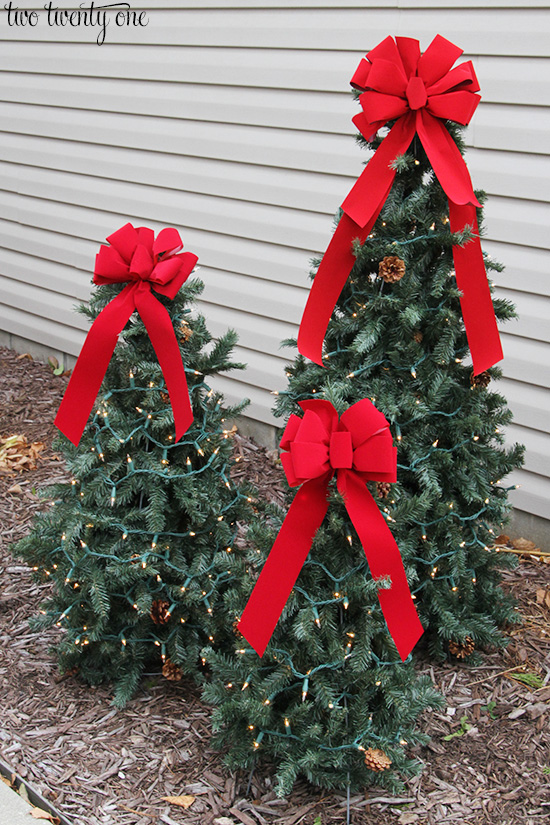
Before I go into the tutorial, let me say that these are ridiculously easy to make and can last years if properly taken care of. Plus, they cost a fraction of what you’d pay to buy them pre-made.
Tomato Cage Christmas Tree Supplies
3 tomato cages of the same size … you can buy a set of 4 heavy-duty cages here
6 strands of 9 foot WIRED, unlit garland (I used 9 ft Holiday Living garland from Lowe’s)
5 strands of 100 lights … found here
3 bows
zip ties … found here
Note: I used 54 inch tall tomato cages.
Trim the Cages
I use unlit garland because should the lights go out, it’s much more of a pain to get the lights to turn back on. If I used unlit garland and use strands of lights on top of the garland, I can easily remove the lights and add new ones.
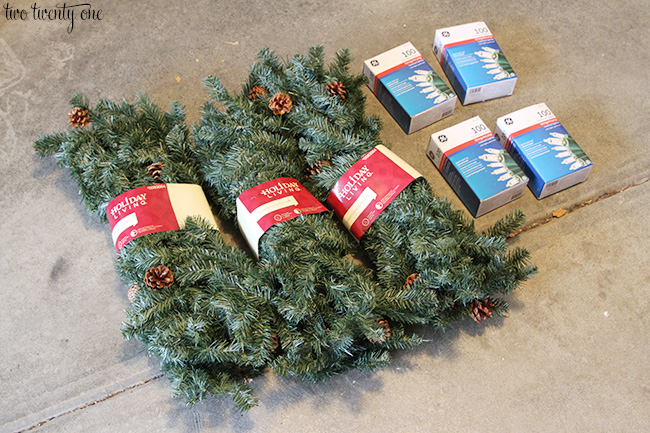
* The photo above doesn’t show the correct amounts, but I wanted to show the exact products I used for my tomato cage Christmas trees.
Snip the tomato cages to make them into three different sizes. You need to cut all three. Here’s Brad making the middle size tree with heavy-duty pliers.
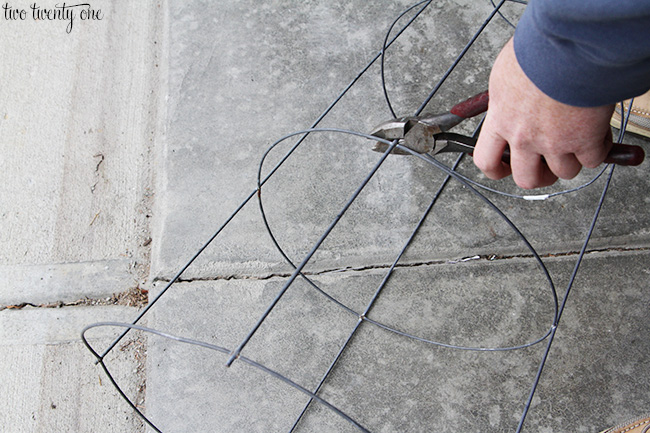
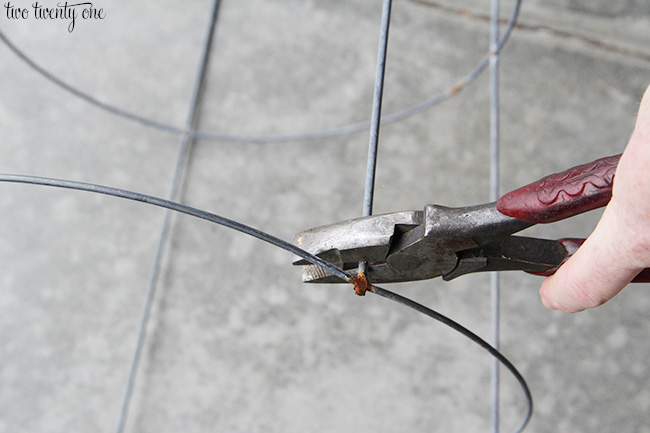
When you’re done you should have tomato cages like the following:
1- 3 ring, 1- 2 ring, 1- 1 ring
This results in tomato cage Christmas trees that are approximately 50 inches, 36 inches, and 30 inches tall.
Because I’m an awesome blogger, I changed things up and forgot to take a photo so I used my clearly professionally-trained Photoshop skills to create the smallest tree on the right side.
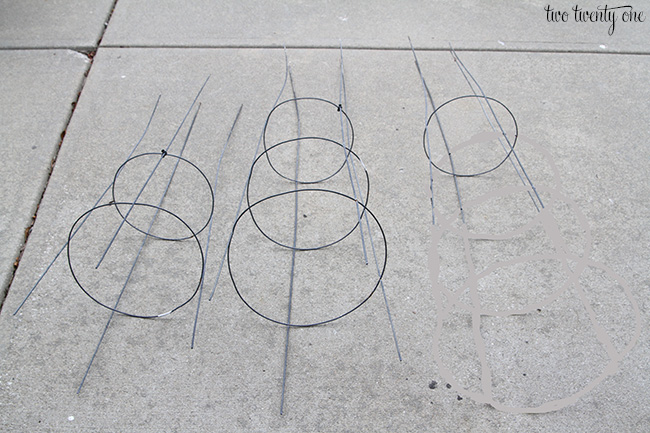
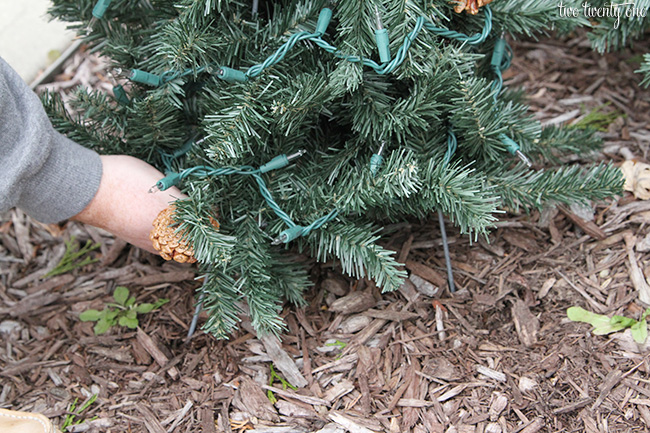
I purposely left the stakes at the bottom of the trees so they can easily be pushed into the ground.
When you’re done creating the tiered trees, use a zip tie to make a point at the top of the trees.
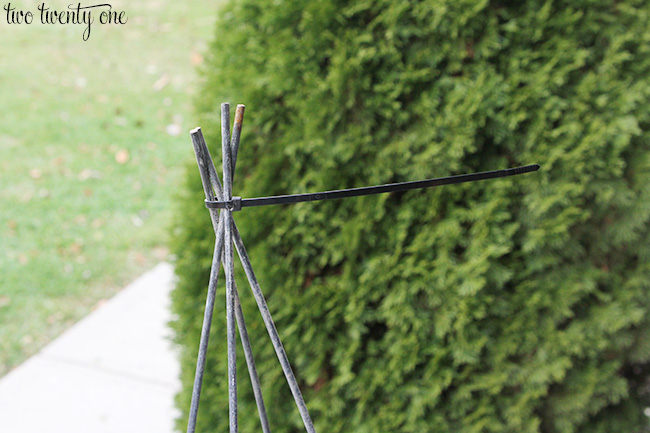
Add Garland to the Cages
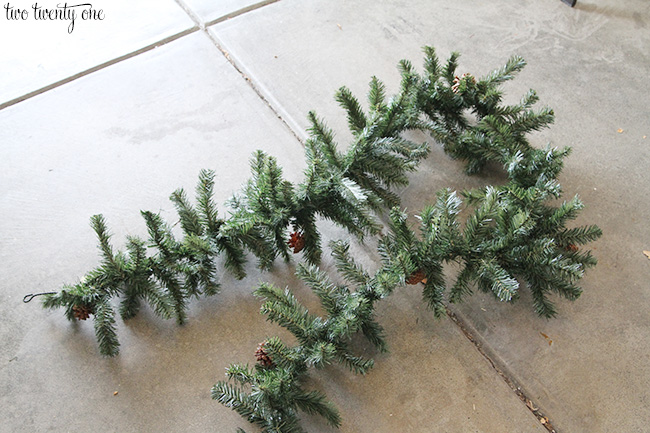
Then, it’s time to fluff your garland. Going from this:
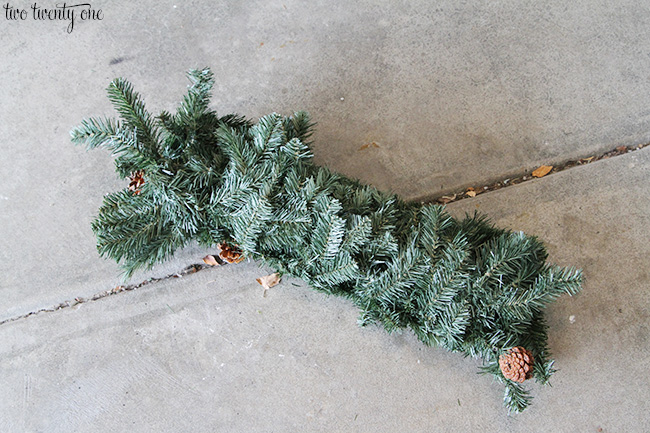
To this:
I’m going to show you have to attach the garland to the largest tomato cage Christmas tree. You do the same thing for the other trees, you’ll just use less garland. I’ll tell you how much garland and lights I used on both trees later on.
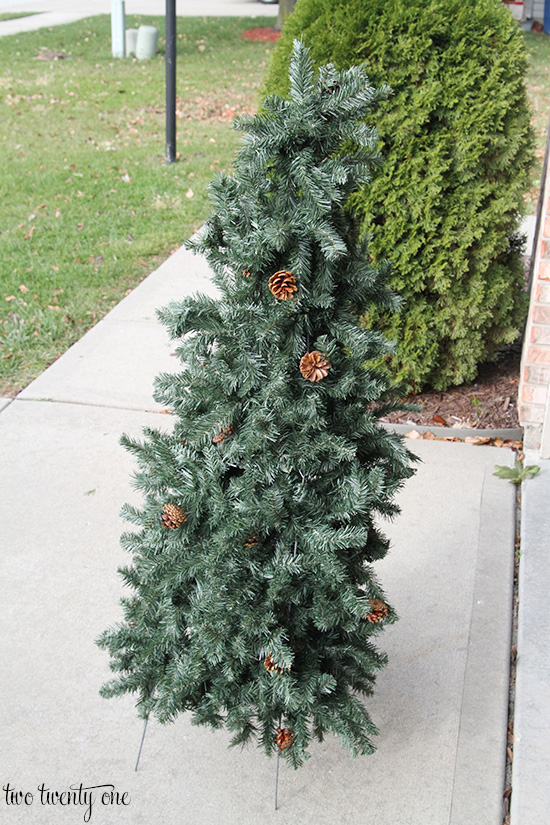
The garland I purchased came with this great wire on both ends so I just wrapped it onto the cage.
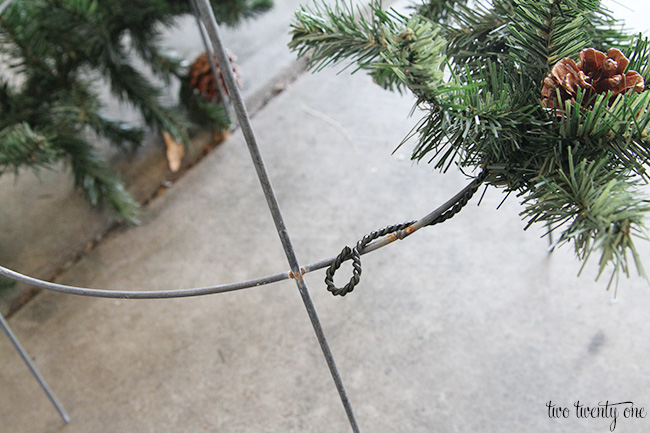
Now, wrap the garland around the cage and secure it with the wire on the opposite end.
I didn’t feel the need to secure the garland more than that, but if you want, you could use some zip ties to attach it to the cage between the two ends.
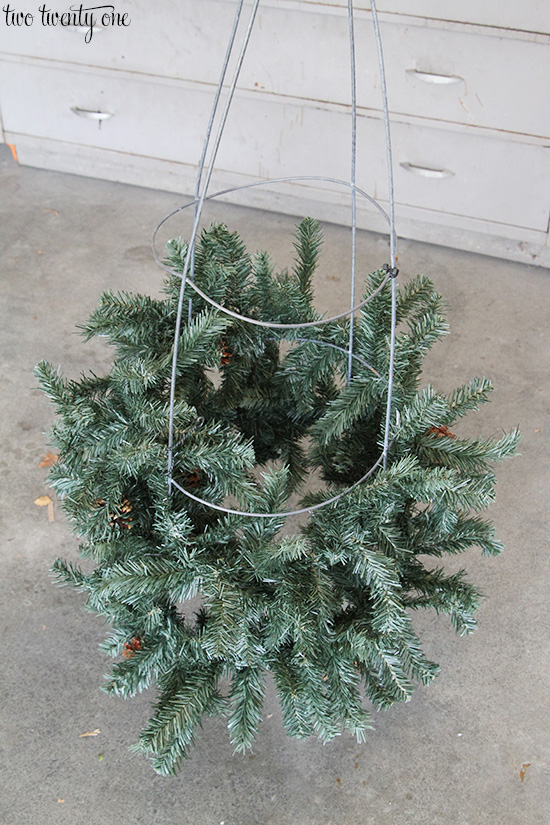
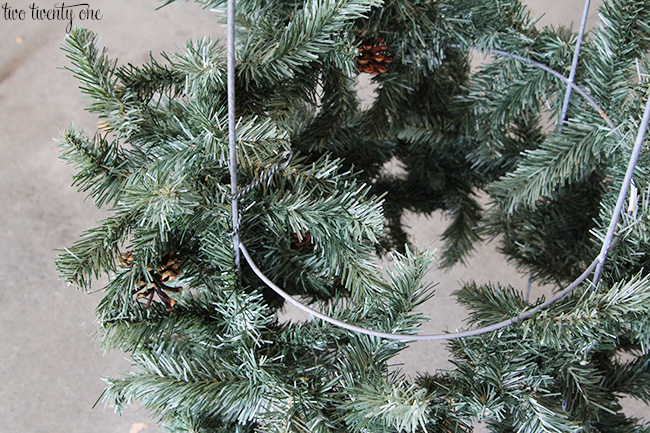
Next, add another piece of garland and repeat for the middle section of the tree.
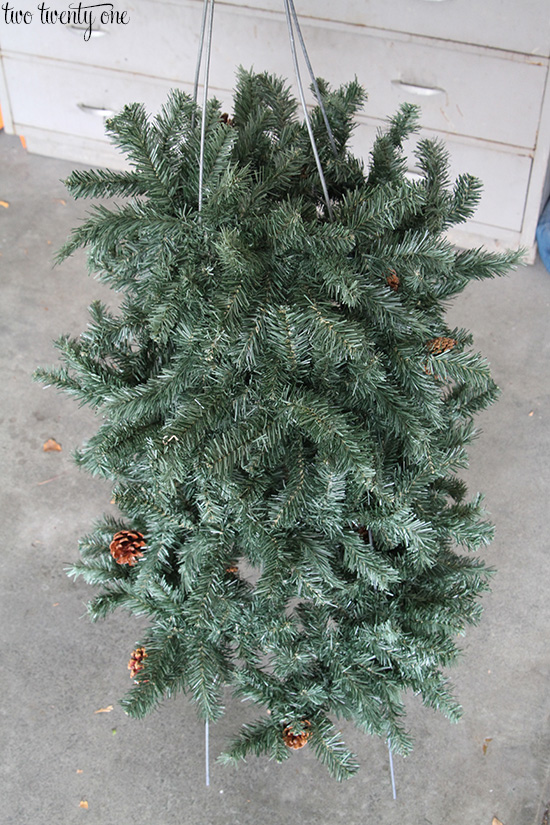
Use one more garland for the top section of the tree.
Add the Lights
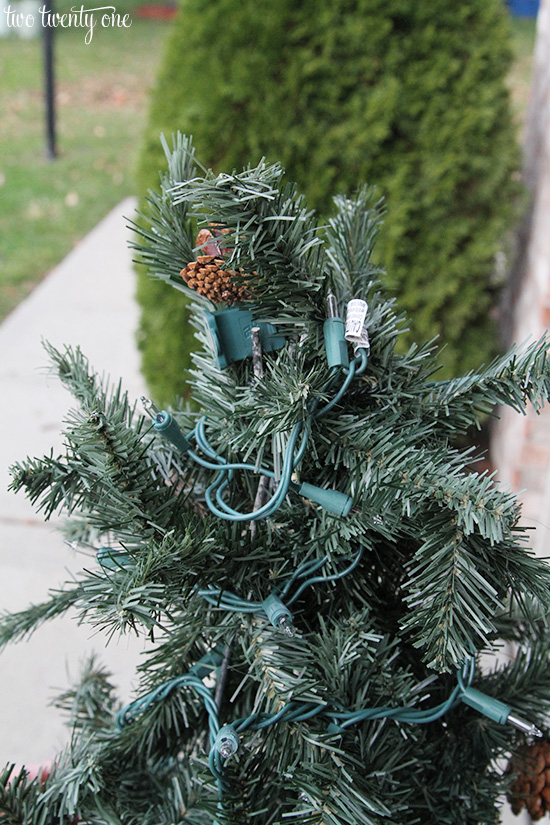
Then, it’s time to add the lights. Start at the top with the female plug and work your way down so the male plug is at the bottom.
Top with Bows
To add a festive touch, attach a bow to the top of each tree.

Securing the trees to the ground is very easy if you leave some of the cage, creating legs that could slide into the ground.
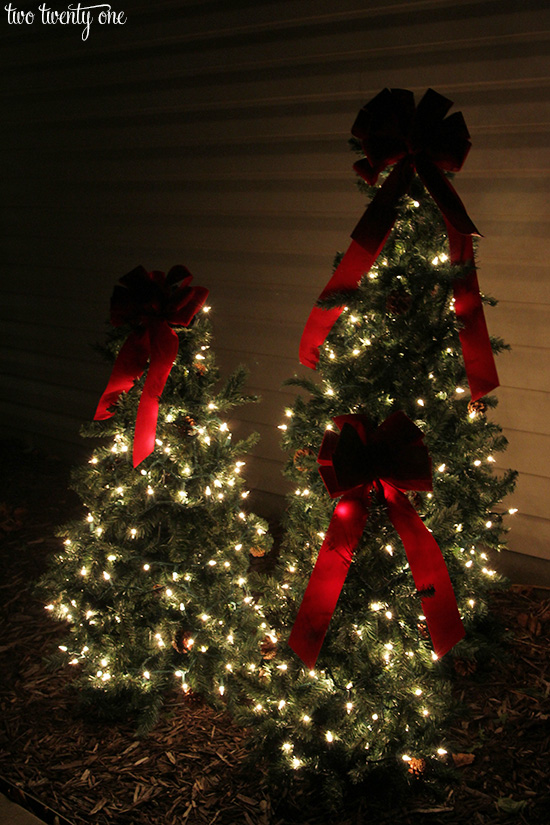
Here’s the final product!

Here’s the breakdown for each tomato cage Christmas tree:
Big tree: 3 strands of garland, 2 strands of 100 lights
Middle tree: 2 strands of garland, 2 strands of 100 lights
Little tree: 1 strand of garland, 1 strand of 100 lights

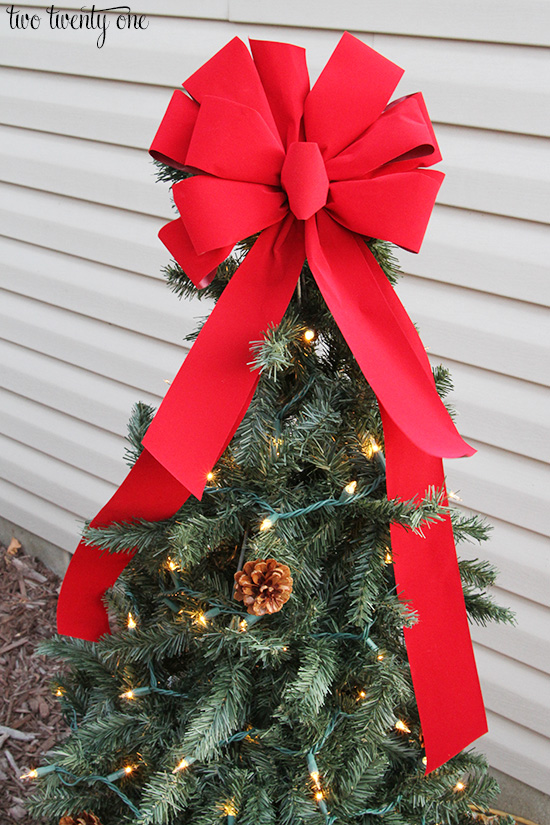
This photo doesn’t really do them justice at night.
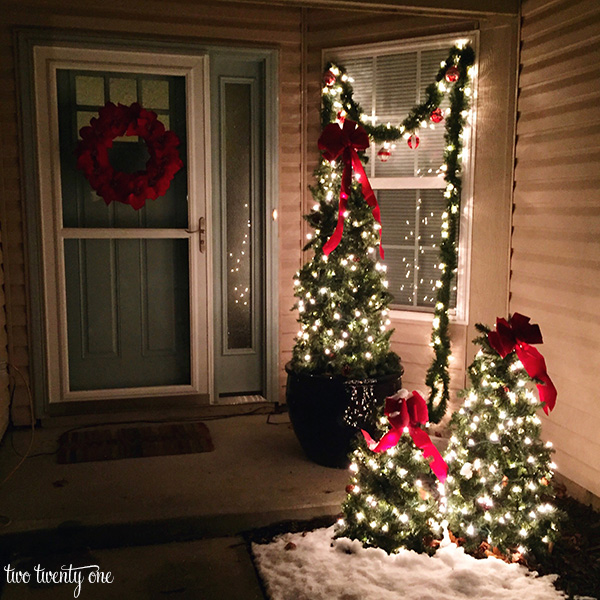
Here’s what they look like in action on our front porch with a little touch of snow.
Think you’ll try to make these tiered tomato cage Christmas trees this year for your outdoor decor?
If you liked this tutorial, make sure you check out my other holiday projects, decor, recipes, and free printables!

 Last Minute Holiday Gift Ideas
 Delivery Driver Snack Basket + Free Thank You Sign
 A Holly Jolly Christmas Loft
 Tinsel Christmas Tree with Vintage Shiny Brite Ornaments
 Front Porch Christmas Decorations
 Christmas Lights at Night Tour
 Christmas Bedroom Sitting Area
 Christmas Vignette Ideas
 Family Christmas Movie Night
 Outdoor Christmas Planter and Winter Decoration
 Quick and Easy Holiday Tips
 Kids Christmas Tree and Playroom Wall
 White and Silver Christmas Tree
 Christmas Canvas
 Holiday Pajamas Galore
 Peanut Butter Balls with Rice Krispies
 Cut Out Sugar Cookie Recipe
 Christmas Night Tour
 Gingerbread Castle Decorating Party
 Red and Silver Christmas Tree
 Easy Ways to Add Christmas Cheer to Kid Spaces
 Holiday Playroom
 How to Decorate a Christmas Tree
 Plaid Christmas Mantel
 Peppermint Obsessed – Favorite Peppermint Products
 Peppermint Christmas Tree
 Sweet Treats Pink Christmas Tree
 How to Make a Red Hydrangea Wreath
 How to Host a Cookie Exchange
 Christmas Entryway
 Pink Christmas Tree
 Fireplace Christmas Decorations
 Decorated Flocked Christmas Tree
 Christmas Playroom
 Christmas Front Porch 2018
 Christmas Kitchen 2018
 Playroom Christmas Tree
 Glam Christmas Tree
 Christmas Nights Tour 2017
 How to Throw a Gingerbread House Decorating Party
 Decorating French Doors for Christmas
 Gift Wrapping 101 – Tips and Tricks
 Red and White Flocked Christmas Tree
 White & Silver Christmas Tablescape
 Spread Christmas Cheer Printable
 Decorated Pink Christmas Tree
 Christmas Front Porch 2017
 Classic Christmas Mantel
 Gift Giving Made Easy
 Gifts for Her
 DIY Peppermint Decorations
 Christmas Bedroom Decor – Our Master Bedroom
 Functional Holiday Centerpiece
 Keeping It Real Home Tour – Christmas Edition
 Christmas Kitchen
 Red and White Christmas Tree – Decorating Ideas
 Kid’s Christmas Bedroom
 Hostess Gift Ideas
 Fabric Christmas Present Decorations
 Peppermint Oreo Truffles
 Christmas Themed Toys for Young Children
 Christmas Card Display
 Winter Wonderland Dining Room
 2015 Christmas Entryway
 Gift Wrapping Tips and Tricks
 White Christmas Tree Decor
 Gift Guide for Women
 Poinsettia Wreath – DIY Christmas Tutorial
 Outdoor Christmas Decorations
 Felt Christmas Tree + FREE Patterns
 Best Friend Gift Guide
 Christmasfied Card Catalog
 Our 2014 Christmas Tree
 Salt Dough Recipe for Ornaments and More!
 Christmas Front Porch
 Christmas Tablescape
 How To Photograph A Christmas Tree
 10 Tips For Capturing Great Holiday Photos
 Red And Green Holiday Gift Tags
 Preppy Christmas Wreath
 Tiered Tomato Cage Christmas Trees
 Snow Fresh, Snow Clean Printable
 Our Christmas Entryway
 Free Holiday Desktop Wallpapers
 White and Silver Christmas Vignette
 Fuzzy Christmas Tree
 No Sew Tree Skirt
 White Christmas Tree — Our Big Christmas Tree 2013
 10 Ways to Save Money On Christmas Decor
 Peppermint Chocolate Cookies
 Holiday Hosting Tips and Tricks
 12 DIY Christmas Wreaths
 Free Christmas Gift Tags
 Gift Ideas For Her
 Peppermint Monogram Wreath
 Handmade Gift – 20 Ideas for Everyone on Your List
 Eat Drink And Be Merry Printables
 16 Free Christmas Fonts for Your Holiday Designs
 Malbec Chocolate Truffles
 Entryway Christmas Decor
 Silver And Blue Christmas Centerpiece
 Chocolate Peppermint Sandwich Cookies
 Christmas Card Books
 Our Big Christmas Tree 2012
 Sweater Presents {DIY}
 Card Catalog Christmas Vignette
 ‘Tis the Season to be Jolly Print {Free Printable}
 Plaid ‘JOY’ Letters
 Simple Holiday Table Setting
 10 Handmade Gift Ideas
 Wedding Invitation Ornament
 Holiday Printables
 Tomato Cage Christmas Tree
 How to Put Lights on a Christmas Tree So It GLOWS


Thanks for the great idea, I can’t wait to make one. So clever.
Thanks, Gail!
Love these! I have a ton of tomato cages sitting around after tearing out our summer garden. Am going to try making one for our patio.
Do it! It’s seriously the easiest project ever.
Love this idea. Definitely going to make these. Thanks for sharing all the great details along with pictures
Thanks, Patty! Let me know how they turn out!
Love these!! How easy. 🙂 This is our first year decorating a house (we just moved to Indy from a small Chicago apartment) so unfortunately we are starting from complete scratch as far as outdoor decor goes. These are so easy though so I might have to add this to my DIY list!
Welcome to Indy! Decorating a house and yard is probably more exciting than an apartment. At least I was excited when we upgraded from an apartment to a house. 🙂 Yeah, these are definitely easy to make– the perfect outdoor decor!
I love these! I was thinking about doing something like this so this tutorial will be coming in handy. As always, you do an amazing job! Hope you have a great rest of your week!
Thanks so much, Maggie! Enjoy your week!
You’re a blogger. They’re going to think you’re crazy.
Hah! Right? After we built the window box in front of our house I naturally took photos of it. My neighbors, who didn’t know that I’m a blogger, later confessed that they thought I was really proud of our craftsmanship and that’s why I was taking so many photos.
I love these! Super cute and easy enough to make. I think I’ll be making these for our house this year!
I’ve been looking for ideas to decorate my first house for Christmas and this is absolutely happening! I am so excited. Thanks for sharing 🙂
www. eatcreatetraveller.com
These are so cute! I love them! I really want to make a few for our front yard. I’ve got to get my Christmas crafting butt in gear!
How do you secure them to the ground so they don’t blow away?
you could put over a pot filled with some type of weight or you could use wire bent in to u shape
The “stakes” I left at the bottom secure them to the ground (see photos). We’ve been experiencing some crazy wind here the last few days and they’re still standing.
Love, love, love this idea! I’m going to complete this project this wknd. so they’ll be ready for action the night after Thanksgiving.
These are great! How tall is each tree?
I used 54 inch tomato cages. So the trees are approximately 50 inches, 36 inches, and 30 inches tall.
I have to say these are BEAUTIFUL! I was reading the Dec. 2014 Better Homes & Gardens and they did the tomato cage tree too. I don’t want to sound mean but theirs looked awful – I was thinking “why would I want a droopy dead looking tree like that”!! I am so glad I saw your post you created them so pretty that now I want to try this! (BHG should have shown yours IMO) Thanks for the terrific idea!
Wow! Thanks so much for the amazing compliment! Made my day!
Did u use the 42in tomato cages? Or the 54in?
54 inch.
Recently I made 3 like this for our Christmas parade float. I can’t wait till the parade to show them off. I added poinsettias to the trees and used smaller bows on top. They look amazing. Thanks for the idea.
I was just thinking it was time to put my tomato cages away. Thanks for the cute holiday idea =)
When the store start putting up Christmas decorations after Halloween, I don’t think anyone would think you are crazy to light them up before Thanksgiving. Speaking of Halloween, these would be cute with black garland and orange lights.
These are amazing! I’ve been wanting to buy LOTS of different-sized artificial trees to fill out our bare flower beds during the holiday season but for as many trees as we would need that would be WAY too cost-prohibitive considering how much even a tiny little 2-4 foot tree costs. I’ll make these instead. Thanks for the brilliant idea.
We’ve also been wanting to get the ones in a planter that you put on each side of an entryway which are also very expensive. These could probably be adapted for that purpose as well if you get some inexpensive but nice-looking planters and find a way to secure the tree into the planter.
You can put these trees in a planter or pot…just make sure the have soil in them so you can shove the bottom wiires from the cage dow & anchor them….these are beautiful, and I have been making them and using them for years now… I prefer the green garland but I have made them using tinsel garland as well. I once made one for an upscale beauty salon out of pale pink feather boas with a matching wreath . I always anchor my lights to the cage with zip ties or pipe cleaners then put on the garland…the lights poke through and there are no wires showing… This was a wonderful video & clear explanation of how to make this project…so happy to have come across it…thank you Chelsea
I laughed out loud, loudly, at your photoshop comment. Too funny!!!!!
What’s the best way to store these? Unwrap em, throw into a container/bag, nest into one another) How durable are the stakes (can they be bent inward year after year for storage). My mom buys fake flowers throws them in a pot for her planters out front. I bet these would be a great substitute and gift for her (perhaps borrow a few of the flowers to decorate vs bows)
I wouldn’t take them apart. I plan to put them in large trash bags to store them in our attic. I definitely wouldn’t recommend bending them.
WOW! I absolutely love this idea! Although it is only July here in FL (and HOT), my mother-in-law and I will certainly have something to look forward to creating in November. Thanks for the step-by-step instructions and pictures. Great job!
Thank You for the Great Idea. I’m going to make 5 or 6……….three to go with our inflatable John Deere Tractor with Santa sitting on the cab……….and the others on the front porch..
Theoretically you could use the tomato cages…as tomato cages…in the summer, then wrap them in garland for Christmas, then unwrap them and use them the next summer as tomato cages…Especially since you are attaching the garlands only at the ends. Repeat every year!!!
Also, if you purchase solar string lights, the trees could be put anywhere on your property I have seen inexpensive solar string lights for sale online for under $20.
Since I’ve retired (last May ’14) I’ve been looking for Christmas projects I can do myself and save myself some money to boot, This looks like something I’ve been looking for and anxious do. Thanks for sharing.
We only have 36 inch cages however I can make do with what I have. Question I have is do you use lighted garland and a string of lights? Thanks and please folks do not put any decorations out until after November 11th.
I used non-lighted garland and then added the lights.
I just took my tomato cages out of the garden this past week. I’m going to go in the shed and grab three of them to make these! they are so cute! Thanks for the idea!
You’re welcome! Happy tomato cage Christmas tree making! 🙂
These are awesome ideas… thanks for sharing them.. I have to ask myself, “now why didn’t I think of that?” LOL
This is a wonderful idea & I’m planning to do this for Christmas.
I made a fall tree using colored leaves garland and yellow lights. I love it and can’t wait to make these. Thank you for the idea.
Love this. Easy, inexpensive and oh, so pretty!
I’m just seeing this for the first time and I really love this idea and will be making it for sure this year!! Thanks for sharing!!
Oh my goodness – I laughed out loud at the photoshop thing! Thank you.
I love this so much!
It’s November 7th and i might make these today and light ’em up 😉
love love!
Such a clever idea. and a great step by step set of instructions, thanks.
It’s that time of the year! Loooove.
Love this! Easy enough for me, the non-crafter to make. Thanks 🙂
I love this idea. I remember Home Depot having the tomato cages in different colors last summer. I might look for green…if they have any in stock right now. I’d really like to try it. Thanks. Betty
That is adorable!! I always put my tomato cages in the corner for the winter, and now I can use them for decor…I love it! Thank you for sharing with us at the #HomeMattersParty
My friends and I made these today for our girls craft day. They were super easy to make and we had a great time. We found out though that we needed more garland then suggested, we had to stop half way and run for more. I’m not sure if it is because we used cheaper garland that wasn’t as full or if we put it on to close together so we didn’t have big holes. They turned out great though and I can’t wait until next weekend so I can light them up!
I have tried this and after finally being able to cut the cages with bolt cutters, the garland is not looking the same. There is too much space between the rows. I followed the directions you gave and I have zip tied them thinking maybe it was moving around too much without the ties but it doesnt look the same. I am very disappointed. Not sure what I am doing wrong or how to fix without buying more garland.
Hey Jackie! Perhaps the garland you purchased isn’t as full or as long as the garland I purchased. Did you buy the exact brand and length?
These were easy to make. I used an extra strand of garland per tree to make the foliage more dense.
We have a huge blue spruce in our front yard, and we’ve always put lights on it. Well, it’s getting too big to do that now, so this will be a PERFECT alternative. These will look great in our front yard! Thanks for the clever idea! Oh….BTW, I’m from Indy also. 🙂
Oh….and I’m a photographer (2nd career) and LOVED your Photoshop comment. Another clever idea….even if not the best PS work I’ve seen. LOL
Love this ideal. Thanks for sharing.
Did you use separate pieces of garland for each “layer” of the tree, or did you use one large continuous piece?
I made the large tree this week. It turned out really cute ~ though I used 5 of the 9′ garlands to make the one tree. Guess I smushed the wraps together too close. It is a full tree though.
I also couldn’t get the zip-tie to stay put at the top of the tree. It kept shooting across the room so I improvised and used strips of vinyl leftover from another project.
I will be making the two smaller trees next year.
All the tomato cages I have are the same size. How did you get varied sizes of trees?
I love your Christmas decorations
HelI have been looking for different paper flower crafts to make so I can put in some vases I have that my son and his family brought me flowers for my birthday and for mother’s day. These look so easy to make, I am going to try them and make a bouquet for one of my vases. Thank you so much for sharing this tutorial. I will let you know how mine turn out.
to cut the cages with bolt cutters, the garland is not looking the same. There is too much space between the rows. I followed the directions you gave and I have zip tied them thinking maybe it was moving around too much without the ties but it doesnt look the same. I am very disappointed. Not sure what I am doing wrong or how to fix without buying more garland.
I love my Alexa and my echo I use in my house. I want to give one to my Mom because she’s losing her sight and I think and echo might help her. Can I loads the apps I think she could use like news , trivia using my phone apps then give it to her? My mom doesn’t have a phone because of her vision plus if the family adds the apps or the device she could use her echo. My Mom doesn’t have a computer either but her complex has wi-fi. Can someone help me help my 97 yr old mother. Thank you.Tree Removal Service