Outdoor Christmas Planter and Winter Decoration
I love decorating our large outdoor planter for Christmas winter. The planter sits between our two garage doors. Decorating it for the holiday season dresses up an otherwise boring area of our exterior.
If you follow me on Instagram, you know my love of the Costco fresh greens planters. They’re $30 each, and I think you get a lot for your money. But because my driveway planter is larger than the Costco planter, I like to add to it. And this year I actually ended up completely deconstructing the Costco planter and using the greens to make a bigger and better arrangement.
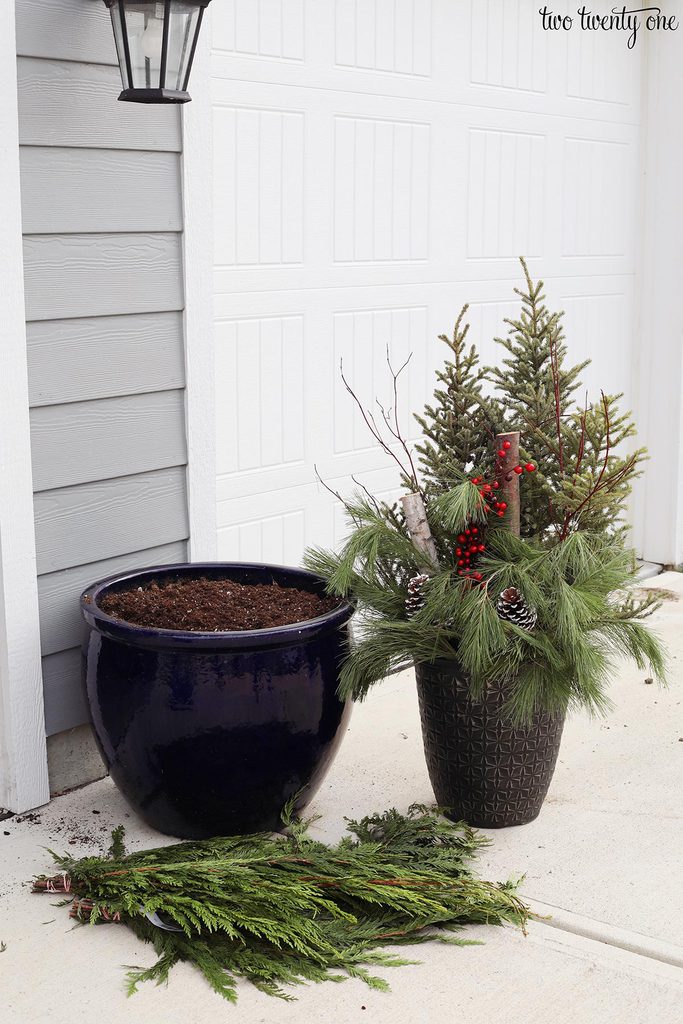

Outdoor Planter Supplies
large planter … Mine is from HomeGoods, circa 2009
1 holiday fresh greens planter or some fresh greens
1 fresh cedar bundle … Kroger
pine cone picks (optional)
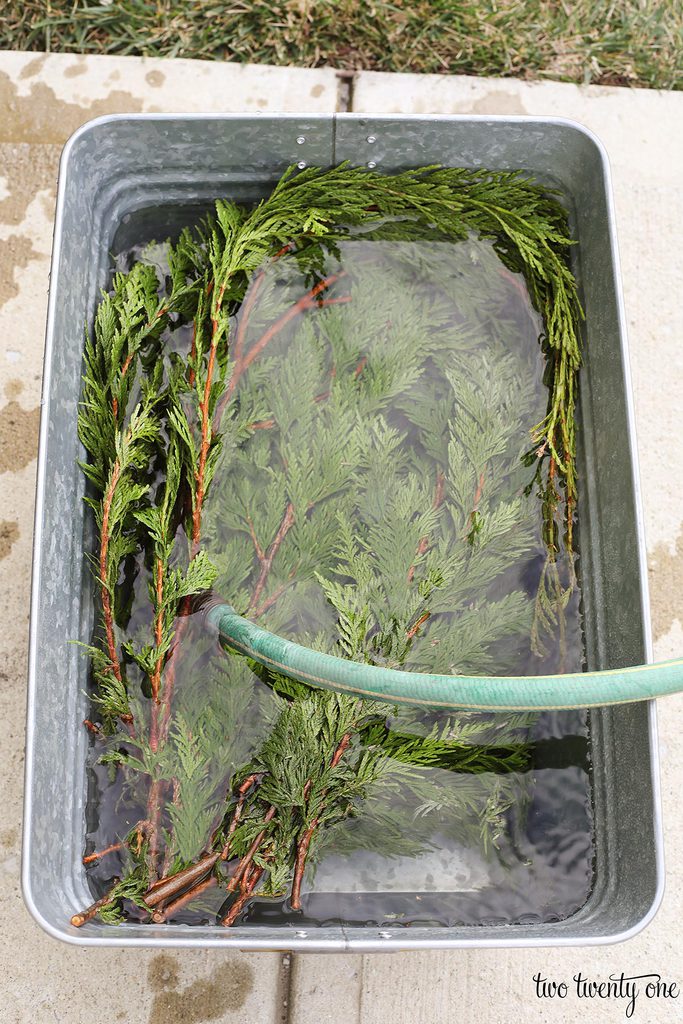
Soak Your Greens
For the greens to last longer, you’ll want to soak them. I only soaked the cedar in a large tub. Your bath tub works too. I didn’t soak the greens that were in the planter because they were in moist soil.
My friend, Kim, has a great tutorial on how to keep garland fresh.
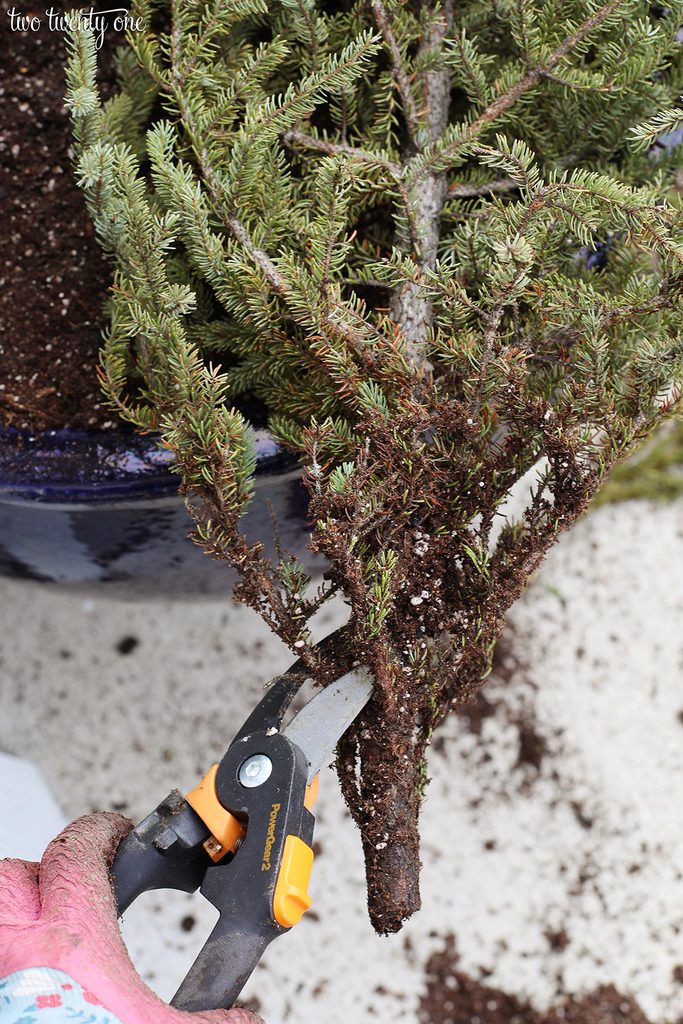
Trim the Trunks
In order for the larger pine trees to not tip over, you’ll want to trim the branches off of the lowest parts of the trunks. Save the branches you snip off. You’ll want those to use as filler later.
I love these pruners. I’ve had them for years, and I use them for everything gardening related. They’re also handy for trimming stems for indoor floral arrangements. Add them to your Christmas list. Trust me.
Insert the Trees
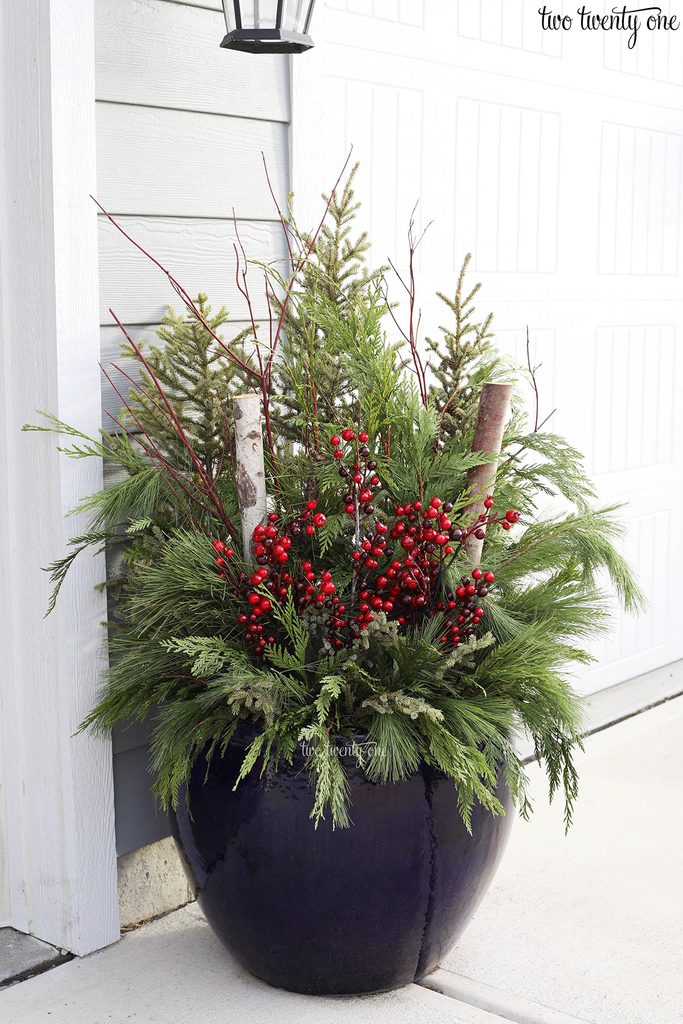
Put the trees in the back of the planter with the tallest in the middle and the two shorter trees flanking it.
If all your trees are the same height, trim two down and put the tallest in the middle.

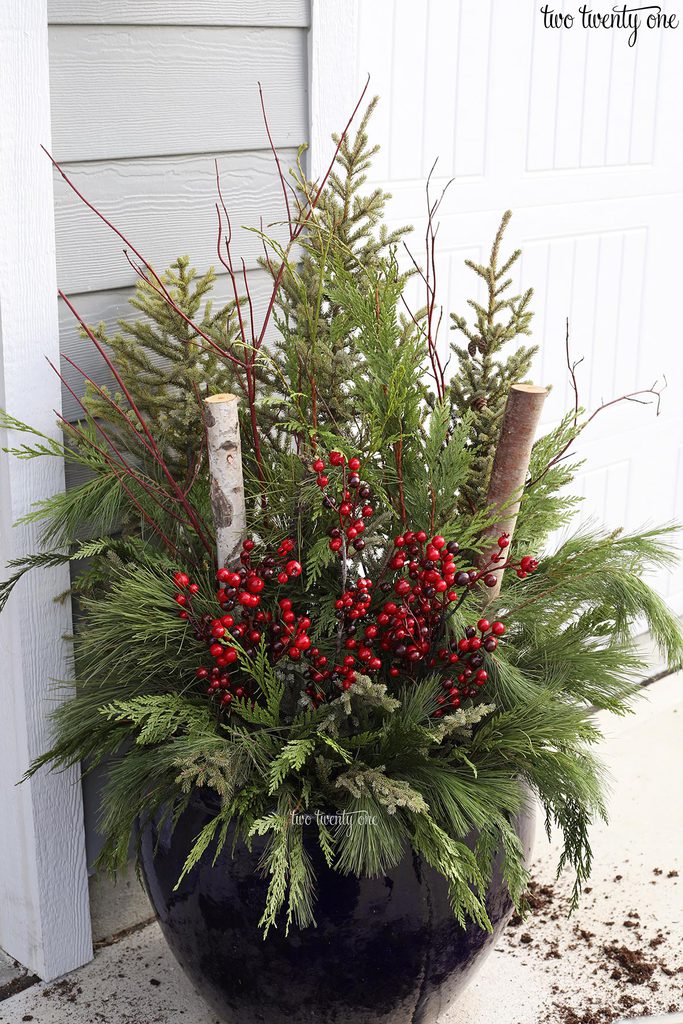
Layer in Greens, Branches, and Logs
Add some branches in front of the pine trees.
Layer in some taller cedar branches in front of the branches. Put the taller branches in the middle and shorter branches on the sides.
Insert two birch logs in front of the cedar and branches.
Then, add in a layer of long pine needle branches– taller in the middle, shorter on the sides.

Pop of Color
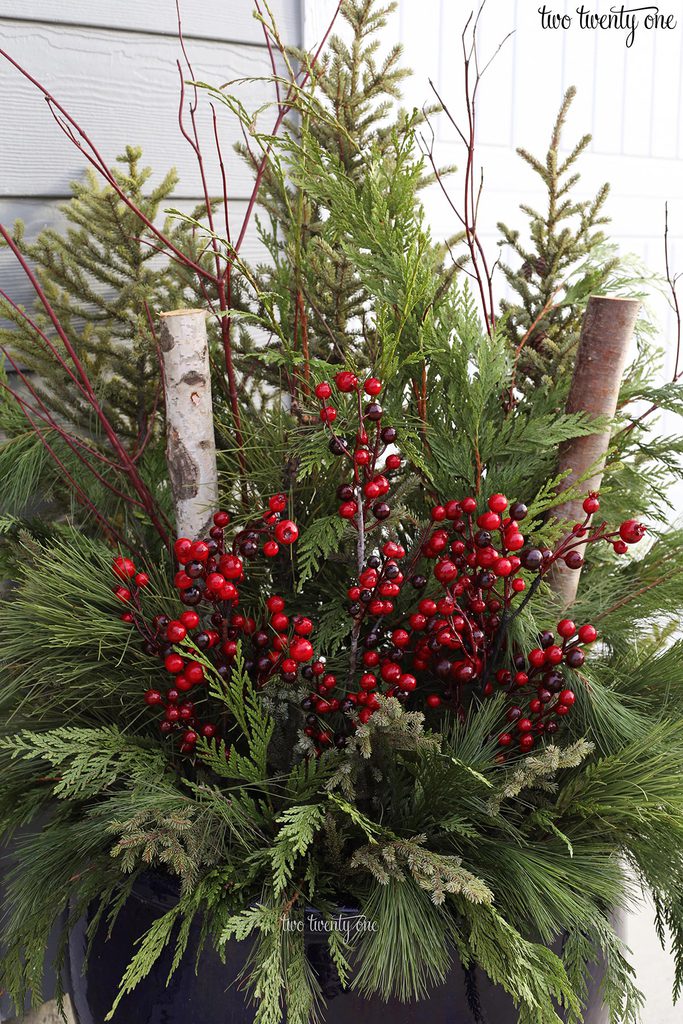
For Christmas, I like to add a pop of red to the planter. I use three faux red berry picks that I’ve saved from previous Costco winter planters. These berry pick would work though. When buying faux berry picks, be sure to check the height. You can always cut them down, but you can’t add height.
Insert the picks in the middle of the planter in front of the long pine needle branches.
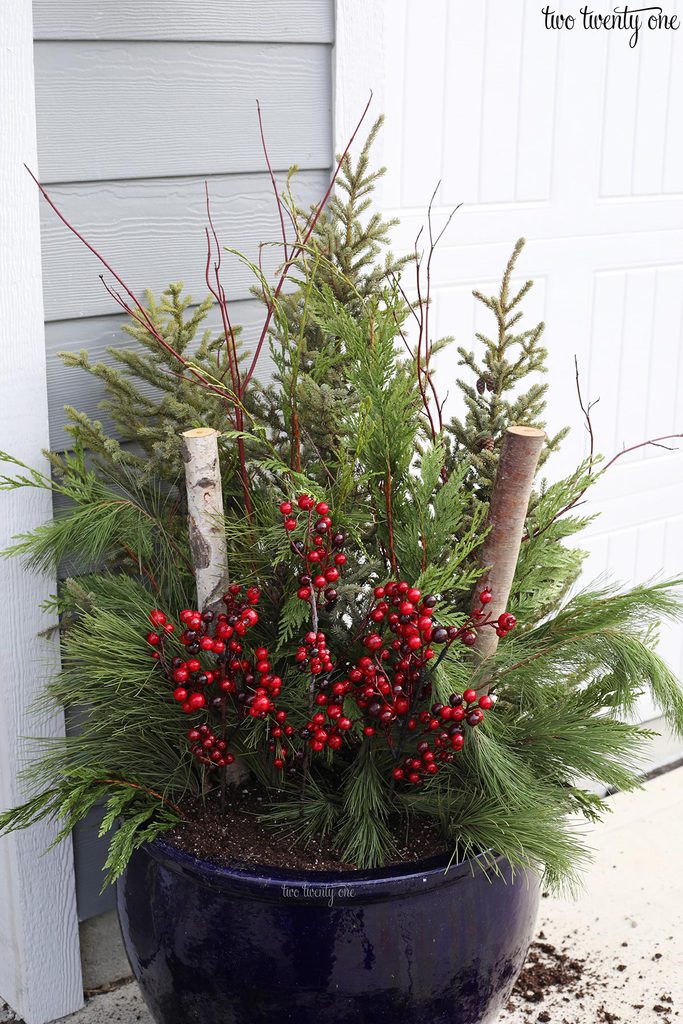
Fill It In
Use smaller pieces of greenery to fill in around the berries. You don’t want the bottom parts of the berry picks to be visible. Be sure to use all the different types of greenery for diverse texture. I like when some of the branches spill over the edge of the planter.
Our planter is under one of our garage lights, so I typically don’t add lights to it. But you can add fairy lights or other Christmas tree lights to your planter to illuminate it at night.
Adapting for Winter
Now you have a winter planter that will last a couple months! Mine typically last until February/March. Once the holidays are over, you can remove the red berries and add white ones or just leave the greens. And as you can see, I left out the pinecones that came with the Costco planter. You could always add the pinecones. Or swap the berries for the pinecones when Christmas is over.
Don’t Throw It Away
When the winter season is over, don’t throw away the red branches, birch logs, berry picks, or pinecones. Save them for next year. The red branches may dry out, but they should still be usable for another year. They also make good snowman arms.
Watering the Christmas Planter
I typically water my Christmas planters every other week to keep the greenery from drying out.
Doesn’t she look very fancy and not like a $30 Costco planter with a $5 bundle of cedar from the grocery store?
Here’s a time lapse video of me putting together this outdoor planter for Christmas.
Pin It for Later


So beautiful!!!
Looks very festive! Thanks for sharing.
This is my favorite post yet!!! Thank you! I ordered the pruners for my husband to put in my stocking too 🙂
I LOVE this!!!
I’ll be saving my berries!
What a wonderful idea! We live in a forest just full of evergreens….will be making this from scratch, as our Costco is 100 miles away…….
Very pretty!