DIY | Home Decor | living room | sewing
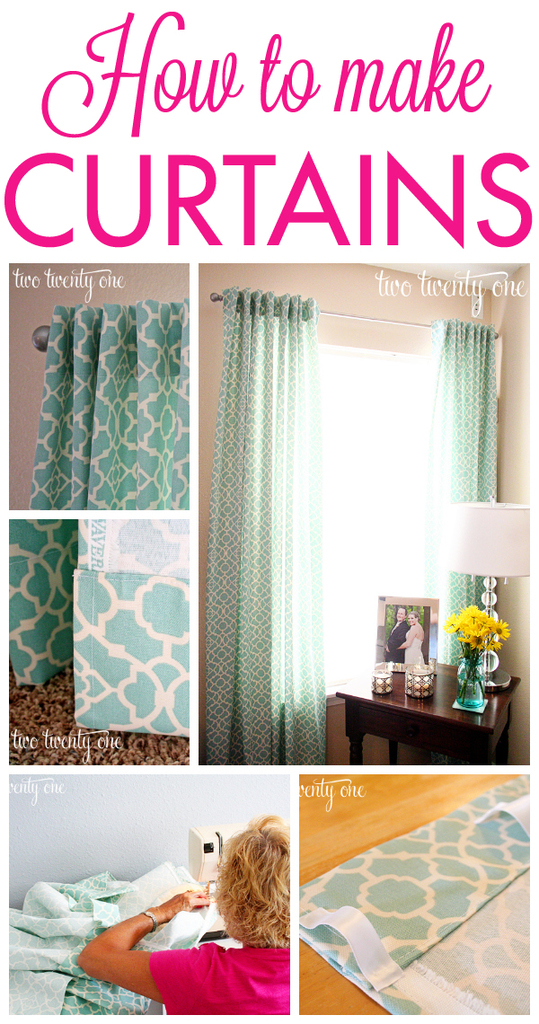
How to Make Curtains – A DIY Curtain Tutorial
My mom and step-dad came to town for a visit two weeks ago. The purpose of their visit? So my could help me sew some DIY curtains. I mean, doesn’t everyone put their parents to work when said parents drive 3 hours to spend quality time with their dear offspring?
This whole process started when I saw Kim’s dining room curtains. Who knew it was so easy (and cost effective) to make your own curtains? Kim’s curtains led me to Meredith’s tutorial on how to make curtains.
So in mid-June when I came across a fabric that I loved (54″ Waverly Lovely Lattice Lagoon), I knew I had to make curtains for our snoozefest of a living room. Isn’t it dreamy?
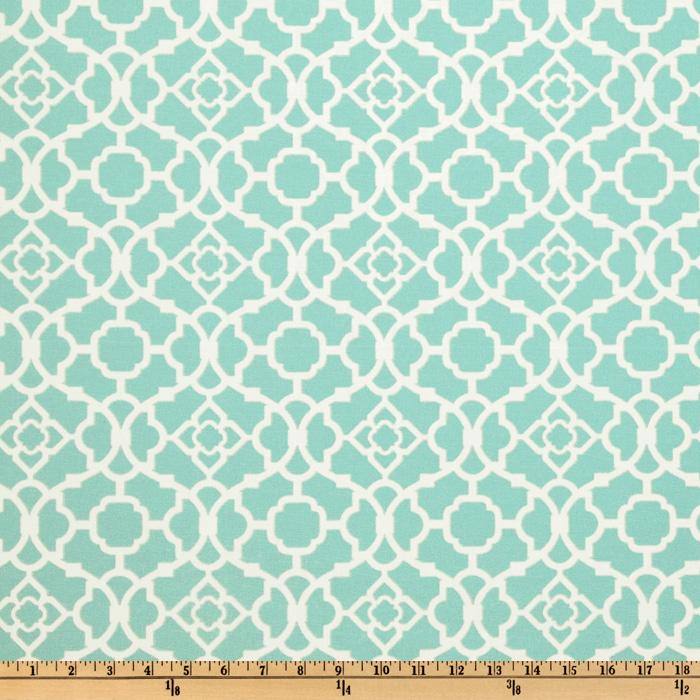 |
| source |
I called my mom at 9:30PM on a Saturday night. She was sleeping. But I was sitting at home on my laptop on a Saturday night so I guess that’s no better. We chatted on the phone about how much yardage I would need to buy. At one point, she disagreed with me and I remember saying, “Bonnie, you’re not understanding my vision.” To which she said, “I guess I don’t, Chelsea Ann”. Ahh, mother-daughter relationships.
I purchased 10.5 yards for $98. Tip: Always search for a coupon code before purchasing. That’s how I saved $17. Boom.
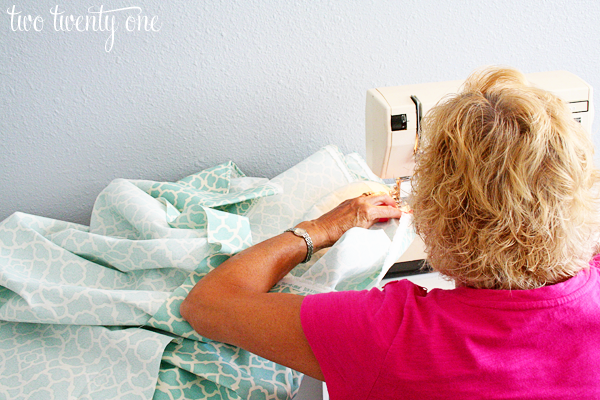
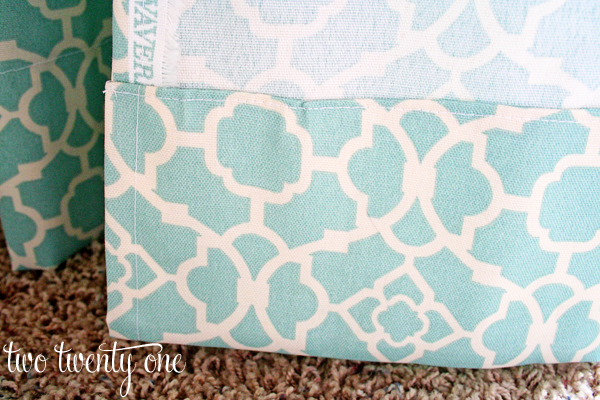
We cut four 95 inch panels. Then we got to work folding over the length-wise edges and sewing them in straight lines. We didn’t bother cutting off the edges because 1. no one sees them and 2. it won’t fray, so why bother?
We did about a 4 inch hem at the top.
And about a 5 inch hem at the bottom.
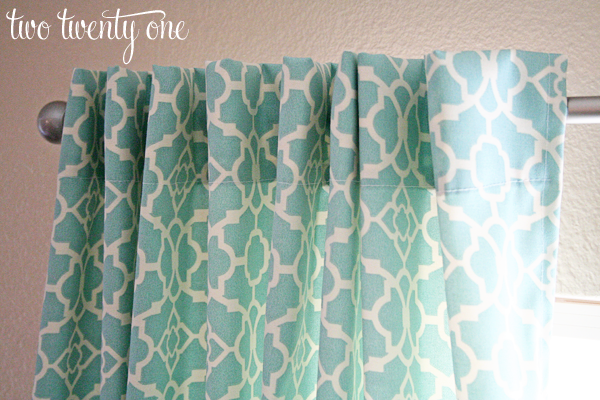
We hung the curtain panels with ribbon that I hot glued on. Sounds kind of crazy, doesn’t it? We used 1 1/2 inch x 3 inch and 5/8 inch x 3 inch ribbon, spaced about 4-5 inches apart at the top of the curtain. I used a lighter to melt the edges and keep them from fraying. The thicker strips were used in the middle, while the thinner strips on the ends. Why’d we do that? Well, I realized that if we used the thicker ribbon on the ends it would look a little wonkier once we got the curtains up on the rods.

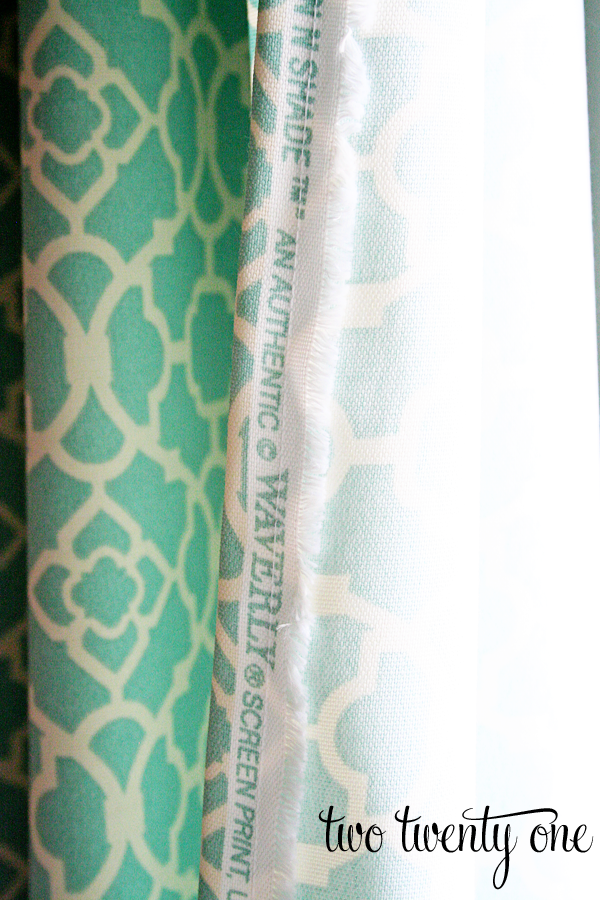
Now, this project didn’t go without some snags. First, my sewing machine desperately needs to be serviced. Secondly, the fabric was printed crooked. This drove my Type A self bonkers.
The tape measure in the photo is straight. The fabric, however, is not.
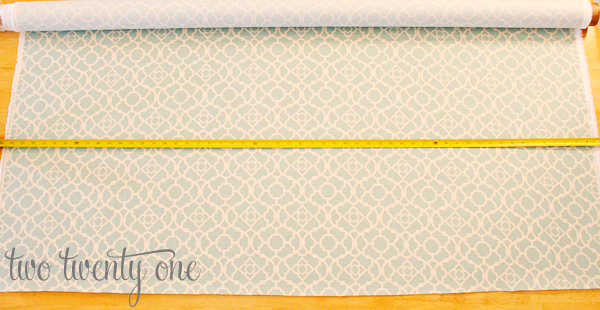
But we worked it out, and you can’t tell that it’s crooked now that they’re hung.
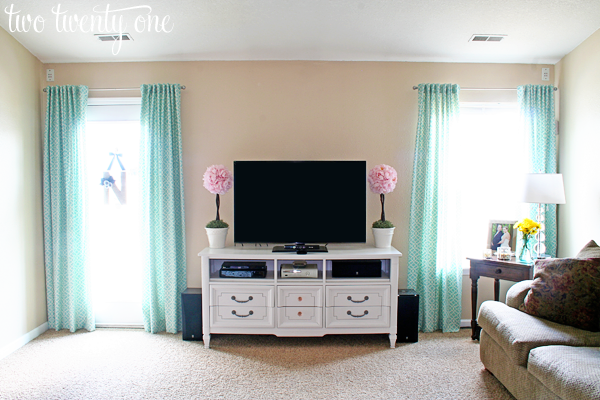
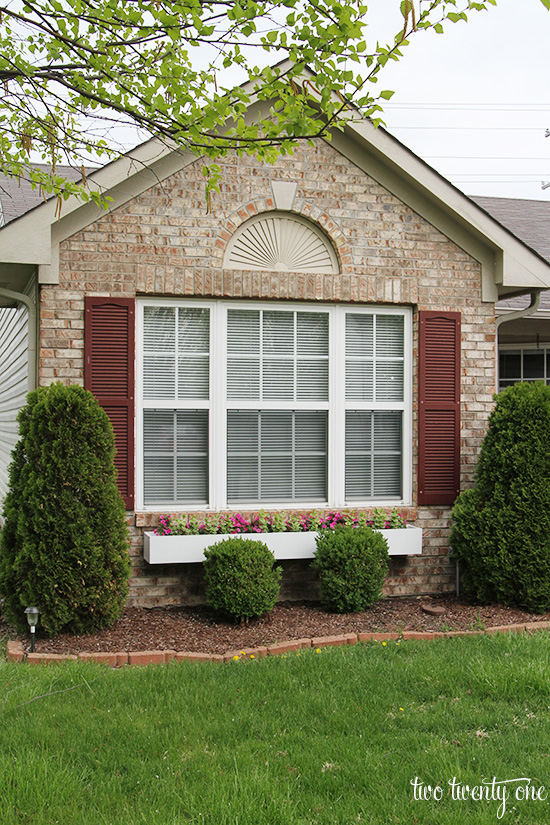
I love a good before and after so here’s the before.
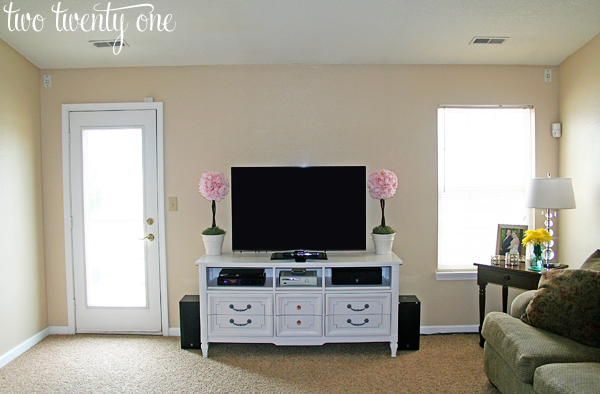
And the after.
Can I just say that I HATE photographing our living room? I probably spent 3 hours (I wish I was kidding) trying to photograph the dresser turned TV stand. There’s something about the light that I just can’t get. I’m also going to blame my 7 year old DSLR. Mama needs a new camera. I’m talking to you, Santa.
My step-dad thought I was crazy for putting window treatments on our backdoor. He kept saying, “I’ve never seen curtains on a backdoor”. To which I replied that I’m a visionary, and I’m going to start a trend. I also may have gone on and on about my love of symmetry.

The door curtains have worked out fine. We just have to remember to move them out of the way when we open and close the door.
Because I’m all about transparency, here’s the breakdown of how much cheddar I dropped on this super easy project.
Fabric: $98… Fabric.com (also found here)
Curtain rods: $22… Target
Ribbon: $3… JoAnn Fabric– I used 50% off coupons
Thread: $0… already had it
TOTAL: $123
Not bad, right?
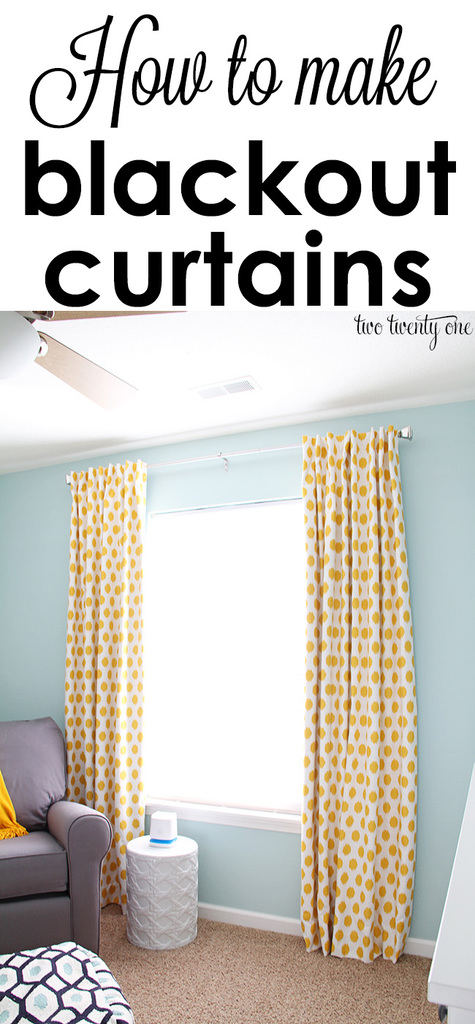
Check out my lined, back tabbed curtain tutorial! You can make them with or without blackout material.
Check out my other popular posts!
 Dry Creek Bed Landscaping – DIY Rainscaping
 Peanut Butter Balls with Rice Krispies
 Budget-Friendly Living Room Window Treatments
 What to Buy at Trader Joe’s
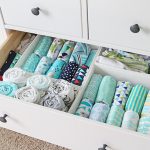 Nursery Dresser Organization
 Growing Peonies – Peony Bush Care


love it!!
Great job! What a cost savings… 🙂
I wish you had let us know how much material. I have heard 1 1/2 times the width of the window and also twice the window width. love everything else!
That’s also what i’m wondering about. I wanna make these curtains myself and I would love to know how many fabric you used for the width of your windows. You uses to panels of 95 inches each for one window? What is the width of each window? Than i can calculate it myself.
Thanks!
I believe the beginning showed 10.5 yds were purchased.
No one has answered the question when making curtains is the material you use suppose to be 1 and 1/2 times the width of the window or 2 times the width. I appreciate your explanation but that is my biggest question and still no answer. I think I will ask the fabric store they should know. Next time you do a curtain recommendation please add this question!!!!!!!!!!!!
The width of the fabric is your choice, depending on the fullness you’re looking for.
As a drapery fabrocatpr fpr 35 years I would always try for at least 2 times fullness on grommeted or rodrum pnels and 2 and a half on draperies with pleats or sheers . Hope that helps
I always use double the width of the area I’m covering to decide the width of my curtain fabric, even if I intend to keep them open all the time. I think that’s pretty standard. Hope that helps!
i make mine 2 times the width so that I get those good looking pleats . It is your choice to make but using a smaller length doesn’t produce something worth ‘aaawing’ about
So pretty! They really complete the space!
oooooh! Beautiful fabric. Didn’t happen to see it in yellow, did you? 😉
I have seen curtains on back doors several times and in your space, it is sort of necessary to maintain the symmetry you have placed. If you only did the window, your head would feel all lopsided. Beautiful room!
Thanks, Lyssa! I’ve only seen it in green and black. :/
Lyssa,
I have it in light purple, bought it at JoAnn’s. I know I saw it in other colors, but I bet you could check out Weaverly’s website . . .
Most fabrics are 54 inches wide so I believe her panels would be 54×95 hope that helps.peg
I feel like you’re reading my mind. We just got a new bedspread so now our curtains don’t match. I’m planning on making my own. I’ve done them before but never took much time with it, this time I definitely will. I love the fabric you used!
I have loved that fabric for forever. They look beautiful! 🙂 And crooked fabric is the worst–I always try to cheat by just following the pattern to cut stuff out instead of measuring and…yeah. Doesn’t always work out. Dear fabric companies: adjust your printing process. Please.
Looks great and balances out the room. I have curtains on my slider, it helps with energy loss in the winter.
The curtains look great! And I agree that the back door needed them….men just don’t understand these things! My mom is currently working on curtains for us too….aren’t moms the best?
This makes me laugh only because I do the same thing to my mom! They live 4 hours from us and I’m constantly coming up with sewing ideas that my mom executes for me… especially curtains! (here- http://aaronandkristenwindle.blogspot.com/2011/10/some-chevron-action.html and here- http://aaronandkristenwindle.blogspot.com/2011/07/mom-sewed-and-i-tried-not-to-screw-it.html )
Moms are the best— especially when they sew 😉
Very pretty! Me likey.
I tried to make curtains once for our office. I cut one panel about 1 1/2 feet too short. Thank goodness the couch hid it. Just the other day I was pondering making more. I really should learn from my mistakes. Can I borrow Bonnie?
Sure, but she comes with a fee.
Love the pattern and color! xxx Kristin
These turned out so pretty Chelsea! Love the fabric choice. And I’m all about the hot glue 🙂
I think your curtain over the door is brilliant! It’s sure to be a trend soon! It really conceils it. I mean, how attractive can a door really be?
So beautiful! And I think the curtains around the door are a great idea–now it looks like you have symmetrical windows instead of a window and a door! You smart thing, you. And the fabric is amazing. And so is the TV stand. I love the whole living room! Can we get more of a house tour, please? So I can admire/copy your style? 🙂 🙂 🙂 🙂 🙂
I laughed out loud when I read your comment. I don’t think you want to see the rest of my house… yet. Plus, revealing things slowly is my tactic to keep you guys engaged and coming back for more. Muhaha!
LOVE that fabric. LOVE.
We put my parents to work when they come visit too. They also might have a bit of a longer drive than 3 hrs ahem13hrsahem.
Gorgeous! I think I need to enlist my mom in helping me make some curtains now! Also, I noticed you have a motion detector in the one corner of your living room – I have one too. Are you worried about the curtain panel blocking the detector? My alarm guys told me that if anything gets in it’s way, it won’t work 🙁
Your whole living room is just gorgeous! The fabric for the curtains is perfect for the room. The TV stand was my favorite but now I think my fave is the new curtains!
Lori : )
Thrifty Decor Mom
Love them! They are so gorgeous!
And I love that you hung them over the door to balance things out!
Looks amazing! Love how it finishes off the room!
Came out great!! The fabric is swoon worthy for sure! It’s coming together nicely, I see your vision 😉
I’m impressed, they look great!!
So beautiful! The fabric is gorgeous and your instructions make even a non-sewer like me keen to give it a try! xx
Great idea….I’m a professional Interior Designer and like the streamline design concept. Wish I had seen this earlier when I used to do so many model homes! I may try it out just for fun, although I think lining it would give more body.
I have just finished making curtains and wish I had used the available slave labour (aka mother) rather than just take her advice…I think they would have turned out way better.
Hot glue v’s sewing machine = good for you, I would love to borrow this idea and rescue my sad curtains.
i love the pattern! and i love curtains over doors!! I have curtains on all of our doors. and the color is so cool in there, such a great pop of color!
I would LOVE to see the rest of your house! Home tour soon please!! :o)
In love with the print! Awesome job:)
Love how those curtains brighten up your room so much. Love the print too!
Nice! They look wonderful. I simply MUST learn how to sew.
Very pretty. Love the color and print. I have rooms in my house that I feel like no matter what time of the day, whether I’m climbing on stools, crawling on the ground, I still have the hardest time photographing them. But I think you did great 🙂 Have a great weekend!
Oh my goodness! Such a lovely difference! They turned out so pretty, and I just adore the TV stand/dresser!
xoxo,
Jen
I love that fabric so much. I actually saw it today at the fabric store. 🙂 Your curtains are amazing and your tutorial is fabulous!! Megan
Beautiful! The curtains make a huge difference in the look of the room! Great job! Also, I’m completely with Jen from iheartorganizing, that TV stand/dresser is marvelous! Have a wonderful weekend!
Love that fabric… and I had to laugh at the ‘slave labor’ part! Whenever my dad comes to visit me, I always enlist him to ‘advise’ (or do!) on a DIY project I had planned.
I’m so glad I came upon your blog over at The Shabby Creek Cottage! I LOVE your curtains and the fabric is so pretty! I previously had curtains on a double back door (French door) and when we remodeled, my husband said, “No curtains on the door”. Oh well…to each his own! I am currently waiting on fabric I ordered from JoAnn’s Fabric Store…it too is Waverly but is the Chippendale fretwork pattern in Mocha!!!! The curtain rod is hanging there, waiting too!!! I’m going to use the rings with clips for hanging them. Hope mine look as nice as yours!!! Stop by and check out my blog! I’m your newest follower!!
Wow – totally love them! They really brighten up your living room with the color and design. Like you, I have to have my symmetry, so I completely understand the curtain over the door. LOL! Some of us shouldn’t be allowed in public, right? And your conversation with your mother sounds like mine with my daughter. She always says, “mom, you just don’t get it.” To which I always reply, “I get it Sarah, I get it.”
This looks awesome. I love the ribbon tab system. It’s so handy an turns out really polished, in my opinion. Thanks for the link love. Your windows look fabulous. I really like the fabric you chose and agree that symmetry is awesome. Yay for
Mom sweat shops.
I LOVE your curtains over the door! I am a symetry gal too. 🙂
On Wednesday I posted a tutorial on a easy DIY tool that will help keep your curtains clean. It’s here:
http://decortoadore.blogspot.com/2012/08/closing-your-curtains-how-to-keep-them.html
Wow so Nice style and tutorial! I love the fabric you have chosen. Have a great day
These are some fantastic curtains. I’ve of the opinion that if you can find the fabric you love, it’s better to make your own home decor pieces because even when the tasks are often tedious, you end up with something you truly love. Ever tried searching and searching for that perfect already-created match to the vision in your head? LOL
And I do know what you mean about photographing spaces such as this. In my craft room I receive lots of wonderful sunlight, which is perfect for photographing objects in natural light, but a beast to photograph the actual wall. Still working on it. 🙂
http://www.artisticexpressionsbyelisabeth.blogspot.com
What is the paint color for this room? I absolutely LOVE it!
amccrowell.blogspot.com
Gosh darn gorgeous! SOOOOOOOOO inspiring! Thanks for sharing. 🙂
ha, I didn’t even notice it was a door until you mentioned it. SOOO much better with the bright curtains! I’m guessing you had a hard time photographing the TV stand because you’re photographing against the light.
You are so cute! And I love the curtains! I’ve been wanting to make some curtains for my living room as well… Just haven’t gotten to it yet ;). I am a new follower!
http://www.katiedidit1.blogspot.com
Love the fabric. It’s funny how curtains make the room look finished now.
I’ve been admiring this fabric for several months now and I am hoping to make (or more like pay someone to make since I can’t sew) curtains for my kids playroom with this gorgeous fabric! I love how bright and cheery it makes your room!
Beautiful! I made mine and even put a liner in them. It hurt to send them to Goodwill when the room was heading in a different direction a few years later.
Gorgeous! Those are stunning. Great job 🙂
Since my husband and I are moving, I’m totally looking for great ideas for our curtains in our new place. I think I found just the right thing 😉
New Follower!
Feel free to follow me back at http://www.ageekswifeandherdog.blogspot.com
I love these curtains I´ll try to make one for my kitchen door.Thaks for the great idea.Bye.
I´m a new follower.
These curtains turned out AMAZING! Love your fabric choice. I’ll be putting it on my FB.
Gorgeous! It’s the same print I’ve been drooling over too. It looks perfect on the door, I like symmetry too.
So great! I made my living room curtains in the exact same waverly fabric. Color and everything. So great! :O)
I love the idea of using ribbon to hang them. How many of the 5/8″ and 1-1/2″ strips did you use for one panel?
You guys did a GREAT job and I just love the curtains over the door (I also share your love of symmetry)! I feel ya about the fabric being printed crooked, that is the worst! Well done ladies!
Beautiful! How far apart do you place the ribbon pieces?
About 5 inches. Just make sure they’re spaced evenly.
So glad I kept scrolling…I was wondering about the ribbon spacing as well. Thanks for this idea!
Beautiful curtains! I love the “symmetrical” effect as well!
Great tutorial… For the fabric did you use a canvas or apparel? 🙂
Thank you
It’s a mid-weight home decor fabric.
The curtains look great! I need to make curtains for my son’s room.
Thank you for the tutorial.
I love the curtains, the fabric, color and I think it was a great idea to do the same curtain over the door. It adds balance and symetry to the room. Great job!
Curtain bg is a leading supplier of readymade to measure net curtains. Any drop available, free postage over and fast delivery, buy online today.
Love your idea. I also love symmetry.
I absolutely love the colour of the fabric. And why not put the curtains over the door!? It creates wonderful symmetry and balance in the room. Kudos!
Love the symmetry…and the colors!
So pretty. What a difference. I had to double check that nothing else had changed. 🙂
Working on my curtain panels and was wondering how far apart you hot glued the ribbons? Love the way this looks instead of putting the rod through the whole curtain.
Thanks!
Hi, Maribel! I spaced them out about 4-5 inches apart. But it depends on the width of your ribbon– just takes some simple division to get it right.
Best of luck!
I did the same thing to my Mama and Pops! lol…I closed on my house on a Friday and they were here on Monday (very proud parents, btw). I feel a bit more guilty though as my parents drove nearly nine hours to reach my new domicile. My Mom is a professional seamstress so my problem was convincing her about the simplicity of what I was after. I had decided to use the fancy clips that you actully just clip the fabric to the rods and it hangs from it so all we had to do was hem all the edges then put the larger folds on the top and bottom. After that if was just a matter of clipping them to the rods 🙂 I got a lot of extra length in mine because I wanted to balloon them near the bottom which I did using a thick twine that went well with my Italian countryside design scheme. By doing this myself I was able to afford the very fine, heavy weight linen I wanted. I’m about to redesign so doing the project again…although I’m not going to have my parents drive all that way because they’ve already given me the education I needed to stand on my own two feet!
Valuable information. Lucky me I found your website unintentionally, and
I’m surprised why this twist of fate didn’t came about earlier!
I bookmarked it.
So easy. Good job
Waw
I am not an expert seamstress but think I could make these. How wide are the panels?
Love the drapes, they really finish off the room. Perfect that you made them symmetrical. I actually didn’t notice one was a door and one a window!
I think the dresser is beautiful as a TV table.
One hint about photographing indoors, especially towards the windows is to take your pictures when it’s just barely light outside, with all of your lamps/lights on.
I had been advisable this web site as a result of our relation. We are not positive whether or not this particular blog post is usually compiled by methods of the pup since nobody recognize these particular pertaining to our problems. You are great! Many thanks!
витамин f
Love your curtains and it does even out the room. I put curtains over by backdoor (French doors) and love it! We like it dark to watch tv and this helps. thanks for showing the steps & cost!! <3
Love the symmetry, hanging curtains at the door and window. That gives me some ideas. Thanks for the great tut!
Hi! I love this tutorial- so much easier than other ones I’ve come across. I will be attempting my own curtains but need to put a liner on the back. Any suggestions on how to go about doing that?
I love it! I also made a curtain for my kitchen window and came upon the same problem – those who sold me the fabric had cut it crooked and upon cutting it myself at home it seemed straight , but when I hung it it tilts a bit to the right. I wanted to ask you about the flowers on the tv stand, do you have a tutorial for them? 🙂
I need these curtains can i pay you to make me some of these same color and pattern.? Please let me know thank you
hey, i am from Bangladesh. i sell curtains in my country. i can parcel you these curtains or even luxurious ones within $100, for the availability of cheap labor. let me know 🙂
[email protected]
very nice!
I love you’re website & how you break things down so clearly. wonderful job.
My daughter bought new curtains with large metal eyelets in the top and they stack back beautifully like verticals almost. I have bought material already for my curtains and now seeing your tute I will be able to get the effect I want by following what you did with yours. Do you use narrower tape at the ends of the curtains to help them stack better? I live in Australia so what kind of ribbon did you use. I’d need to fold it to make it narrower at the ends of the curtain I suppose . I will be making 3 drops of 140cm wide in each curtain for a large sliding door that opens in the middle so I will have to sew on the ribbon to carry the weight. Do you know what grograin ribbon is would that be a suitable ribbon ?
My daughter bought some new curtains with those large eyelets at the top and they stack like verticals. I love them but I already have had my material for about 2 years and seeing how you made yours I believe I can approximate about the same result following your tutorial. Thank you so much. I will have 2 curtains with 3 drops of 140cm in each for a large sliding door opening in the middle so I believe I will have to sew the ribbon on instead of glueing because of the weight. I live in Australia I’m wondering about grograin ribbon do you know what that is . I would appreciate your comments.
Hi Sandra! I think grosgrain ribbon would work just fine. Best of luck!
Thanks for the tutorial. Will totally use it. Could definitely do without the flip “slave labor” comment. Found it offensive. Almost clicked right off the site. Good luck!
Lol… curtain sweat shop. Love your tutorial and love how they turned out!
I’m not that much of a internet reader to be honest but
your sites really nice, keep it up! I’ll go ahead and bookmark
your website to come back later on. Many thanks
Wow, I just have to congratulate you on this beautiful article on how to make curtains. I personally have had the pleasure of making almost all the curtains in my home and I have to say that I always looking for coupons to save money on materials. That was a great tip. I would really appreciate it if you could take the time someday to visit me at my website dedicated entirely to sharing meany different articles and ideas on how to make curtains. http://www.howtomakecurtainsfree.com/blog/
At first, I would think that curtains on a back door look odd. But now I am looking at my back door to our porch (which is placed in between the floor to ceiling windows in the living room and the dining room (which I use as my studio space), and it doesnt seem like such a bad idea now.
You are so clever! I LOVE these curtains and especially love how easy you make it seem. I was fortunate to just happen upon this blog tonight, I just bought a sewing machine today and now I know what my first project will be. I am now super motivated! P.S. Love the ribbon idea!
Those really make the space look lovely! I will be making some curtains this summer, so this was really helpful.
Beautiful! I agree with you about the symmetry and love the look of the two panels. I found this from pinterest and am now following you on bloglovin.
Only just read this post , thought it was fab and very inspiring . Inspiring enough for me to make my own , and may I say your step father needs to visit England we have curtains on front and back doors xxx
Love the website! Love the article! Love the simplicity of it all. So inspiring. I am a symmetrical person as well.
Just to throw in my two cents towards step-dad; try placing small, inconspicuous tie backs on both sides of the back door to make passing thru a little easier (there are so many to choose from, you may find something to fit in that tight corner).
Regarding your sewing machine; I made the mistake several times of taking my machine in for service when it all it needed was a dusting and oiling. If you bought it new, or still have the manual and all parts that came with it, you should have the screw driver and maintenance lubrication to do the service yourself. If the thread is knotting up a lot while you sew, it is usually due to using the wrong needle or thread for the fabric you are trying to sew. I learned all this and more by taking a sewing class at my local community college for several semesters, just for personal enrichment. I still consider myself a beginner to mid level skills but I learned so many little tips that I no longer get frustrated with my machine nor does it take me 4 hours to complete a 1 1/2 hour project.
Keep up the good work and I will definitely be sharing your site with my friends!
Cheers!
The manufacture of gates, automated gates, railings, trolleys, fire escapes, access platforms throughout the UK.
You’re so funny when you said Cheddar I died. Also I get putting the, on the door I’ll be using this tutorial to make curtains to go over the French doors in our living room. I think we would be friends is that weird lol thanks for the awesome blog post
Hayley
the curtains look great t like their colour and your sitting room too, it’s warm!!!
🙂
Just a quick question – love the photos and the room looks super cute! How does it all work with the ribbon backing being glued on – solid? do you open and close them a lot? I am just about to make some black out blinds for my son’s room and wanted to know about that before I went the glue direction rather than the sewing direction.
The ribbon has held up well. None have fallen off of the curtains on the window, which I never open and close. Some have fallen off of the curtains on the door because we open and close those daily. I would sew the ribbons onto the blackout curtains because of the weight of the curtains.
Hello! I love the curtains! When you say you made a 95″ panel is that how long your fabric was before adding the hems or after? Thanks!!!
Thanks! They were 95 inches before adding the hems. But make yours as long as you want them for your particular windows.
I love you! My glue gun station is right beside my sewing station….where I’ve bitterly sat for the last few days trying to think of an easy way to add ‘rings/hooks’ to my newly sewn ENORMOUS drapes ….. and all the while the answer was staring me in the face…GLUE tabs on! Thank You for making me so happy!
When glueing the ribbons on, how far apart from top and bottom of ribbon, or do you lay flat?
I put a little bit of space in between the top and bottom to allow for the curtain rod to go through. I’d say it’s about a 2-3 finger gap from top to bottom.
I learned how to straighten fabric when I took a class nearly 30 years ago… wow, that seems like a crazy long time ago…. You need to give yourself a little extra fabric. You cut into the fabric, at the top, just enough to cut past the side seam. Grab a single thread. Pull. It will start to gather the fabric. Gently pull that thread all the way across the fabric. You will have to work with the gathered fabric. Sometimes, depending on the fabric, the thread will break. When it does, run your finger across that thread and pull the fabric back towards you. As you do it, you will see a little line where the thread was pulled. Cut your fabric along that little line until you get to the point where the thread broke. Do this until the thread is pulled all the way across the top of the fabric. Really, this should always be done with any fabric before you make a project especially clothing. This will help the fabric hang right. You will be amazed at how much fabric you lose.
Hope this helps!
I love these and have decided to try the hidden pocket style. My question is this; how do you hang them on the pole so that the pole hardware is covered? Right now mine are hung but don’t look too great because you can see the part that is attached to the wall and the curtains run into it….. any ideas?
Hi Michelle! I’m a little confused by your question. Do you mean hide the brackets that hold the curtain rod up? I simply thread the curtains around the brackets. For example, I’ll thread 5 tabs on one side and 5 tabs on the other side so the bracket is hidden in the middle. Does that make sense?
Yes, that’s what I was wondering. That makes sense, I’ll try it. Thanks for your help!
I love, love your curtains!! I love their simple elegance. I would like to make some in the same fabric but I am wondering if it is more aqua than a light green. In your photos they look aqua but on some fabric websites they look like a bright teal. Thanks for your help! Love your blog by the way… I think I could live in your house
Hi Kathy! The fabric I purchased is more of a turquoise/aqua. Hope that helps!
This is great! People ask me all of the time how to make curtains. I have not taken the time to write down steps. I will just share your blog instead! They look good!
I had difficulty knowing how far down from the top of the curtain to place the top of the ribbon (I guesstimated from your photo) and how much loop to allow. They’re for my granddaughter’s apartment and they haven’t been hung yet, but I’m afraid I got the ribbon too close to the top and it will show when put on the rod.
Curtains look terrific!! I too, am a fan of things looking perfect on both sides of my room. 🙂
I just wanted to tell you that you have a great momma for 1. Picking up the phone after she was already in bed.. Haha! 2. For driving three hours to sew curtains!!
I have two great kiddos, who are still super tiny (6&1.5) but I would totally drop everything go sew curtains for them too!
Best wishes, jenny
With the latest study from PEW Research stating that
95% of teens have access to the Internet, 80% of kids
have cell phones and 48% have data plans, providing a safe cyber-space should be a priority for all parents.
They only want your money and they want as much of it as they can possibly get.
Daily, even hourly, businesses can see how many individuals clicked on their
ads and the traffic that is being driven to their website.
I love, love, love how your curtains turned out. You provided a great tutorial. Your mother is an angel who came to her baby’s rescue. I just love the fabric. The fabric pattern is very trendy right now but it’s a timeless pattern, like the Greek key. Thank you for the wonderful tutorial. My mom was sharing with me about using queen and king sized flat sheets. They’re already hemmed so they go up pretty quick too. Sounds great if you can find patterned or plain sheets that you like. They are also a lot cheaper than buying yards of fabric. Just passing a simple solution on to you. Thanks again and tell your mom that she is an angel.
Those are really cute curtains. I love the idea of straps! I’m definitely going to use that idea. I would recommend cutting off the selvage next time. It is woven different than the rest of the fabric and often puckers when the curtains are cleaned or steamed. You could either serge the edges or use a seam binding.
I love how u put the curtains in the back door I only have one window in my leaving room and the back door im thinking about doing the same think thanks for the idea it looks beautiful
Hi – These curtains look great, I love your suggestion on hem and tob tab sizes. I was wondering what the function of the ribbon tab is as opposed to having a traditional pocket rod curtain, meaning a curtain with a hem at the top that the curtain rod can slid through?
Thanks,
Dorothy
Hi. Lovely curtains and they really jazz up the room. I need some more detail on the ribbon tabs on the back. If they are 3 inches in length and is puckered and the fold over or hem is 4 inches and the tab is down one inch from the top that does not add up.Please clarify. I love these curtains and want to make them.
The living room just changed with the addition of the curtains – great job! And love the fabric that you used. This project is really one to try out!
The fabric is gorgeous! I’m about to tackle a similar project for our master bedroom, and the back-tab tutorial might be the way to go. Thanks!
The curtains are so cute, it is really good specially if someone wants to add a new burst of color from their usual plain color. This blogs makes me realize how much advantage it will be if someone knows how to sew, even basic sewing will really help in the long run. The instruction is really easy, I think this will be better than buying expensive curtains, aside from the customizing, no one can beat personal touch. Thank you for the tips and sharing.
Hey Chelsea…I see that this posting is over a year old….I’m always the last to find things. I wanted to bring up,the fact that you said the fabric was printed crooked and that you also didn’t cut off the salvage edge because it doesn’t fray. Well….there’s a reason you should always cut off the salvage edge; okay maybe a few reasons. First off, you don’t want to advertise on the inside of your curtains for the fabric maker, second, you want any sewn item to look as a nice on the underside as the side you see (according to my grandma and I have to agree) and finally, the salvage edge is more tightly woven than the regular fabric so it tends to make things a bit wonky. This could also lead to fabric being crooked. Now I’ll step off my soapbox and say tha I enjoyed your tutorial and I’m going to begin my bedroom curtains now. Just as soon as I cut off the salvage edge. 🙂
Hi Thanks for the idea and doing them right now your way. However I have a question about the ribbon…I am worried that it won’t be so strong. Any ideas what I can use instead? Also because my curtains a little bit heavy
Thank you! You can use the technique I did for my black out curtains. See here: https://www.twotwentyone.net/2014/11/make-blackout-curtains/
I love the fabric. I’ve been dying to put curtains over my back door. Everyone thinks I’m crazy. In my living room I have a fireplace in between a window and the back door. We use the backdoor more than the front door. So my question is how aggravating are the curtains on the door? Do they get in the way?
They aren’t bad. We’ve gotten used to them. And we open and close the backdoor 5+ times a day to let our dog outside. We just run into issues when people come over and open the door to let the dog out. They don’t pay attention and the curtains get caught in the door. Other than that they’ve worked out great!
this looks so lovely I have been trying to Google where I can get my inspiration from because I have a passion in this field but the re souses keeps on blocking my way Thank God I have found you and I have learned something precious thing ever. thanks a lot. hope to here from you soon.
Okay, you posted your curtains a long time ago, but I am just seeing them, and they look great! I am with you on the symmetry issue, and am constantly deflecting comments about my own vision for my house. No one seems to understand that I am allowed to design a space, rather than just accept what’s there because it’s there and why change it when it’s perfectly fine the way it is. Blah blah. Thanks for posting your steps on the curtains and blackout curtains, I will likely be using them soon!
Thank you for the helpful guide! I appreciate your love of symmetry, and my first thought (because pushing the curtains out of the way all the time would drive me crazy) is that I would do one long curtain, but pulled to the side with a tie. You could have it pulled to the hinge side on the door, no need to fight with it, and since your hinges are closest to the wall, it would still look lovely. Too late now, I suppose, but an idea for others, or if you change out your curtains in the future!
We just have the lacy window treatments that came with our house, and I’ve been chomping at the bit to get some colourful curtains up!
P.S. – You can tell your step-father that I have curtains on my back door – and I love them! Rods are attached to the door at top and bottom, and there’s a tie in the middle for an hourglass shape.
In my country the cloth is cheaper, i did a curtain with less than 50$
Great job
May God bless your mom
Just stumbled upon your website. I agree that drapes were required on the door. In case it’s become a pain to move them out of the way when necessary, you might consider screwing to the top of the door two vertical 1 x 2 strips of board, and attaching the rod to those, instead of to the wall. Then the drape moves with the door. It wouldn’t be suitable if you leave that door open often, but if it’s always closed, it would make entry and exit through it easier. The drapes look lovely!
Yes, I’m late to the party also but wanted to tell you the curtains are most lovely! (I have actually used this same fun print for a clutch purse!) I will comment, though, on the crooked print job. When I look at your close up photo of the ribbon tabs, I see that the grain of the fabric is what appears to be crooked. Decades ago in my high school sewing class our teacher told us to always be sure the fabric was “on-grain”, that is, that the lengthwise and crosswise threads are perpendicular. Sometimes in rolling it onto the tube or bolt it would get pulled or stretched crooked. We were taught to gently pull it back into shape by gently pulling it on the bias. (google “straightening fabric” to find more details if I don’t make sense)
How is the hot glued ribbon holding up, especially on the curtains over the back door where there is more wear and tear on the curtains?
I just saw your 2012 how-to curtain creation on the Pinterest site, so therefore my 2015 comment/question; here’s hoping you might still respond.
First my comment: I truly enjoyed your photos and the way the curtains fall as if they were pinch-pleated, which is the genius of the tab ribbon detail over using the pocket rod method. I’m also thinking that the ribbon idea allows the curtains to slide more easily on the rod if one needs to open or close the curtains.
Second, a question: If your curtains have been laundered or dry cleaned since, did the side edges, where you left the selvage edge in tact, shrink or pucker at the seam making the side length’s of your panel uneven?
Thank you for sharing your tutorial, and here’s proof that your lesson is still reaching other do-it-yourselfers.
I am so grateful to hear you say “the fabric was printed crooked”. I made my first ever pair of curtains and thought I was losing my mind. Or that I had started slipping vodka into my drinks…
Thanks for the tutorial!
So funny, I looked at this post a few weeks ago because of the ribbon tabs, and I’ve come back to it again because I’ve got my fabric and I’m ready to go, and I realized I bought the SAME fabric!! Haha!
Thanks for all the info!
How long did the hot glued ribbon hold up? I’m skeptical on the hold up of hot glue for heavy curtains like that.
Great blog here! Also your site loads up fast! What host are you using? Can I get your affiliate link to your host? I wish my site loaded up as quickly as yours lol|
I want to start the own business
Love the idea of symmetry….Maybe you can find the old fashion curtain rods that swing to be able to solve your slight problem with your design.
Thanks for all your postings
goo one,i appreciate this post and i want to start the own business.
My husband and I just moved into our first place and we have started decorating! I have been searching high and low for cute curtains/draperies but have not been in love with any. I am now thinking of making my own, but id I am honest with myself, I will not get around to it any time soon! Thank you for the tutorial, I am pinning this. http://www.coverupdesign.com/naples-fl-custom-draperies-and-shades.htm
I love the idea of back tabs! Can I ask how they have held up? Does the hot glue work?
Love the blog and will keep reading!!
I’m totally with you on the symmetry, whether it’s numbers or pattern, symmetry is just relaxed and pleasing. The curtains definitely look right as a pair – elegant and cosy! Love the fabric too; geometric patterns are usually easier to line-up, as long as the fabric ‘behaves’. I have door curtains too, how else to shut out the light, and on winter nights, the cold?!
I completely get the symmetry and would have done the same thing. 🙂
I’m curious – how well does the hot glue hold up? Like say if it’s a high traffic area? I’m needing to do curtains for my sliding glass doors in the kitchen, so they would be opening and closing often and need to hold up.
For that price you could have just bought curtains and saved yourself the trouble.
Just a side on the photography, ( Im a professional one). No camera can ever capture the difference between the highlights and the darks that you were asking you camera to do – by pointing it at the light. This is where you need a tripod. 1st- take the photo that shows all the edges of you curtains ( this will be a very dark image indeed), then take a more in between dark and light image. Work your exposures up until you have a bit of the edges of the curtain just about blowing out and you cant see them. Dont go past this part- you have no need for them. Then ( because you took the images on a tripod and DIDNT move the tripod) you can put the images on top of each other in Photoshop and use the handy exposure mix to have the computer spit out a image that will not be too dark and you can still see the edges of the curtain. YOU MAY HAVE TO DO 5-7 SHOTS!!!
Good Luck
Great job!
🙂
Okay, you posted your curtains a long time ago, but I am just seeing them, and they look great! Thank you sharing the post about how to make curtains.
Great job! 🙂
Great job on this, Chelsea! Really easy to follow curtain tutorial!
This site is completely awesome. I’ve ask these info a great deal and I realised that is professional, fast to understand.
I congratulate you because of this article that I am going to recommend to people around.
I request you to recommend the gpa-calculator.co page where each learner or
learner can find ratings grade point average levels.
Be great!
Wow.. Great job. Thanks for wonderful information. thank you
http://www.sriragavendraliners.com/index.html
I found the perfect material for my granddaughters bedroom curtains at Joann’s but it is polyester. Does polyester make good curtains?
Good post and good images regarding curtains. I saw online that we can use tracks or poles to hang them. There are so many different methods used to make window curtains look beautiful and easy to use.
Thank you so much for such a wonderful article of yours. I want you to know that is has helped me a lot.
And to help you with your duties at home, try our cheapest curtain cleaning singapore
Just visit us!
I love the information of this article it helps me a lot, this article is so informative! so keep it up! I suggest you can also visit us blinds fabrication for you to help to do more article like this one.
OMG its really beautiful.I found this fabrics from Spandex Collection in NYC ( http://www.spandexcollection.com) which was a nice weight–not too beefy, not too
Every person has its own ability to stand out but limited person can make changes in someone’s life, but you have this both characteristics! So I’m conscious about myself now, what will I do to be somewhat like you! Can we go sometime for curtain cleaning singapore?