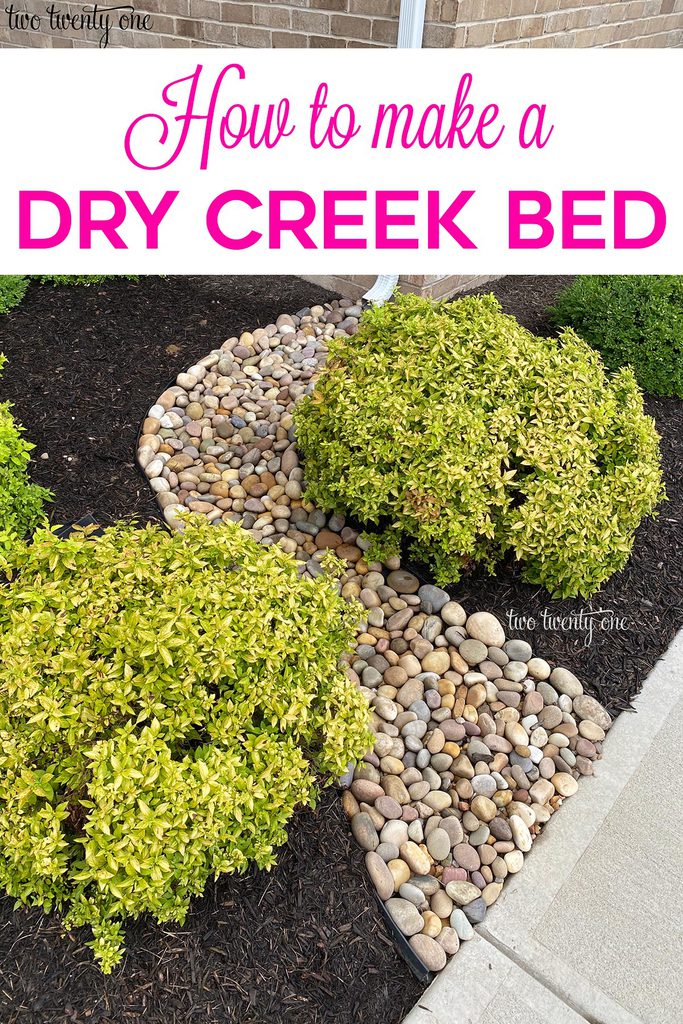
Dry Creek Bed Landscaping – DIY Rainscaping
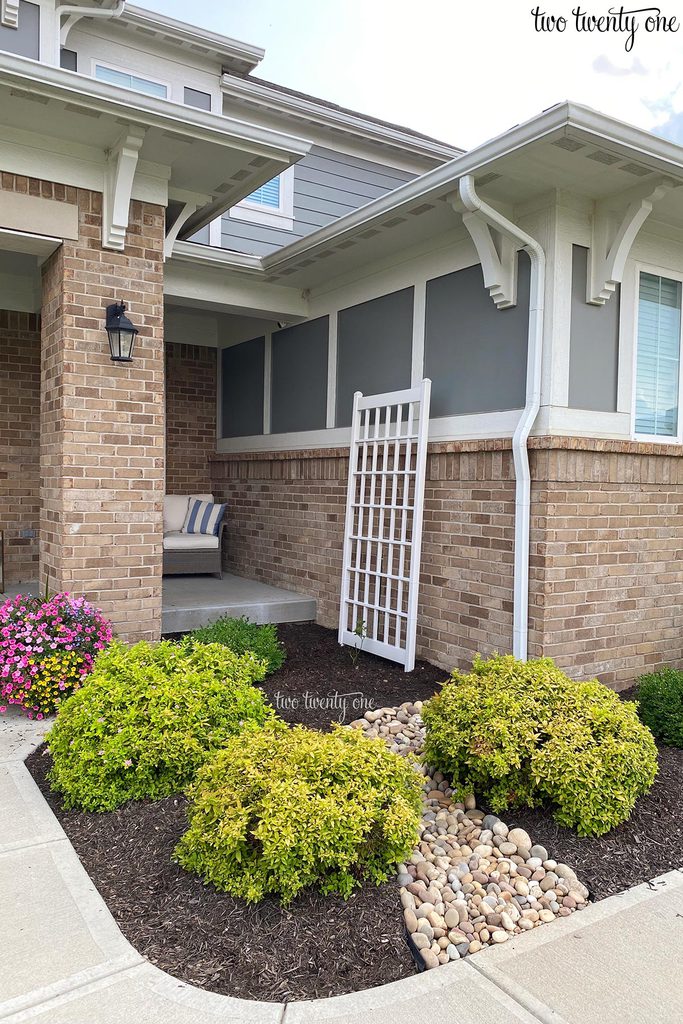
Did you know you don’t have to live with those ugly downspout splash guards and washed out mulch? In a couple of hours you can create a dry creek bed, also known as a dry stream bed, to divert the water away from your house. And it won’t break the bank.
Things to Love About a Dry Creek Bed
1. Dry creek beds are a great addition to your landscape design. They help to add more character to your outdoor spaces, especially front yards for curb appeal.
2. They’re maintenance free. Once you create your dry stream bed, that’s it.
3. DIY dry creek beds are also a great solution if you don’t want to spend hundreds of dollars on French drains or to route your downspout underground.
4. They’re an attractive way to manage stormwater.

How to Make a Dry Creek Bed
Supplies
shovel … click here for the shovel
long level … click here to buy a 48″ level
gravel
river rock … click here for the rock
landscaping edging … click here for the edging
Tip: If you don’t have a large level, take a long piece of wood and set your smaller level on top of it. Or ask a friend or neighbor if they have a large level you can borrow.
1. Determine the Layout of the Dry Creek Bed
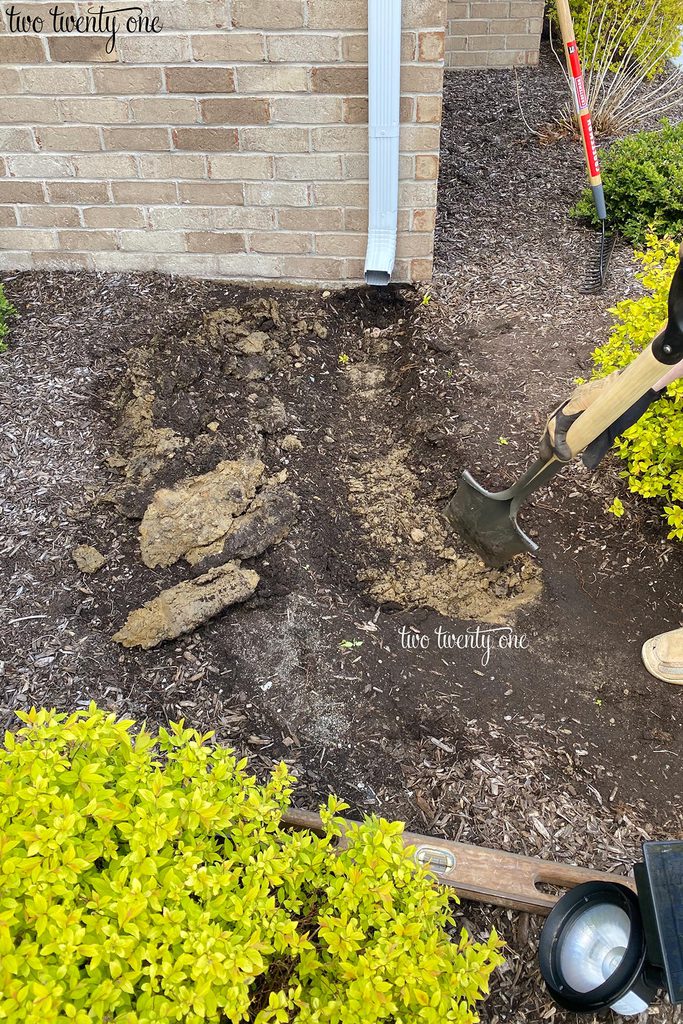
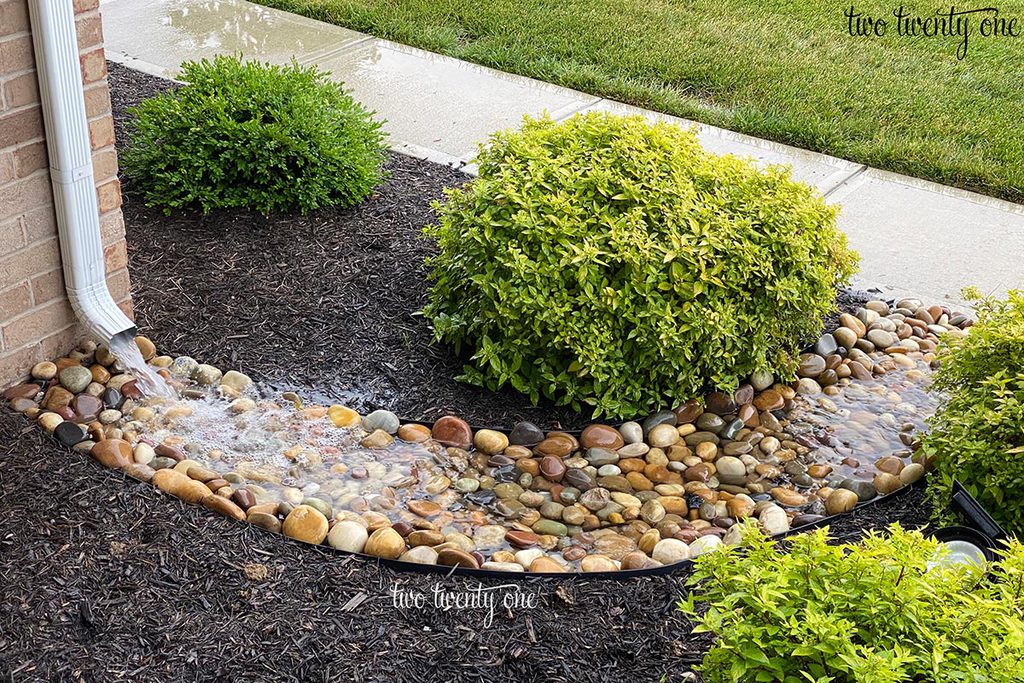
Before digging, you’re going to want to figure out the natural path the water takes when it flows out of the downspout. This should be fairly easy to see because the water will have washed away mulch and/or soil. You can mark the path with landscaping spray paint or just use your shovel to score the dirt and make the outline.

2. Dig a Trench
Using the washed out away as your guide, dig a trench about 3-4 inches deep. When digging, be sure to grade the trench down so the water will flow away from the house. If you don’t slope it, you risk water pool near the foundation, which isn’t a good thing. Use a large level to ensure the trench is angling down and away from the house.
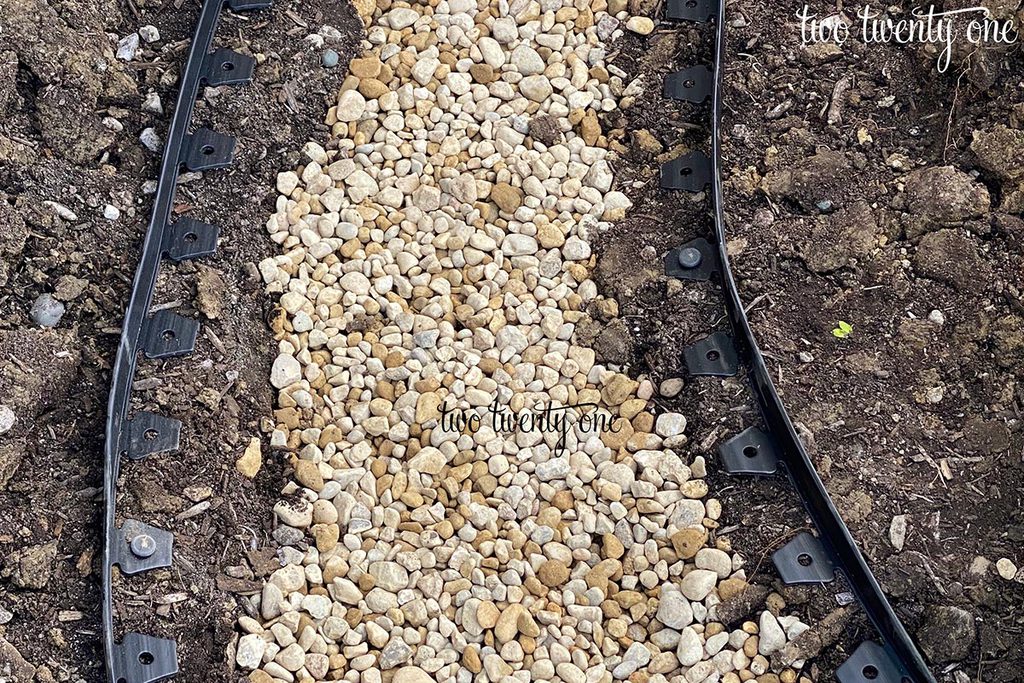
3. Fill the Trench with Gravel
Once your trench has been dug, fill it with gravel that will blend in with the river rock. Our river rock has warmer tones, so we went with warmer-toned gravel. Pack the gravel in by stepping on it or using the backside of a shovel. The gravel will absorb excess rain water at the bottom of the creek bed. Click here for the wheelbarrow.
An optional step is to add landscaping fabric before adding the gravel. Some people add landscaping fabric to help in guiding the water away from the house. We didn’t use landscaping fabric and have found that the dry creek bed works fine without it.
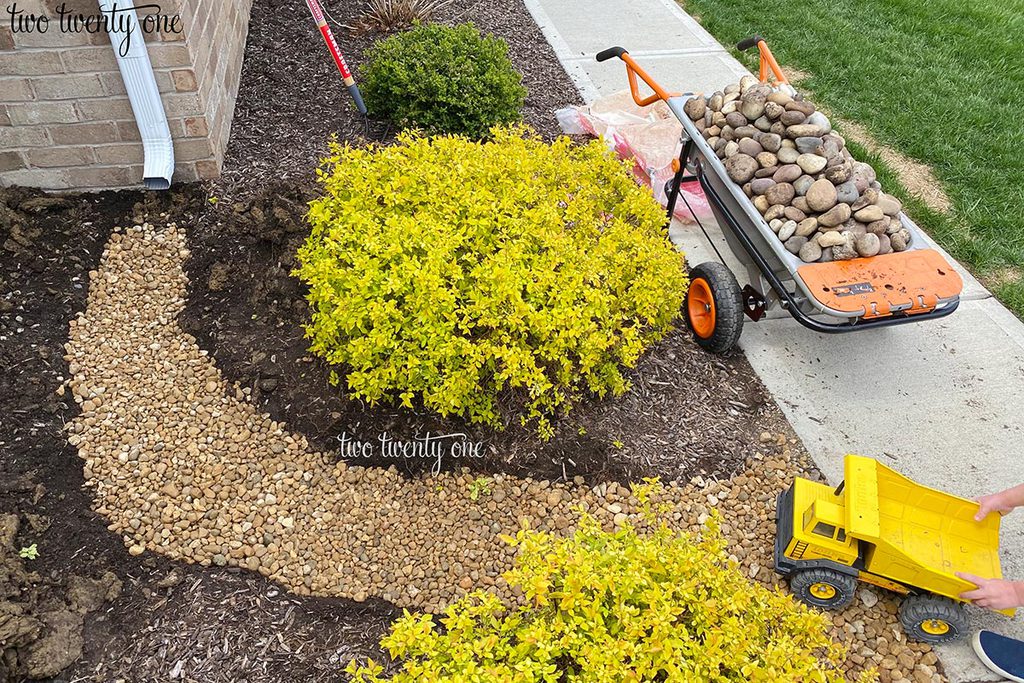
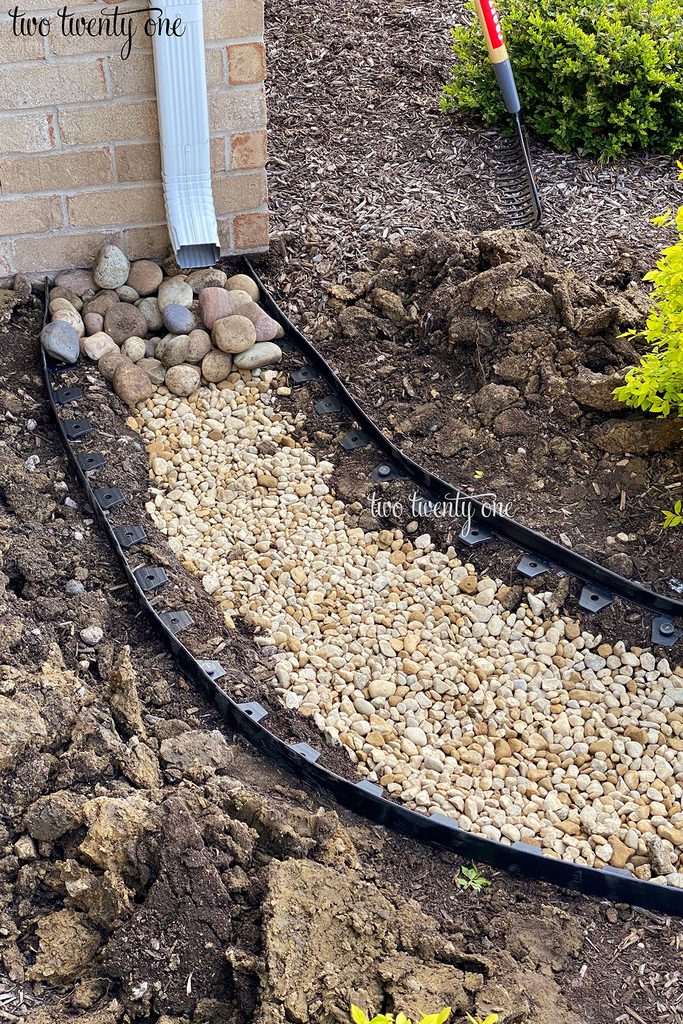
4. Install Edging
To reduce erosion, keep the rocks in place, and create a path for the water, we added edging to both sides of the dry stream. The edging we purchased came with stakes to secure the edging. Be sure to follow the path the water takes.
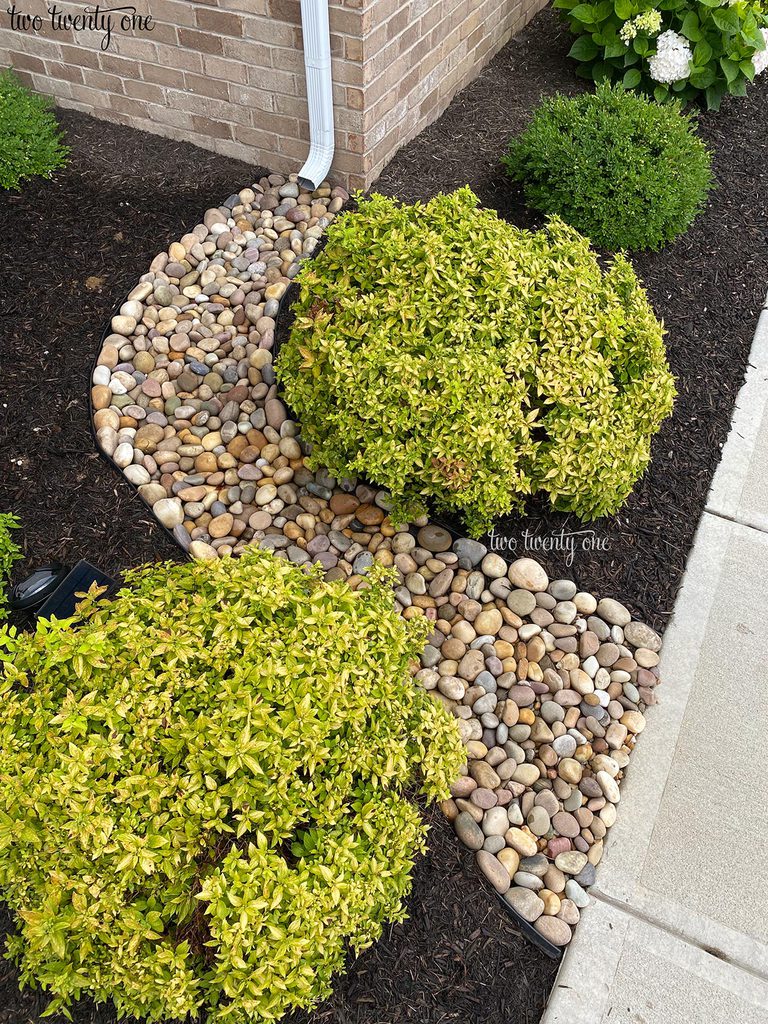
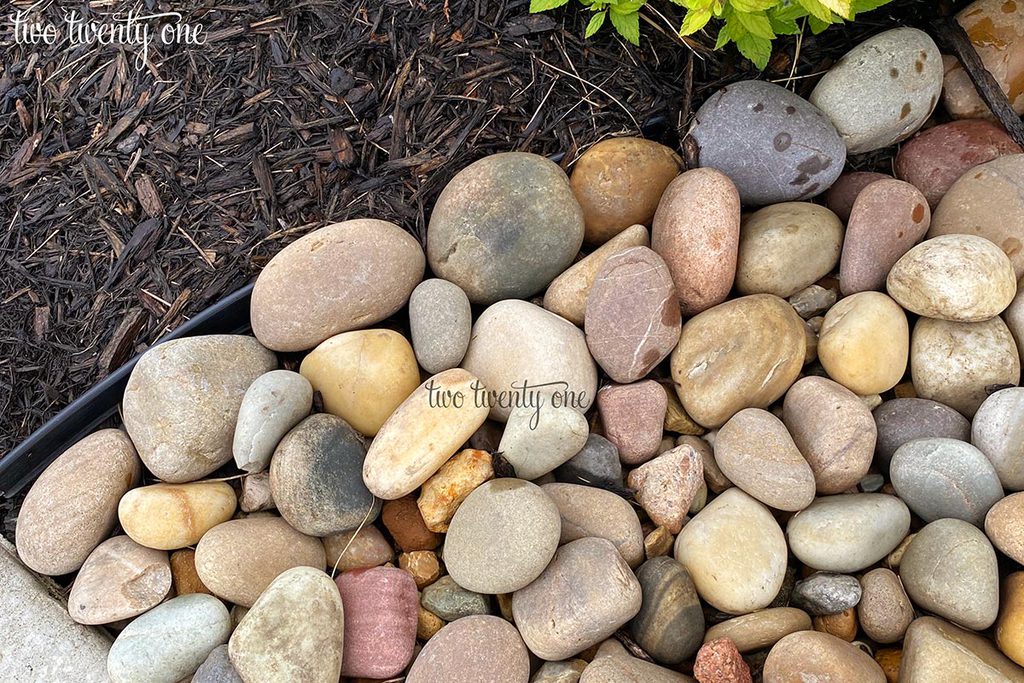
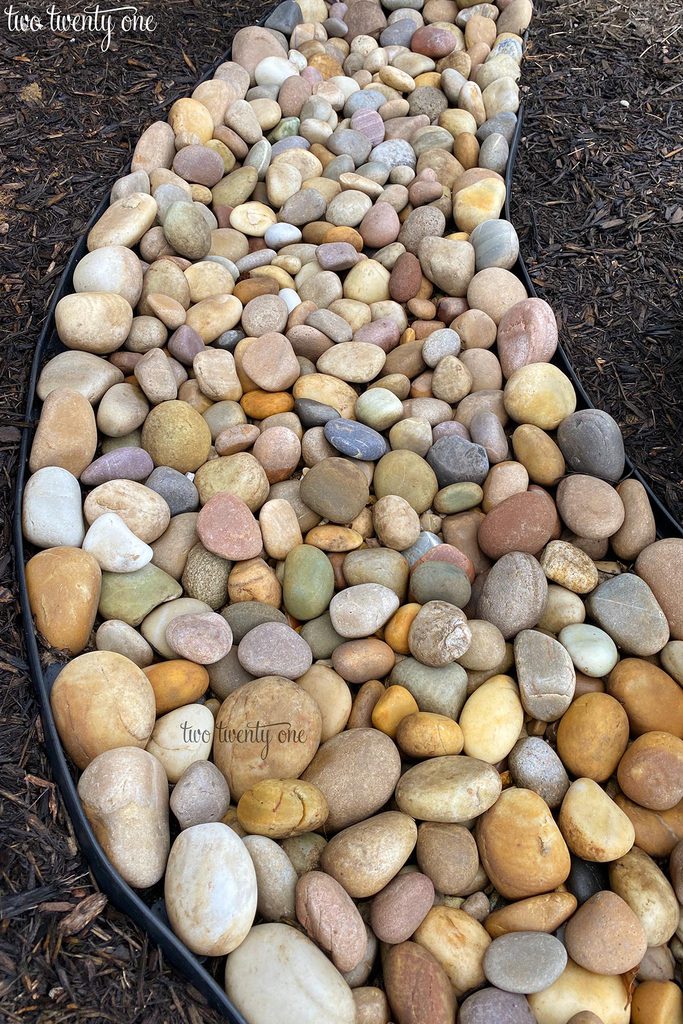
5. Add River Rock
Once the edging is in place, it’s time to start placing the river rocks. River rocks are best because they’re smooth, which allows the stormwater runoff to slide across them. So keep that in mind– flat stones are better than rough stones. When laying the rocks, put the larger rocks on the edges and smaller rocks in the middle. Try to get the smaller rocks to lay as flat as possible so they can guide the water away from the downspout and house.
6. Mulch Around the Creek Bed
You may want to wait to mulch after completing your dry creek bed. Keep an eye on the weather in the coming days. If there’s rain in the forecast, make a note to check on your dry stream to see how the water is flowing. You may need to make some adjustments based on what you see. And then add mulch once everything is looking good.

Here Comes the Rain
Once your dry stream bed is complete, wait for a good rain, and head outside to check it out. Ours flows across our front door walkway and into the grass.
Make sure the rainwater is flowing away from the house. If it’s not, then you need to grade it down and away from the house some more. And maybe add some landscaping fabric to help the water flow. If the water is pooling too much, you might also have to address that as well because you don’t want too much water pooling by your foundation. But if you make a particularly long creek bed that’s farther away from your house, you can create a rain garden with small pools.
Dry Creek Bed Video
Here’s a video of our dry creek bed in action during a pretty heavy rain shower.
There’s so many outdoor DIY projects you can tackle in a weekend– fire pits, rain barrels, mulching flower beds, and now, a dry creek bed!


This is such a good idea. You don’t want water going under your house. More problems and expensive. Y’all did a good job! Thanks for the step by step instructions.
This is so beautiful, and funtional, too! I’m saving this for future use. Thanks!
Thanks for sharing! Saving this as we could benefit from installing this in our front flower bed.