• Home
  • Home Tours
    • Home Tour – Current House
      • Paint Colors & Sources
      • Full House Tour
      • front porch
      • Entryway
      • living room
      • kitchen
      • Dining Area
      • playroom
      • nursery
      • bonus room / loft
      • basement
      • deck
    • Home Tour – First House
      • Full House Tour
      • front porch
      • entryway
      • kitchen
      • home office
      • living room
      • dining room
      • great room
      • nursery
      • master bedroom
      • master bathroom
      • guest bedroom
      • guest bathroom
      • laundry room
      • pantry
      • Closets
      • outdoor
  • Lifestyle
    • organization
    • gardening
    • hair & beauty
    • christmas
    • travel
    • tips and tricks
    • stories
    • party
    • Gift Ideas
    • wedding anniversary gift ideas
    • debt free
    • blogging
    • photography
    • personal
    • podcast
  • baby
    • pregnancy
    • baby & kid organization
    • nursery
    • Tips & Tricks
    • Travel Tips
    • Favorite Products
    • child safety
    • Holiday
  • Projects
    • Home Decor
    • organization
    • outdoor
    • furniture
    • christmas
    • holiday
    • wreaths
    • printables
    • sewing
    • wedding
    • car series
  • recipes
    • desserts
    • appetizer
    • meals
    • holiday foods
    • drink
    • kid
  • Shop
    • Amazon Storefront
    • Affiliate Links
    • Shop My House
    • Shop My Closet
    • Shop Gift Guides
    • Shop Baby & Kid
    • Shop Toys
    • Shop My Favorites
    • Shop Holiday
  • About
    • Meet Chelsea
    • FAQ
    • Advertise
    • Press
  • Contact
    • Advertise
    • Email
    • Facebook
    • Instagram
    • Pinterest
    • Twitter

Two Twenty One

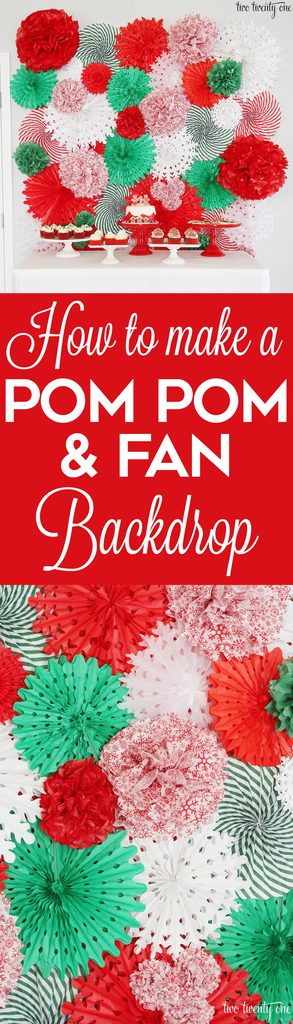
DIY Tissue Paper Pom Pom and Fan Backdrop

313 shares
  • Share
  • Tweet

Who’s excited to learn how to make a completely unnecessary but immensely festive DIY tissue paper pom pom and fan backdrop?!

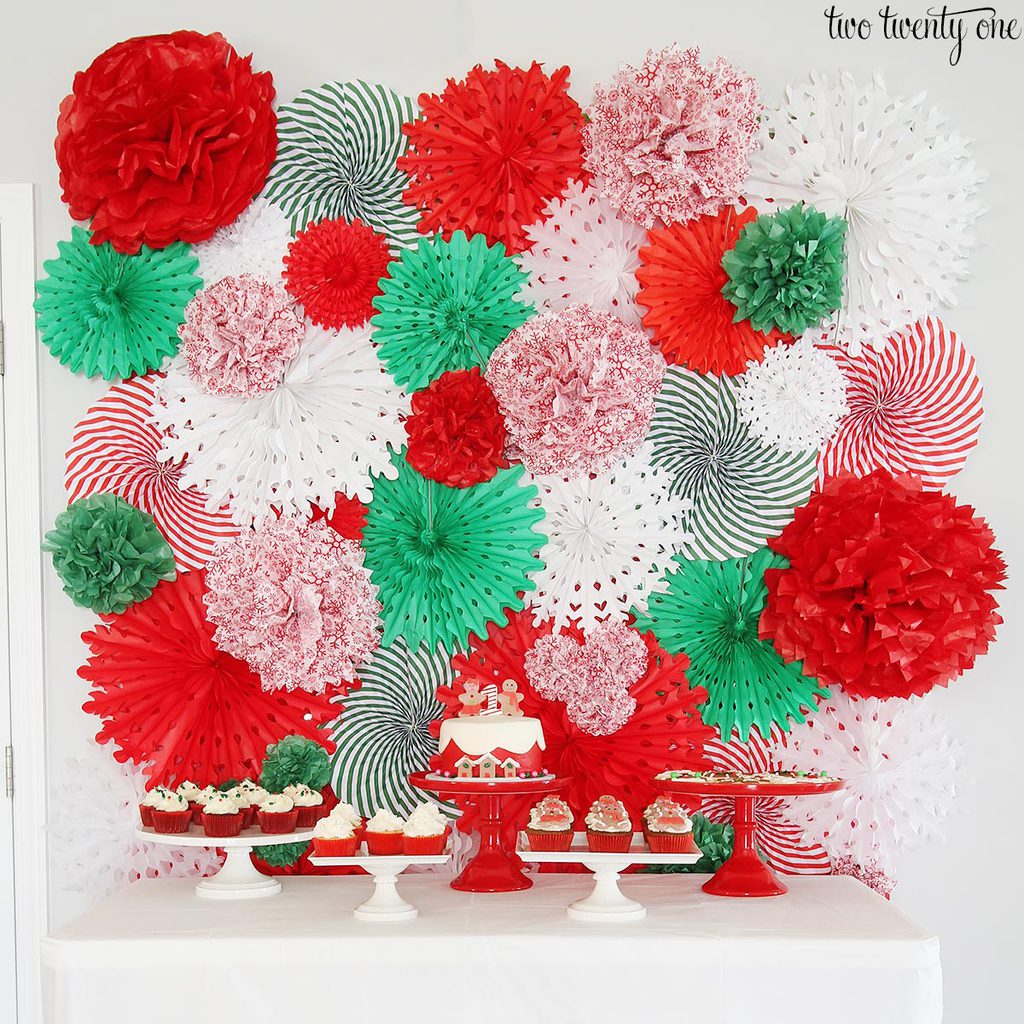
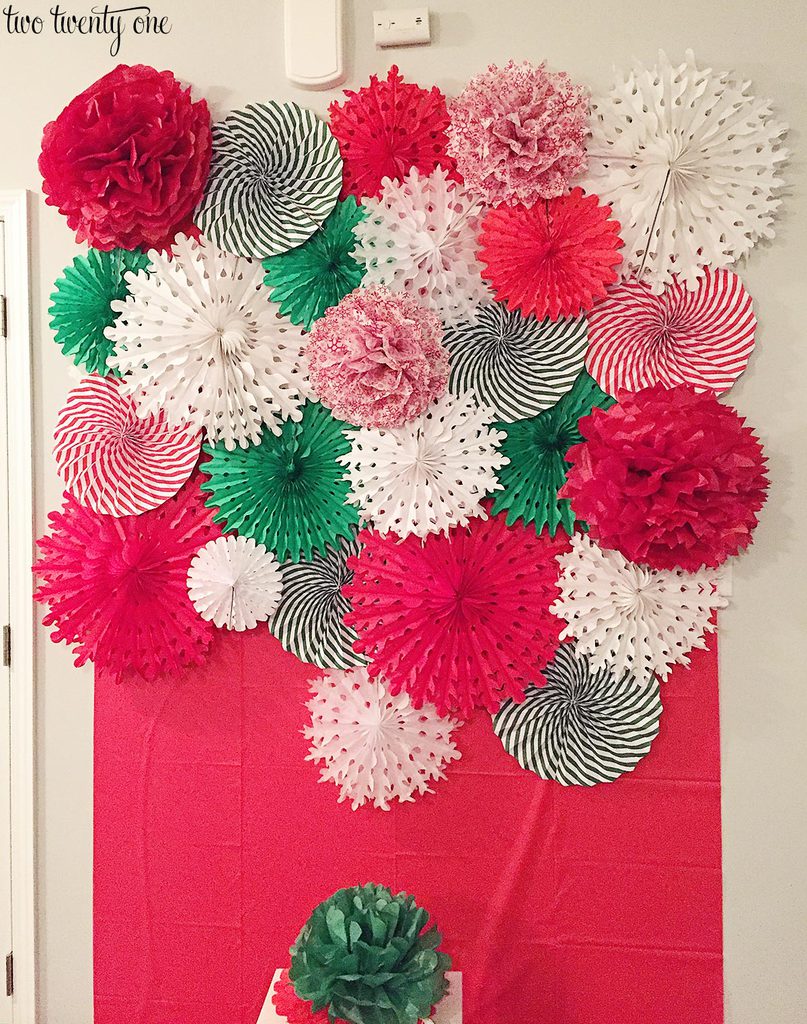
I created this backdrop, with the help of my friend Jen, for her daughter’s gingerbread-themed first birthday party. It served as the backdrop for the cake table, but you could use it as a photo booth backdrop, food table backdrop, or behind a table filled with photos of yourself.

It’s a backdrop for anything, really.

How to make a tissue paper pom pom and fan backdrop! Great step by step tutorial!

Here’s what you’ll need for your own DIY backdrop:

plastic tablecloth … Oriental Trading Company
tissue paper hanging fans … Oriental Trading Company
tissue paper pom poms … tutorial HERE
painters tape … this is my #1 choice
duct tape … we used this exact tape

You’re going to want to get an array of hanging fans– different colors, designs, and sizes. I’ll link the specific hanging fans that we used at the end of this post.

You’re also going to want a good mixture of tissue paper pom poms– different colors and sizes. If you didn’t know, tissue paper pom poms are extremely easy and inexpensive to make. You can find my step by step tutorial here.

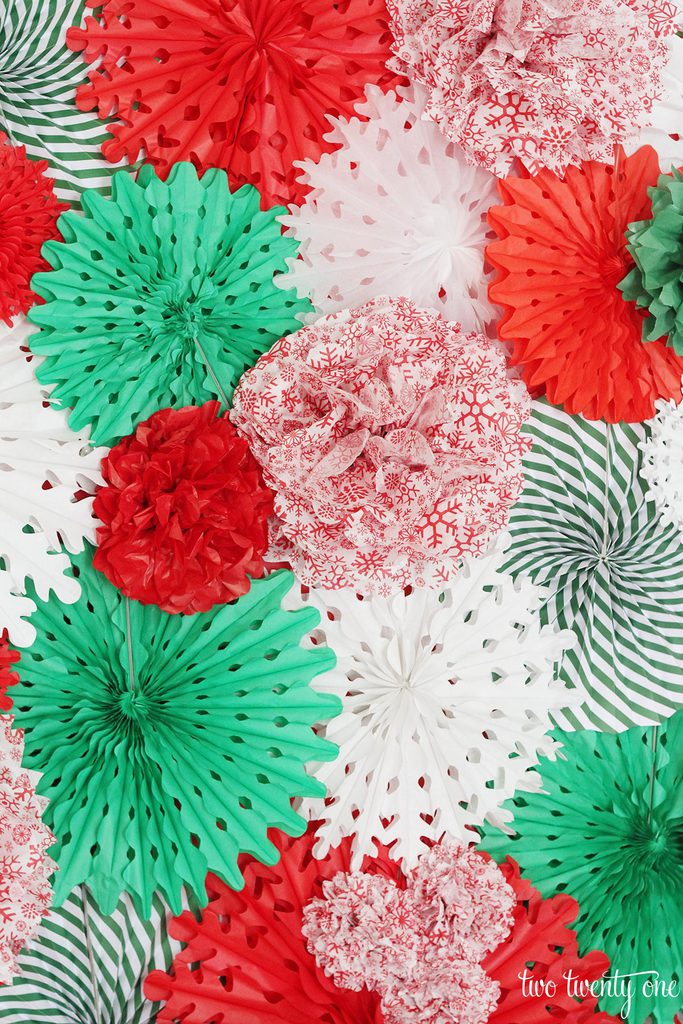
I’d suggest going with at least three colors. As you can see, we went with red, green, and white. Mixing pattern into the backdrop helps to break things up. For the pattern, we had green and white striped fans, red and white striped fans, and white tissue paper with a red snowflake pattern.

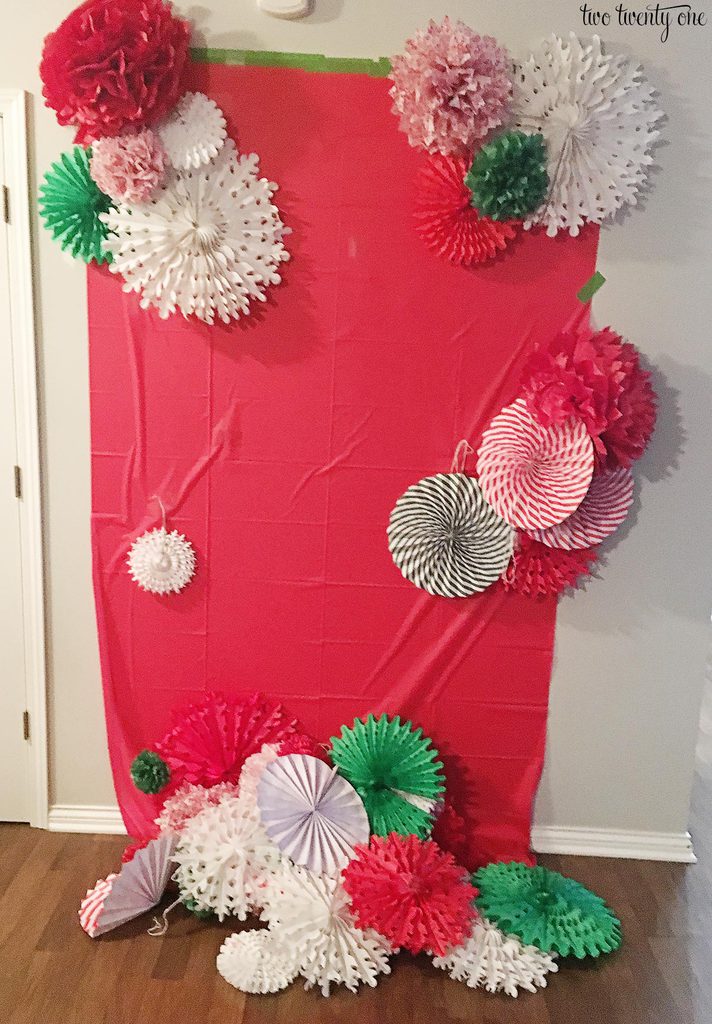
I’m going to be honest, the following photos aren’t that great. They were taken on my phone at night while we put up the tissue paper pom poms and tissue hanging fans, so please excuse the lack of quality photos.

I’ll also add that the step-by-step photos were taken during our first attempt at the backdrop. We used clear packing tape, and it was a huge fail. (See photo below.) If you want your backdrop to stay up, use DUCT TAPE.

backdrop-7

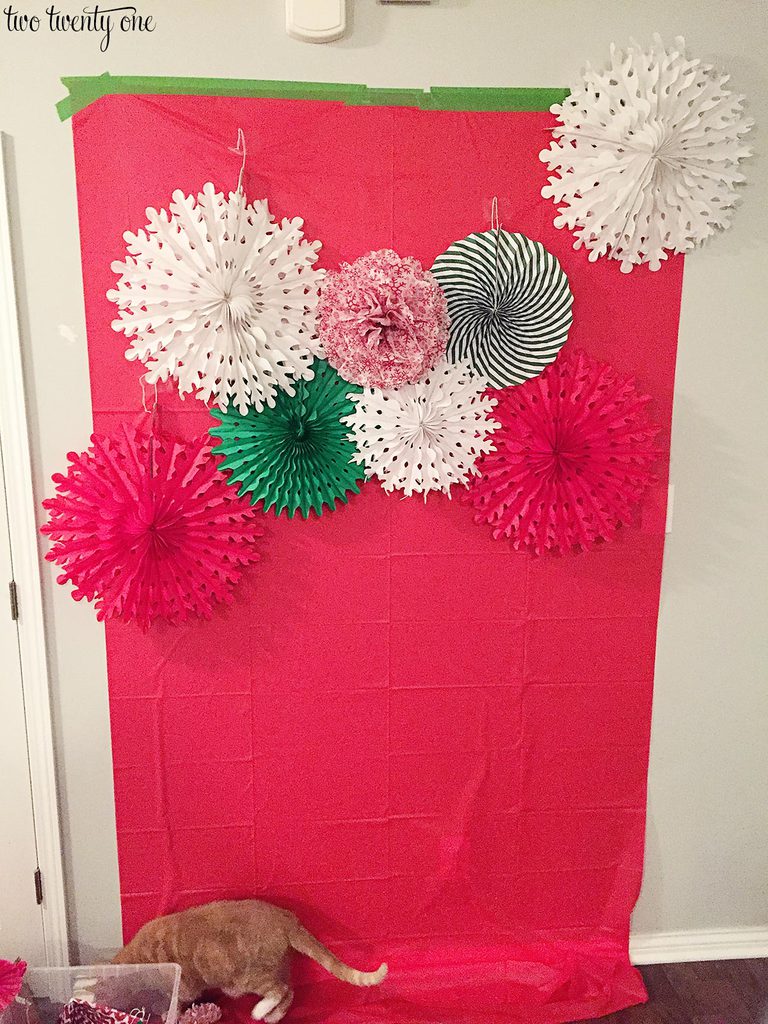
Step 1: Hang the Tablecloth

Locate where you want the backdrop. Use the painters’ tape to hang the tablecloth. We just ran strips of painters’ tape across the top.

Step 2: Start Big

Begin using the duct tape to secure the biggest fans to the tablecloth.

Then, start adding in the bigger pom poms. I made tape double sided tape loops by folding the duct tape. I stuck the tape onto the back of the pom pom or fan and then gently pushed it into place.
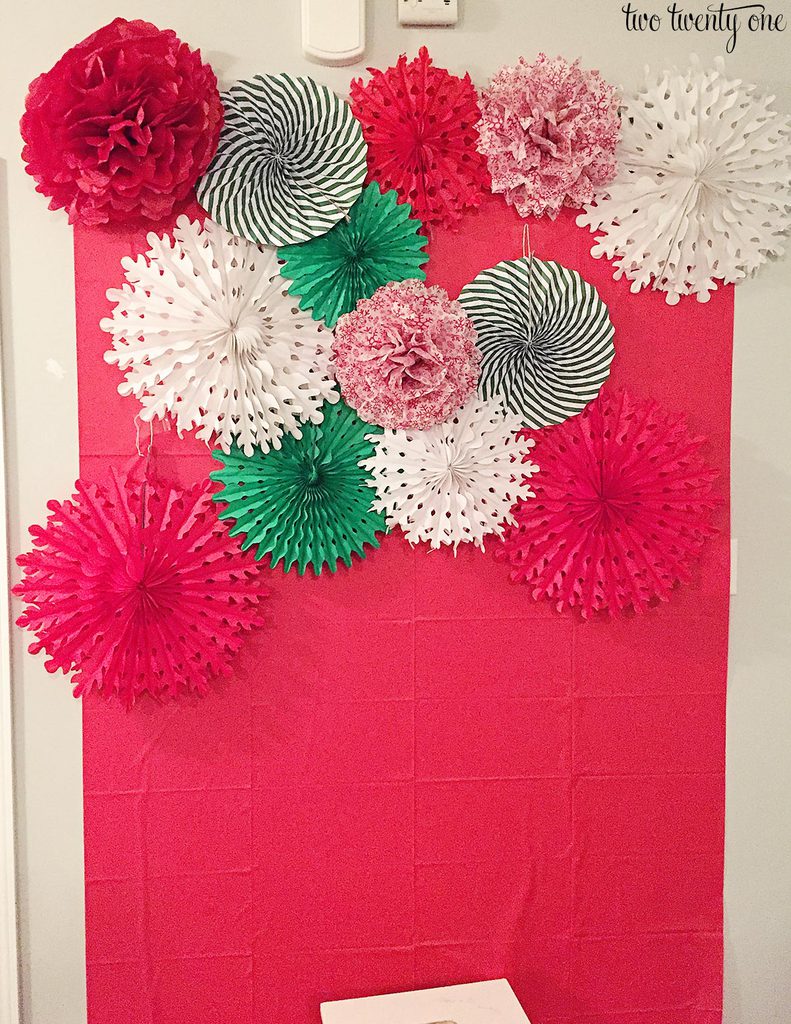
backdrop-1

backdrop-2

Step 3: Fill In

After all the bigger fans and pom poms have been placed, start filling in the spots with smaller fans and pom poms, securing them to the tablecloth with duct tape.

backdrop-4

backdrop-6

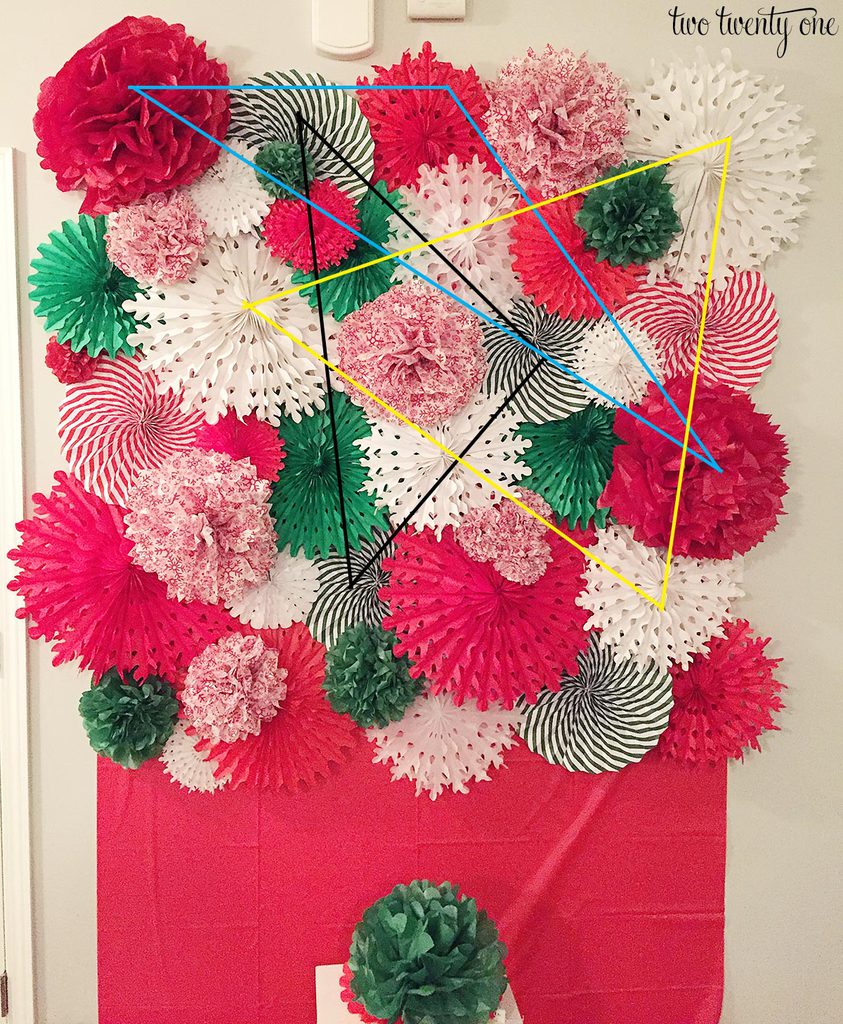
When placing the pom poms and fans, try to alternate colors, forming imaginary triangles with the colors/patterns.

I highlighted three triangles below so you can get a visual of what I’m talking about.

backdrop-5-triangles

Like I said above, the first backdrop was a fail because we used clear packing tape. The next night, I had to redo the whole thing (with duct tape), using the photos I’d taken the night before.

So here’s how the final backdrop turned out.

How to make a tissue paper pom pom and fan backdrop! Great step by step tutorial!

How to make a tissue paper pom pom and fan backdrop! Great step by step tutorial!

I’m happy to report that the duct tape held strong for weeks after the party.

Hanging Fans:

 red and green hanging fans • red, green, and white tissue paper hanging fans • red and white snowflake assortment • peppermint hanging paper lanterns • tissue snowflakes

Special thanks to my friends at Oriental Trading Company for providing the hanging fans!

How to make a tissue paper pom pom and fan backdrop! Great step by step tutorial!

Filed Under: baby & kid parties, DIY, party, photo booth props

Never miss a post from Two Twenty One!

Get the latest DIY projects, organization ideas, tips & tricks and more delivered to your inbox!
Your information will *never* be shared or sold to a 3rd party.
« Hot Chocolate Bar
DIY Peppermint Decorations »

Comments

  1. Megan says

    January 4, 2017 at 6:43 PM

    Ok, I adore this and now want to serve all of my meals with said wall decor. Question: So you directly taped the pompoms and snowflake fans to the table cloth? So they are a one use decoration? Or could you get the tape off???

    Reply
  2. Anonymous says

    January 10, 2017 at 8:23 PM

    Came over from Eighteen25 and I just am so happy you explained it in such great how to get from step one to the end…and with pictures!!! Thank you. Thank you.

    Reply
  3. Jacque says

    January 16, 2017 at 2:07 PM

    This turned out ADORABLE!!!!!

    Reply
  4. Courtney says

    January 17, 2017 at 2:08 PM

    So cute Chelsea!! Love this idea!

    Reply
  5. Katie Jones says

    January 24, 2017 at 8:36 AM

    So fun and festive – makes me wish it was Christmas all over again! May steal this idea for my daughter’s second birthday coming up, thank you for the inspiration. 🙂

    Reply
  6. Elizabeth says

    January 25, 2017 at 1:30 PM

    Thank you so much for this detailed tutorial. Thanks to you, I recently used this method on a fan wall for my daughter’s first birthday party, http://countrypeony.blogspot.com/2017/01/swan-lake-first-birthday-party.html.

    Reply
  7. Lee Orlian says

    January 30, 2017 at 5:20 PM

    Love it! This is beautiful and it is both a great birthday idea and an amazing backdrop decor. Thank you for sharing!

    Reply
  8. Madalyn says

    January 13, 2020 at 1:42 PM

    This is adorable! I’m wanting to make something like this for a baby shower. Since it is at a venue we can’t get in to until the day of, would this transport easily if I were to have it already made on a plastic tablecloth? and then we would just hang it once we got to the venue?

    Reply

Leave a Reply Cancel reply

Your email address will not be published. Required fields are marked *

Recipe Rating


  • Email
  • Facebook
  • Instagram
  • Pinterest
  • Twitter

Never miss a post from Two Twenty One!

Get the latest DIY projects, organization ideas, tips & tricks and more delivered to your inbox!
Your information will *never* be shared or sold to a 3rd party.
This blog accepts forms of cash advertising, sponsorship, paid insertions or other forms of compensation. The compensation received may influence the advertising content, topics or posts made in this blog. That content, advertising space or post may not always be identified as paid or sponsored content.

The owner(s) of this blog is compensated to provide opinion on products, services, websites and various other topics. Even though the owner(s) of this blog receives compensation for our posts or advertisements, we always give our honest opinions, findings, beliefs, or experiences on those topics or products. The views and opinions expressed on this blog are purely the bloggers’ own. Any product claim, statistic, quote or other representation about a product or service should be verified with the manufacturer, provider or party in question.

Two Twenty One is a participant in the Amazon Services LLC Associates Program, an affiliate advertising program designed to provide a means for sites to earn advertising fees by advertising and linking to amazon.com.

Blog Policy

© Two Twenty One, 2011-2020. Unauthorized use and/or duplication of this material without express and written permission from this blog’s author is strictly prohibited.

Privacy

Copyright © 2022 · glam theme by Restored 316 · Design by Stephanie Jones

Copyright © 2022 · Glam Theme on Genesis Framework · WordPress · Log in

313 shares