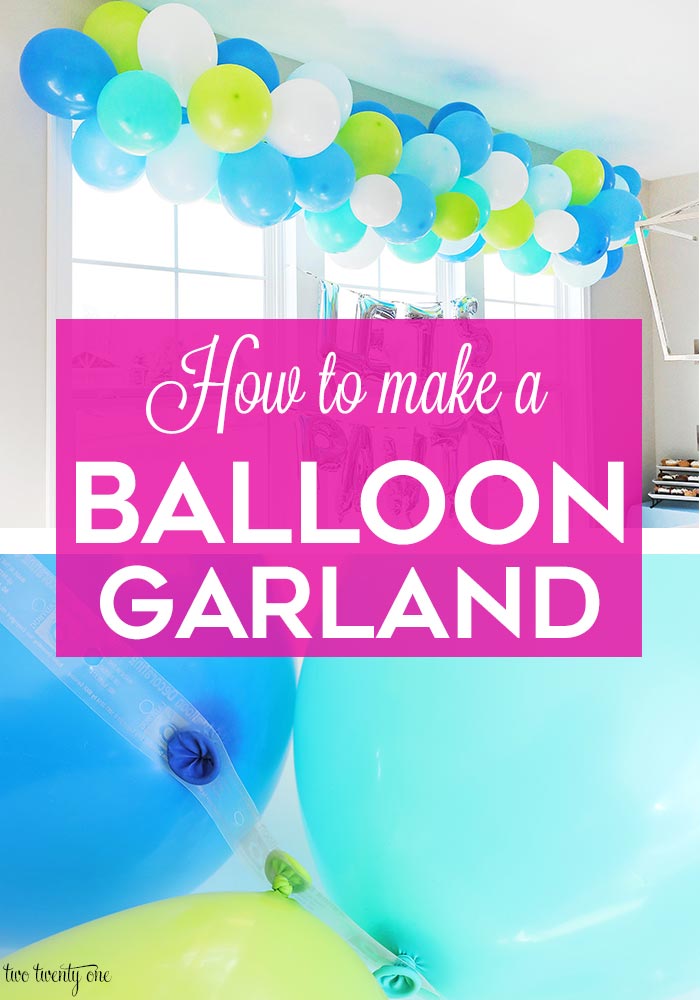
How to Make a Balloon Garland
I’m sharing how to make a balloon garland. A balloon garland is an easy and inexpensive way to take your party to the next level. Who would’ve thought stringing a bunch of balloons together would look so cool?
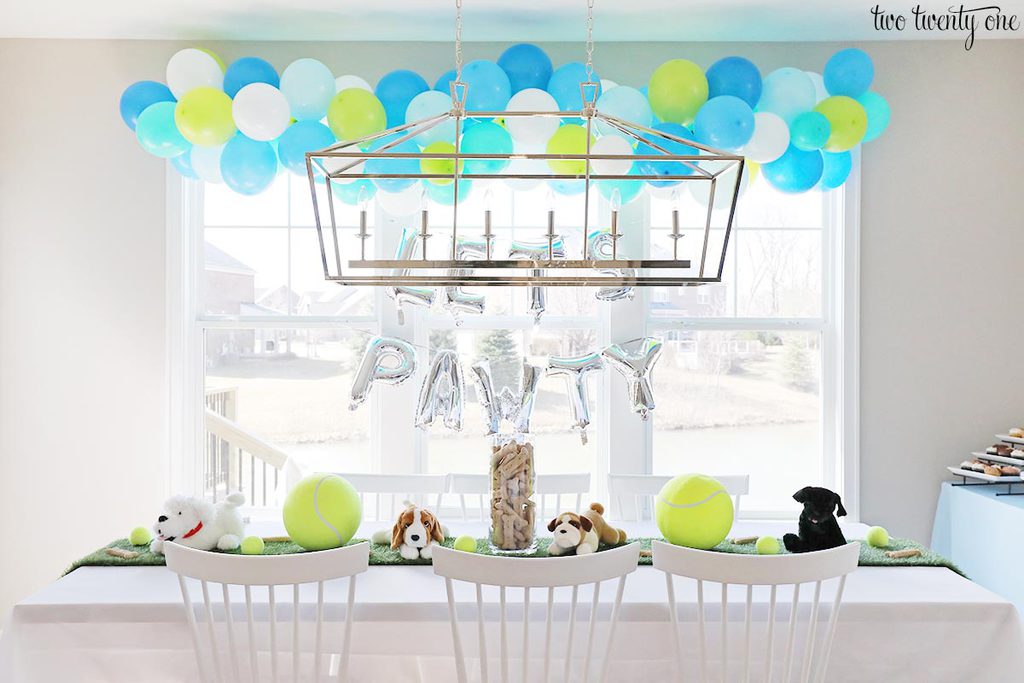
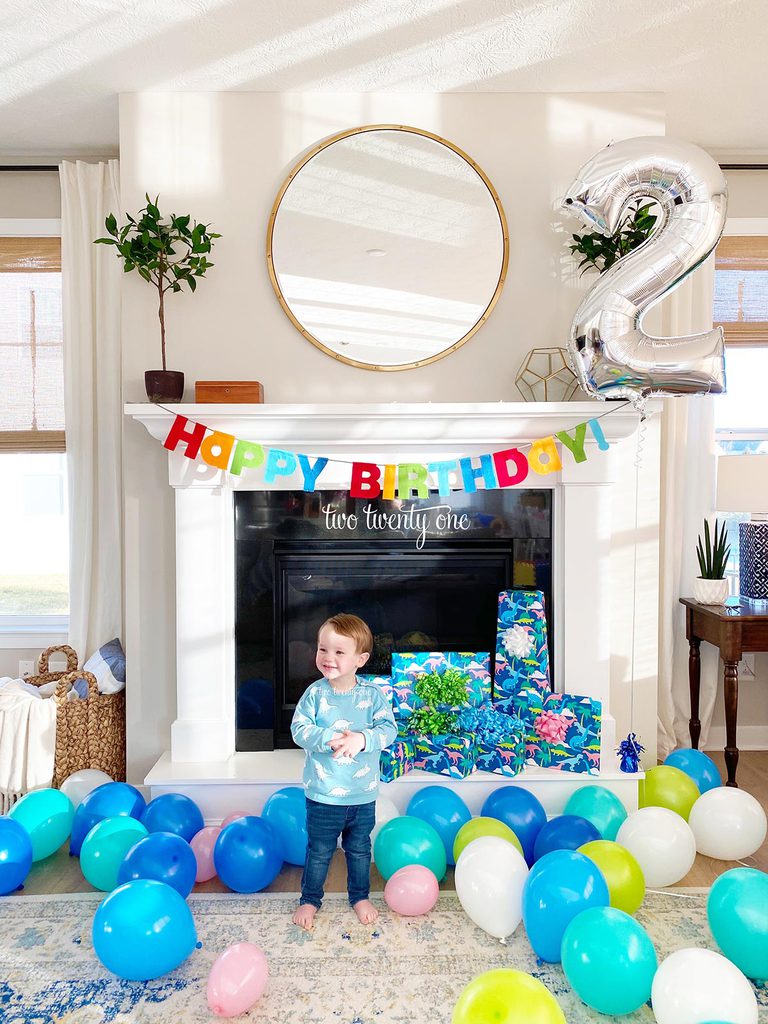
I’d rate making a balloon garland as a beginner-level project so anyone can do it! The balloon garland I made for Emmett’s birthday party is the first one I’ve done.

Balloon Garland Supplies
10″-12″ latex balloons … purchased here
balloon tape … purchased here
fishing line … purchased here
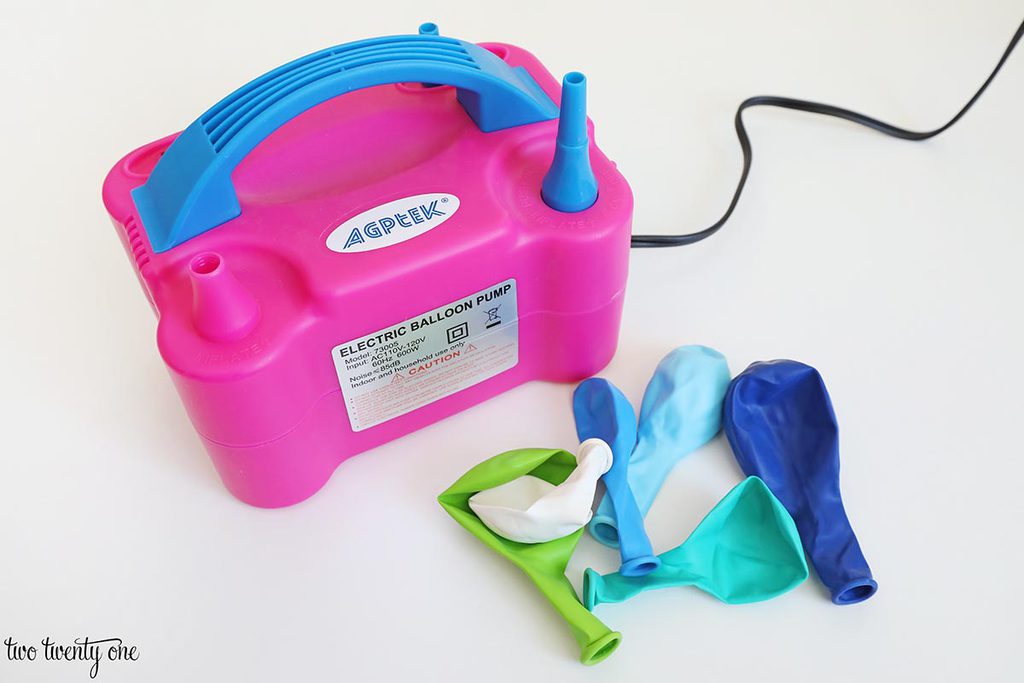
electric balloon pump (optional) … purchased here
nails
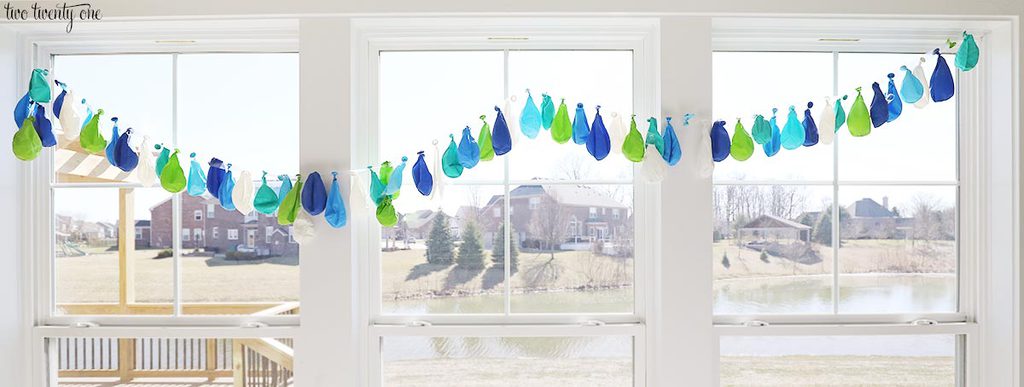
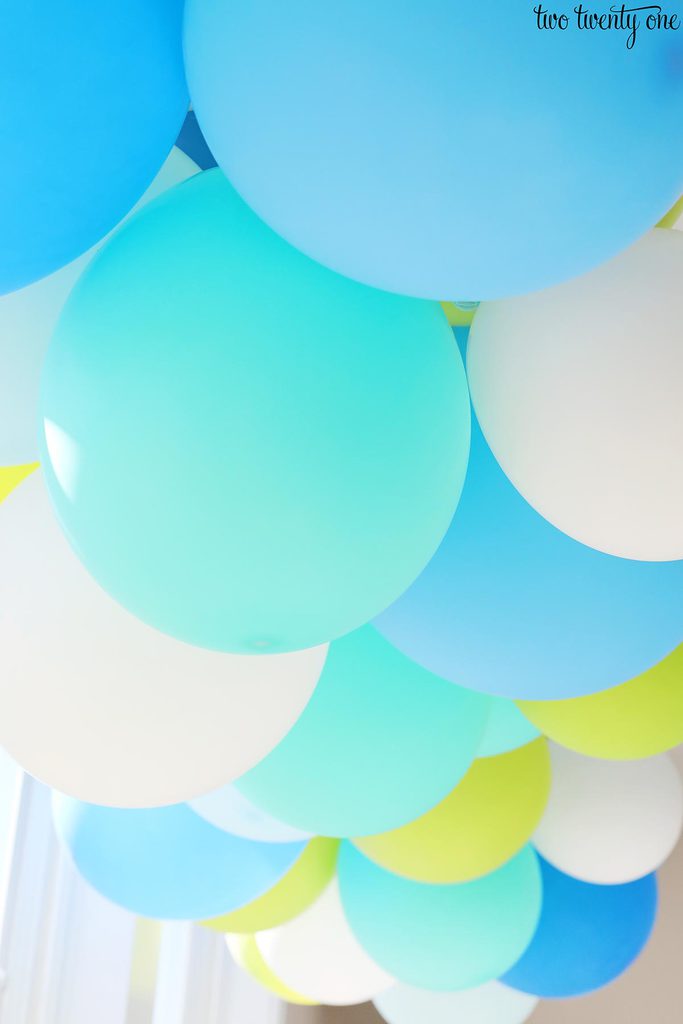
I used 6 different colors– royal blue, medium blue, light blue, turquoise, apple green, and white. The medium blue, light blue, turquoise, and white balloons came in a set. And I grabbed the royal blue and apple green balloons from my stash, but they’re easy to find in stores.
In total, I only spent $22 to create this balloon garland.
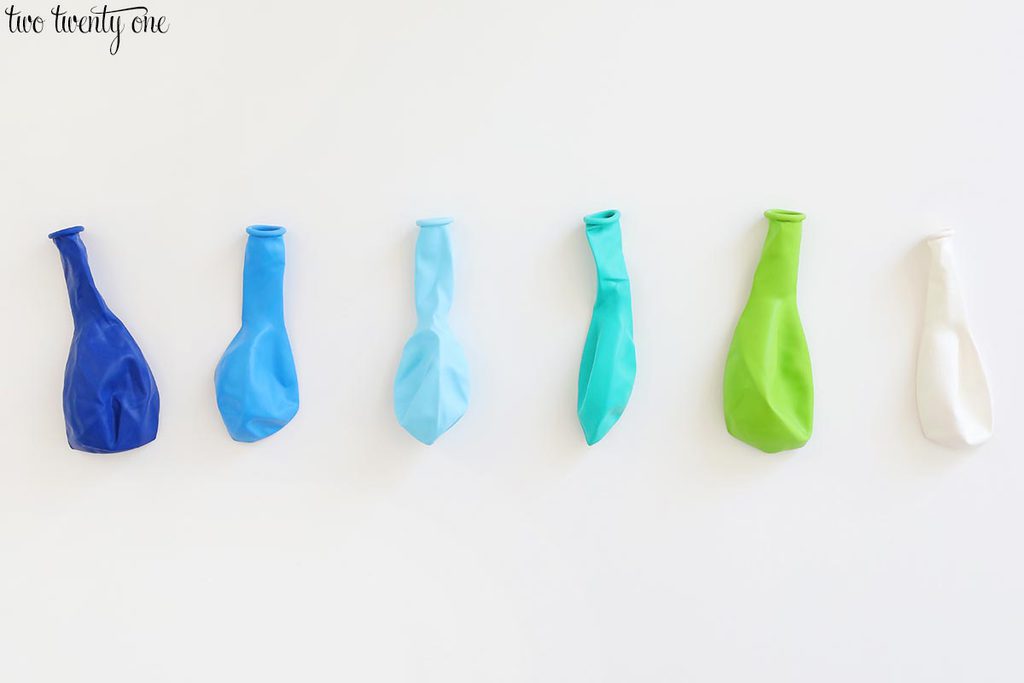
Blow Up Balloons
Blow up the balloons, keeping the size consistent.
I blow up a few of each color at a time.
I use an electric balloon pump to blow up all the balloons. This is optional but it’s really nice when you need to blow up so many balloons. Plus, I’m guessing the balloons last longer because no condensation ends up inside the balloons. I asked for my electric balloon pump for Christmas. But I gladly would’ve spent $20 of my own money to not have to blow up dozens of balloons with my mouth. So if you’re looking for a Christmas gift idea– electric balloon pump.
Add Balloons to the Balloon Tape
Start adding the balloons to the balloon tape by inserting the lip into the large holes. Do not cut the tape!
When inserting the balloons, alternate the direction.
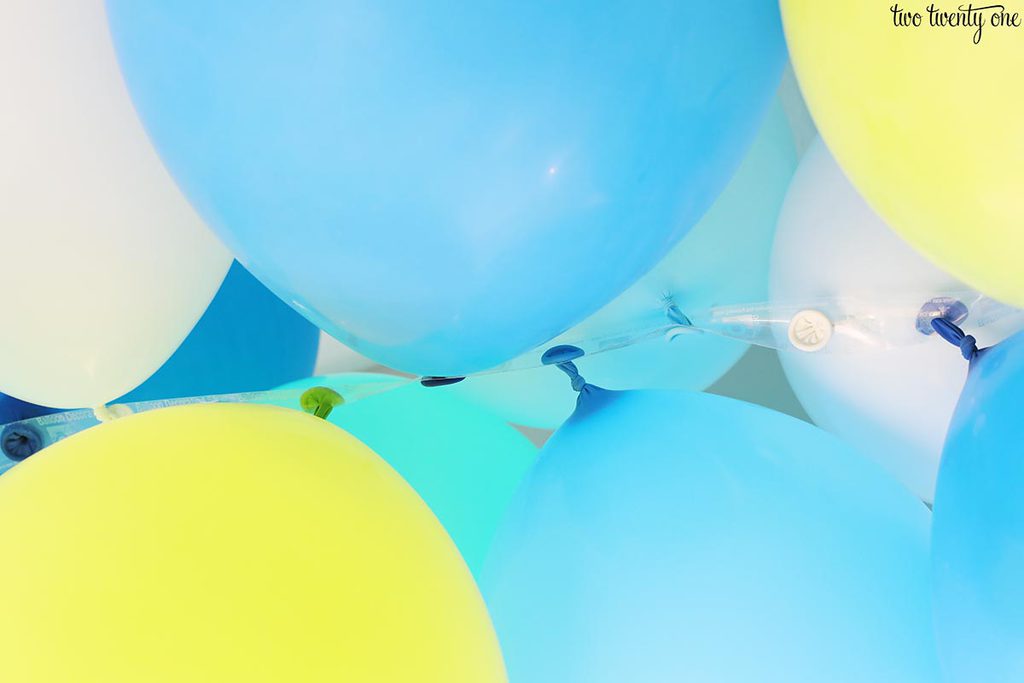
I work in sections– blow up around 15-18 balloons, add them to the balloon tape, repeat.
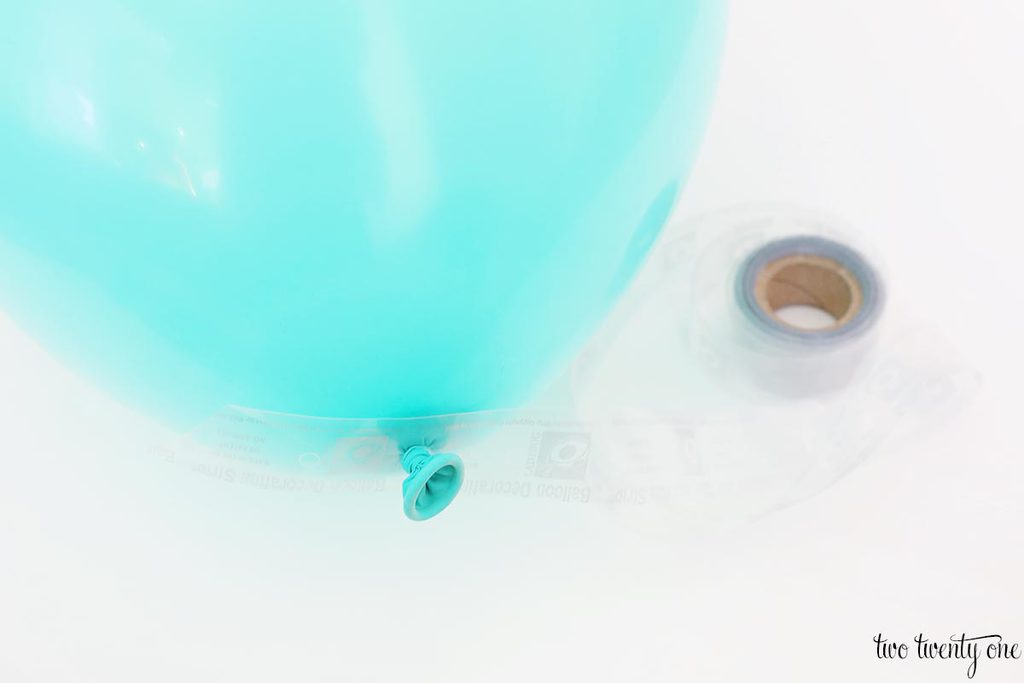
Notice how I skip the smallest holes. Adding balloons to the big and small holes with this size of balloons will lead to a jumbled mess. So when working with 10″+ balloons, only use the big holes.
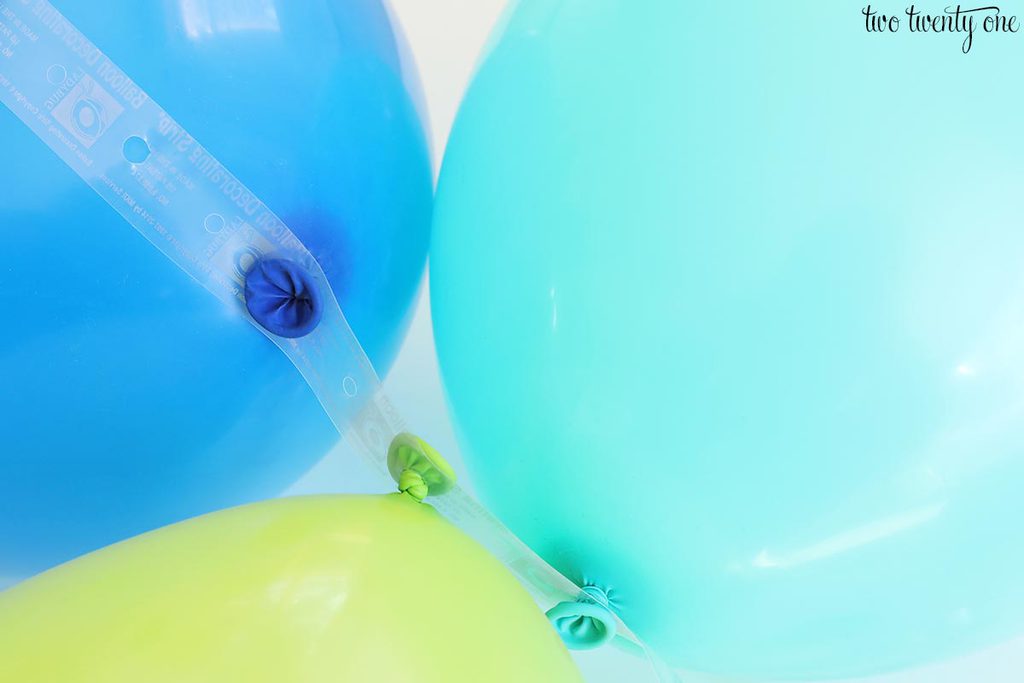
As you add balloons to the balloon tape, the tape will start to twist, which is totally fine.
I’ll show you the pattern of the balloons later in the post.
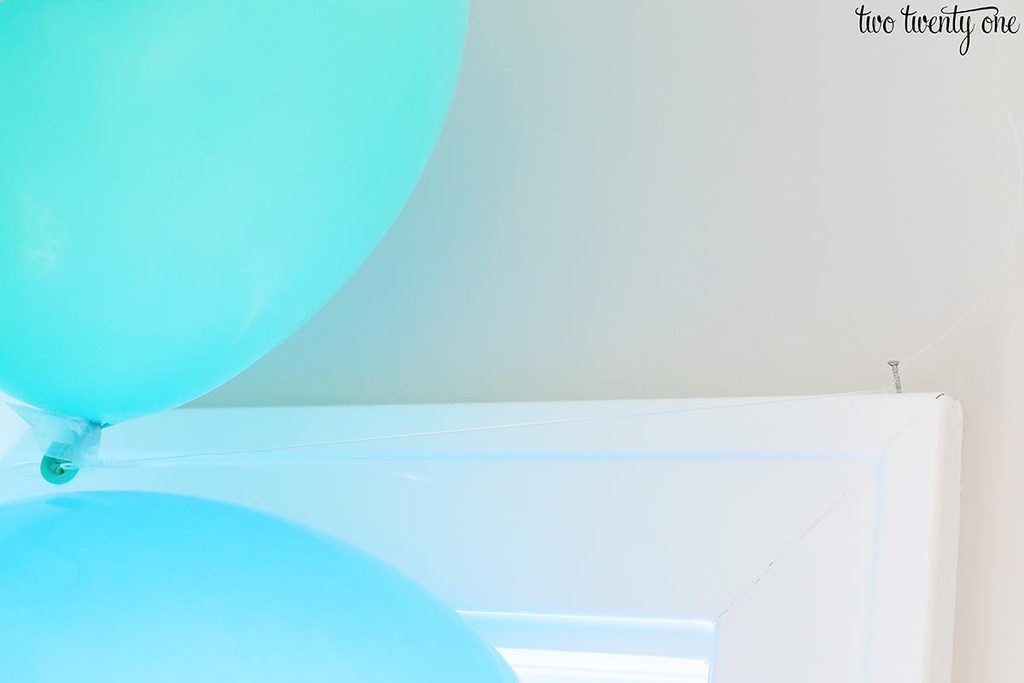
Hang the Balloon Garland
If you’re hanging above a window, like I did, put some nails in the window moulding. I used three nails– two on each end of the moulding and one in the middle. If you’re hanging the balloon garland on a wall, I suggest using these.
To secure the balloon garland to the nails, use fishing line. Tie the fishing line to the nail, and then tie the other end to the balloon garland tape.
Fill in Bare Spots
Once the balloon garland is hung, you’ll notice some bare spots where you can see the balloon tape. Blow up a few balloons, but make them smaller. Add them to the bare spots with some clear packing tape (fold the packing tape to make it double sided). You may have to play around with the size a little bit.
You can also add smaller balloons to the garland to balance out the color pattern.
For this balloon garland, I only ended up adding four smaller balloons. I could’ve added more but I ran out of time. But the balloon garland still looked good.
Garland Size
To give you some specifics, the width of this set of cased windows is 122 inches. And I ended up using 122 inches of balloon tape and approximately 65 balloons.
I didn’t know I needed to use the same length of tape as the width of the windows. I actually ended up making the balloon garland slightly longer and then cutting some off once I hung the garland. So to be on the safe side, make your garland a little longer than what you need and adjust accordingly. Because it’s easier to cut off some balloons and tape than it is to add some.
I deflated all the balloons and took the photo below to show you the color order, or lack there of, in case you want to recreate this exact balloon garland. Or you can always use 6 different colors in substitution.
I didn’t really have a pattern I followed. Because when I did, the balloon tape would start to twist and the same colored balloons kept ending up in clusters.
Time
Since this was my very first balloon garland, it took me a couple hours to complete and hang it up. But one of the nice things about balloon garlands is that you can make them a few days in advance. I made mine on Thursday night. The party was on Saturday afternoon, and it still looked perfect. Shoot, it still looked pretty good a week later. Although, I’d suggest not making it more than 3 days in advance. Just to be on the safe side.
And I need to give a shout out to my crazy talented friend, Taylor, for teaching me everything about making a balloon garland. She has created some amazing balloon garlands and balloon arches. So definitely check out her blog and follow her on Instagram for inspiration!
Want even move party inspiration? Check out my Party Page!
Want to save this post for later? Pin it here:
Well, well look at your mini Martha! Lol. That balloon garland looks awesome and you cannot beat $20 for an electric balloon pump. You never realize how tiring blowing up balloons are until you have to blow many up.
This gives me great inspiration for the Unicorn Baby Shower I am planning! I’ll change the colors to pinks and purples!! Thanks!!
Can the tape be reused?
Love the tutorial & esp. the colors you used! Think the balloons would stay attached in their slots if the party is outside?