Front Yard Landscaping Refresh
Last month the landscaping on the front part of our house was in desperate need of refreshing. I mean, the photo below speaks for itself.
Yikes.
We failed to put down new mulch last summer, so the mulch was looking rather… rough.
Not to mention a lot of the little pebbles the builder put down for the downspout run-off had washed away.
To be fair, I took these photos after I had trenched the landscaping and made it look worse. But it makes for better before and after photos, am I right?
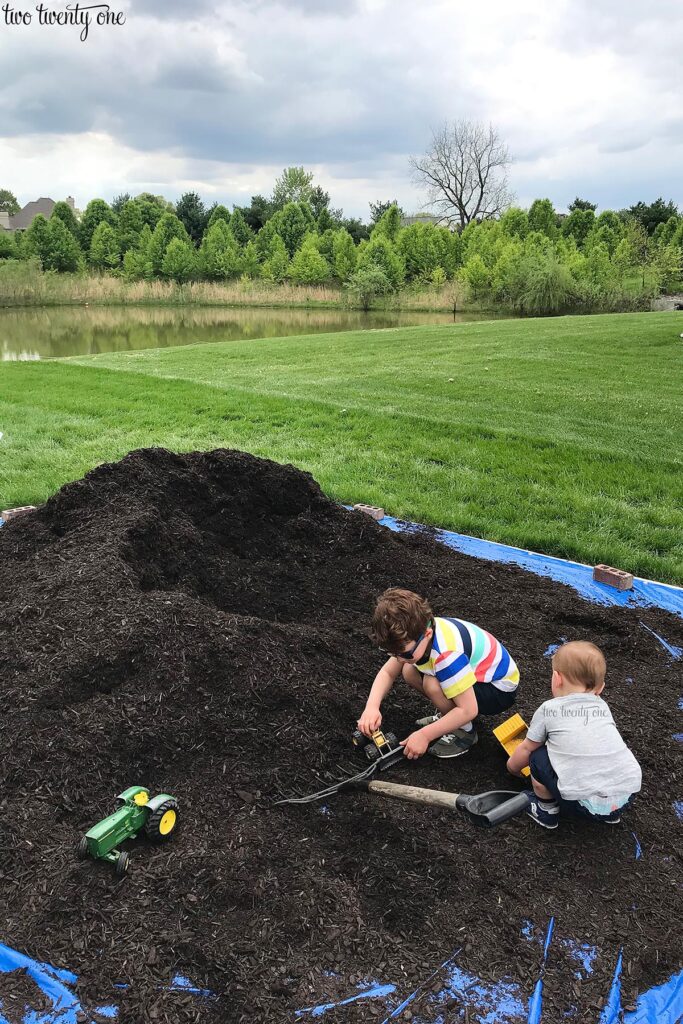
So we had 3 cubic yards of dark brown mulch delivered, and our boys promptly started using it as a sandbox.
And this photo showcases how our one-year-old is basically a miniature linebacker with a stubby rat tail. (He’s never allowed to play tackle football though.)

Some Mulching Tips
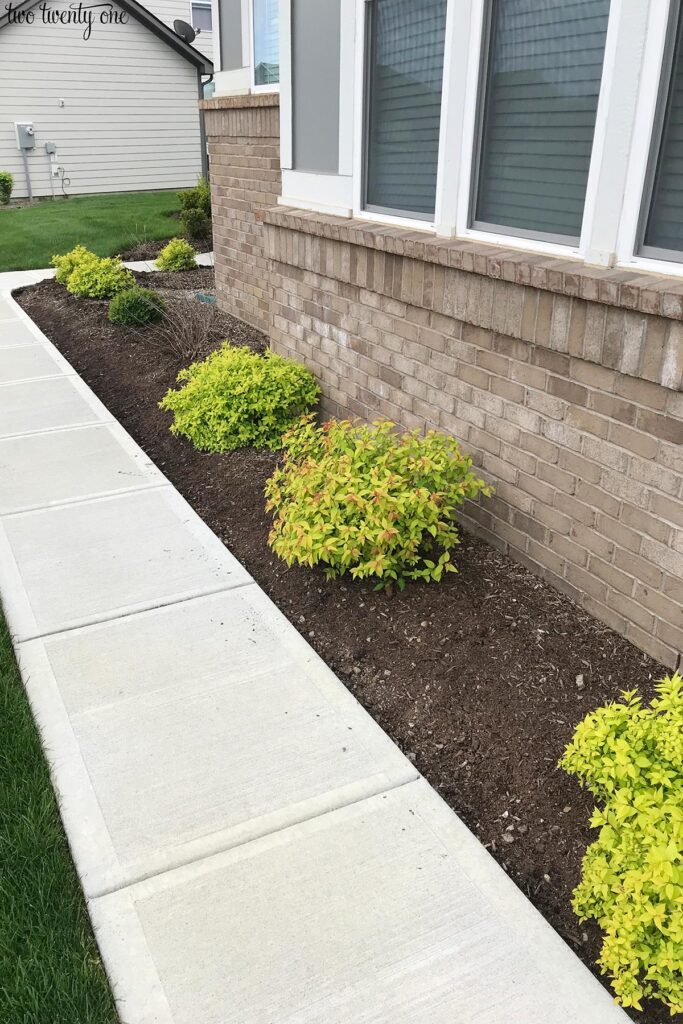
Before you mulch, make sure you create a trench along walkways so the mulch doesn’t sit even with walkway. You want the dirt to slope a little. I did this by dragging a square shovel along the edge, scraping the dirt out of the way.
And where grass meets mulch, you want to create a trench with a square shovel. This will give very clean lines and keep the mulch contained to the landscaping.
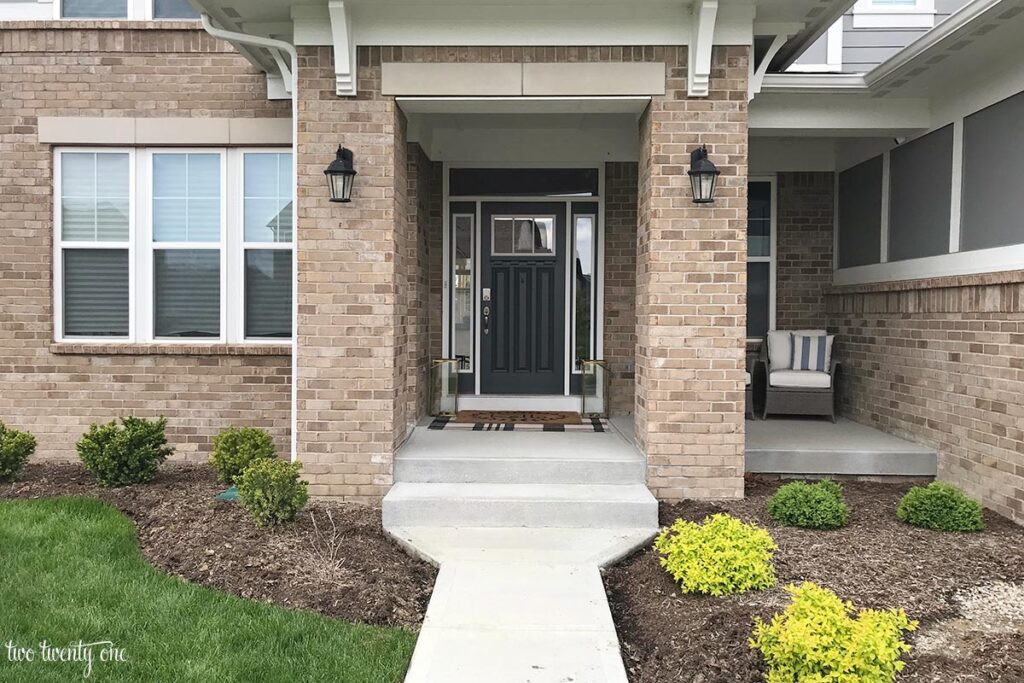
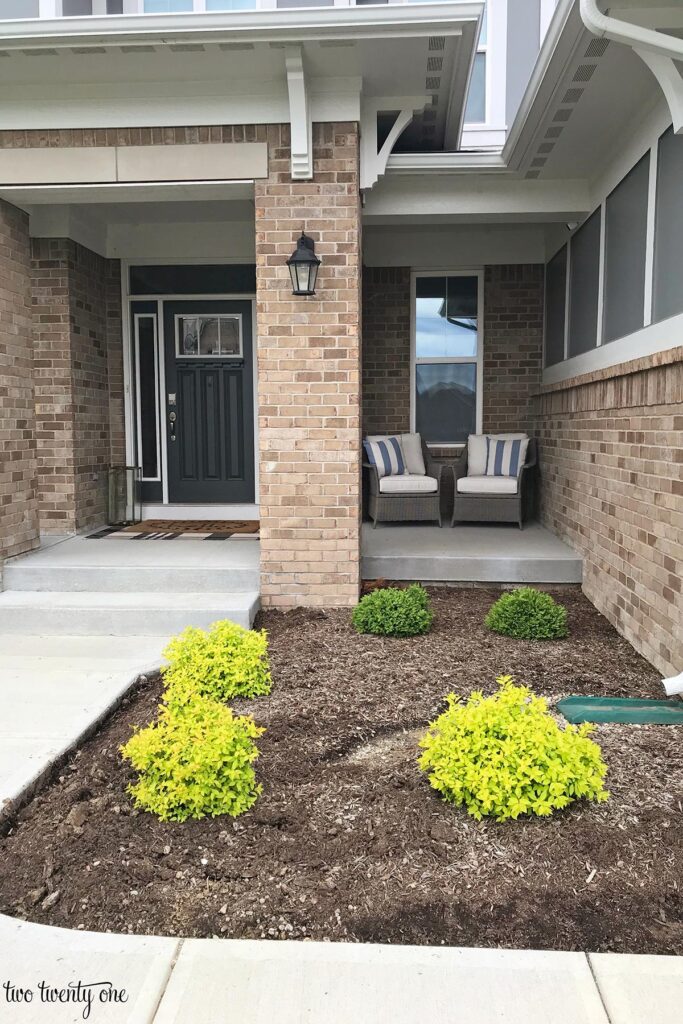
And after a few hours of work, here’s how things look now.
Much better, right?
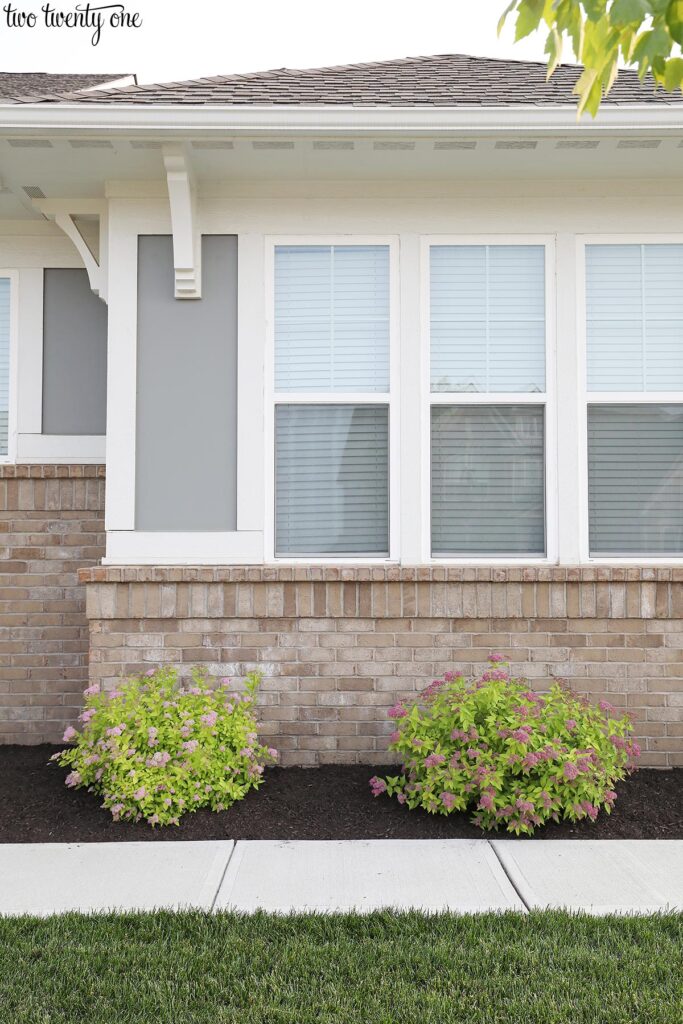
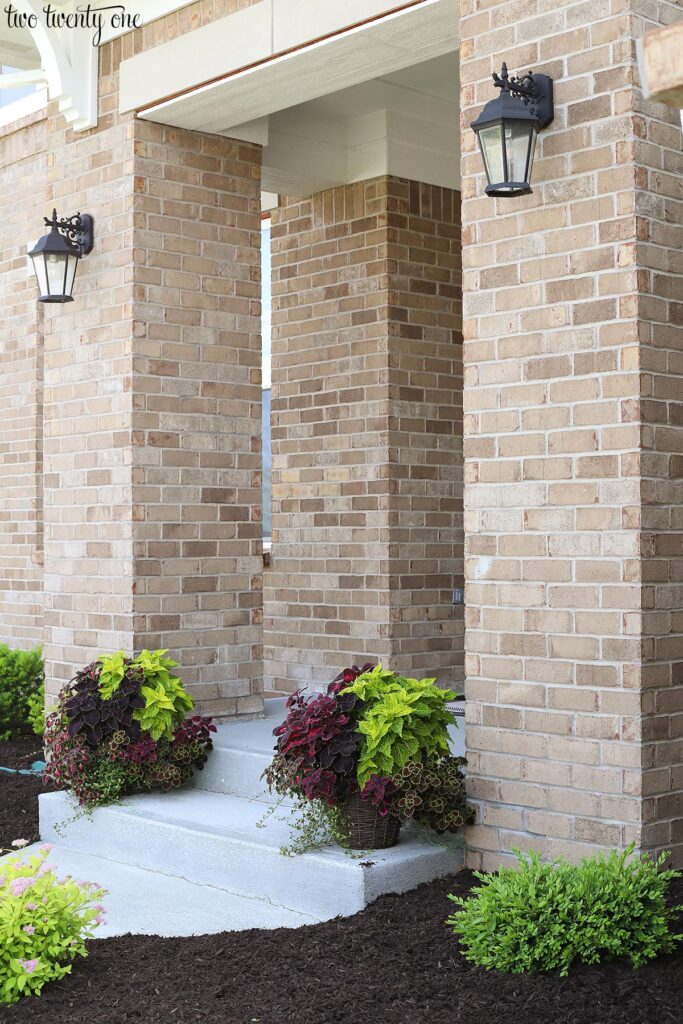
We haven’t really done anything in terms of adding or subtracting plants. Everything, except for the hydrangea, came with the house. Our builder planted 12 plants in front of the house, and we had no say in what plants were installed. We’ll probably tackle more of the actually landscaping next year because we don’t want to mess up our freshly laid mulch.
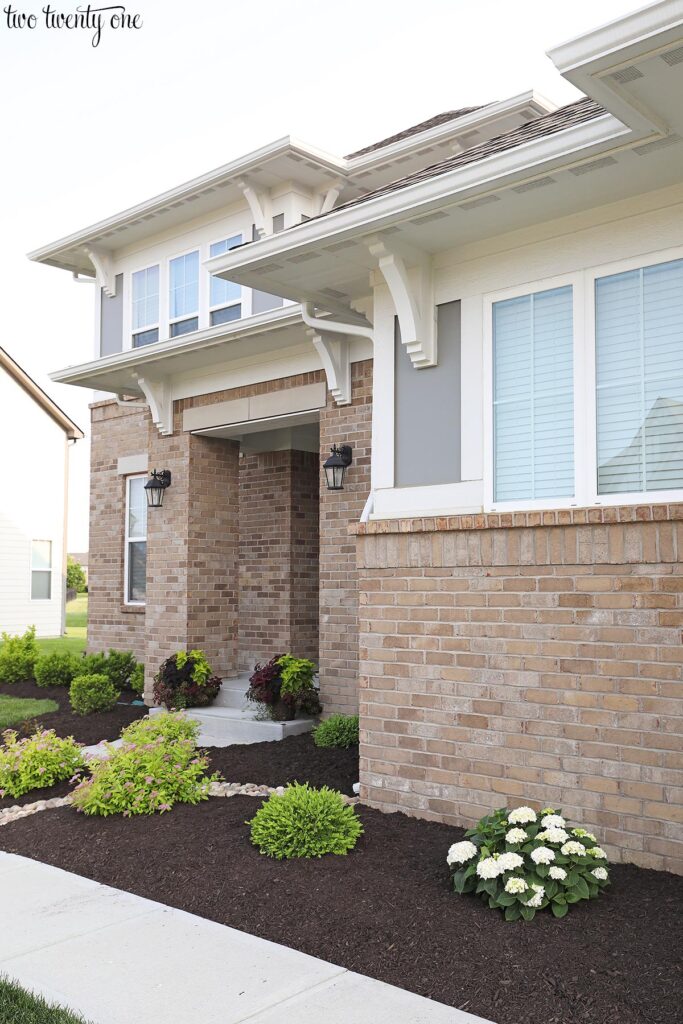
I don’t know if the hydrangea will stay there because I think it might be getting too much sun. So I’m going to give it a couple weeks, see how it does, and move it if necessary.
I love boxwoods (the leafy bush next to the hydrangea), but they take forever to grow– something to keep in mind.
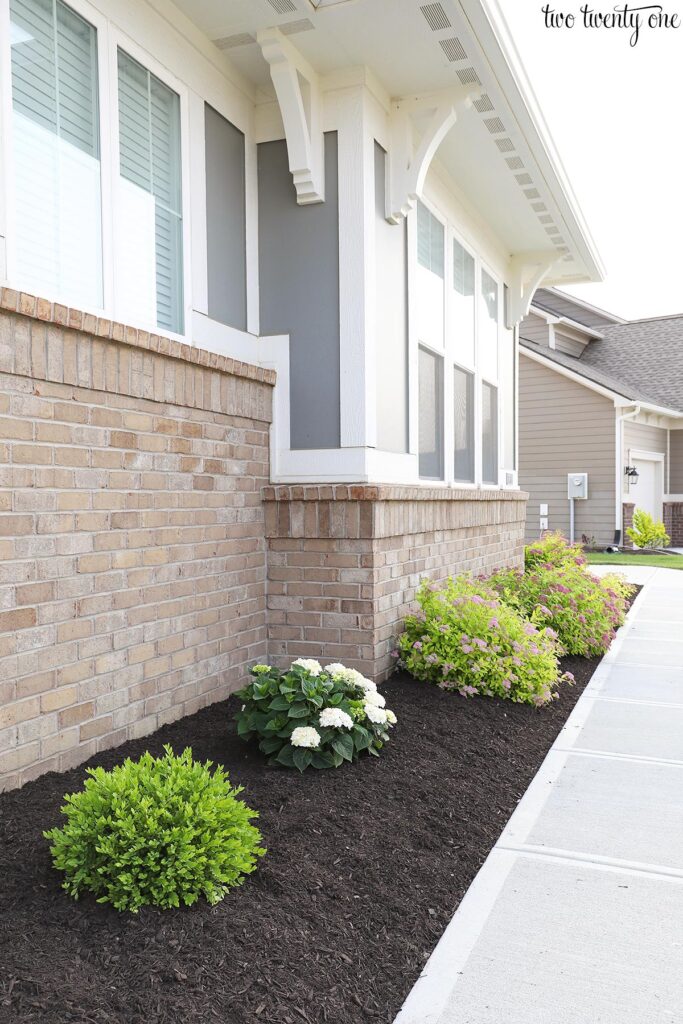
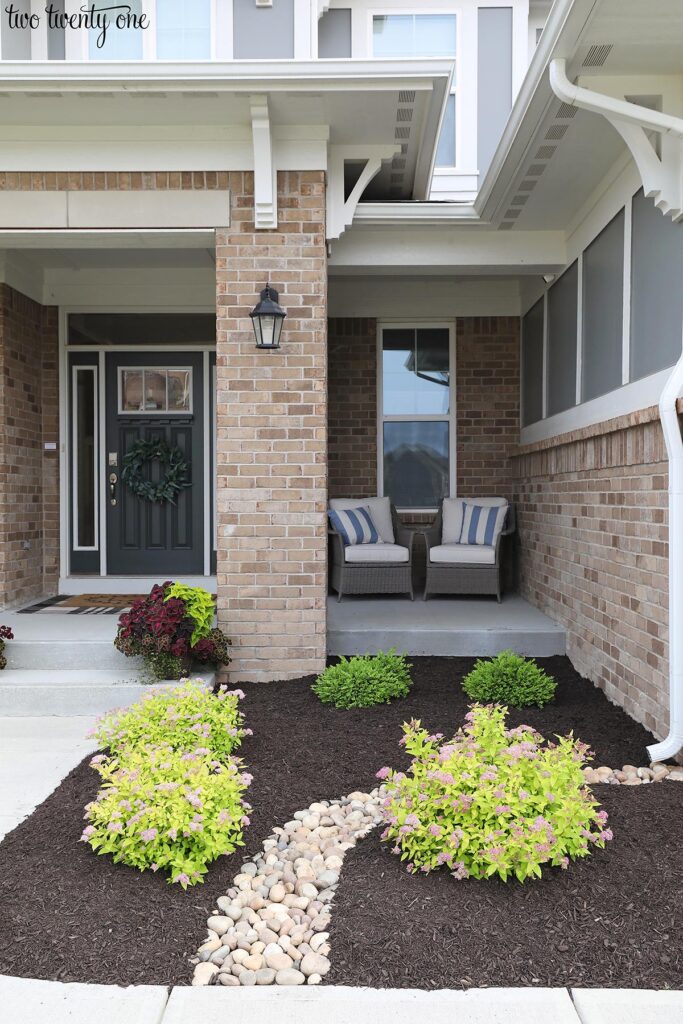
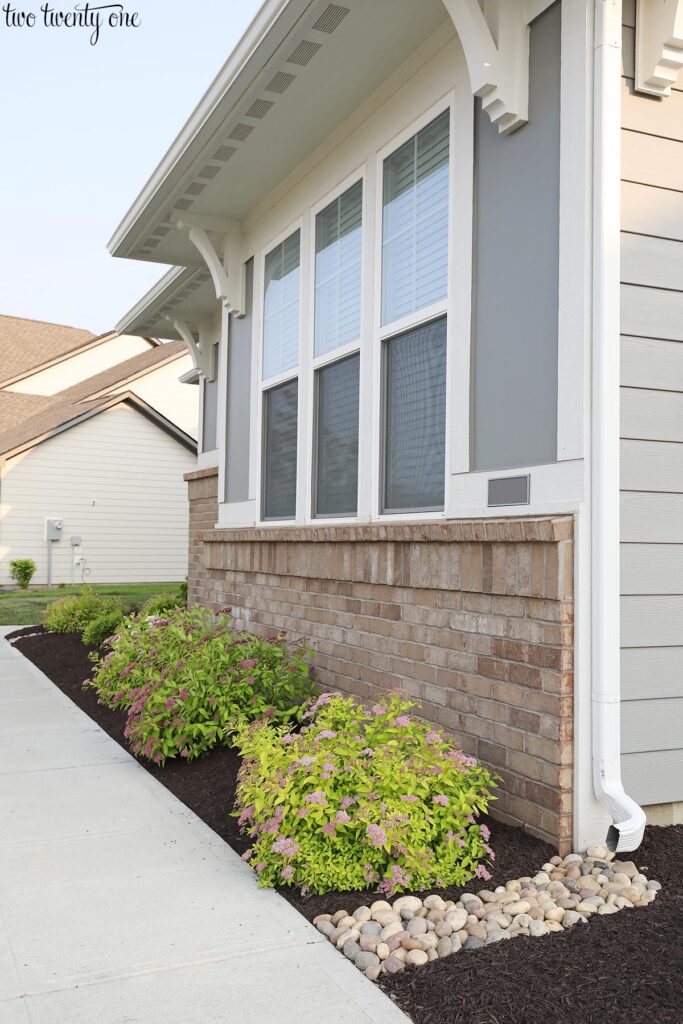
These spirea aren’t my absolute favorite, but they work for now. They’re a pretty shade of green with tiny pink flower clusters. And they fill out fairly quickly.
I’d like to add a trellis and a climbing plant to add some color to that empty space left of the downspout.
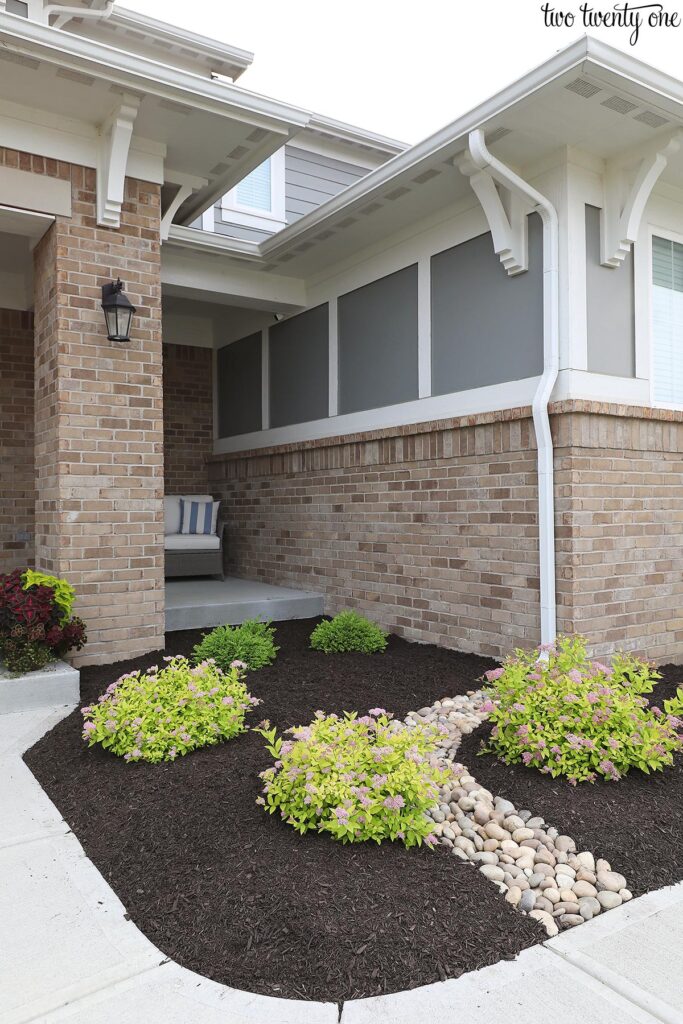
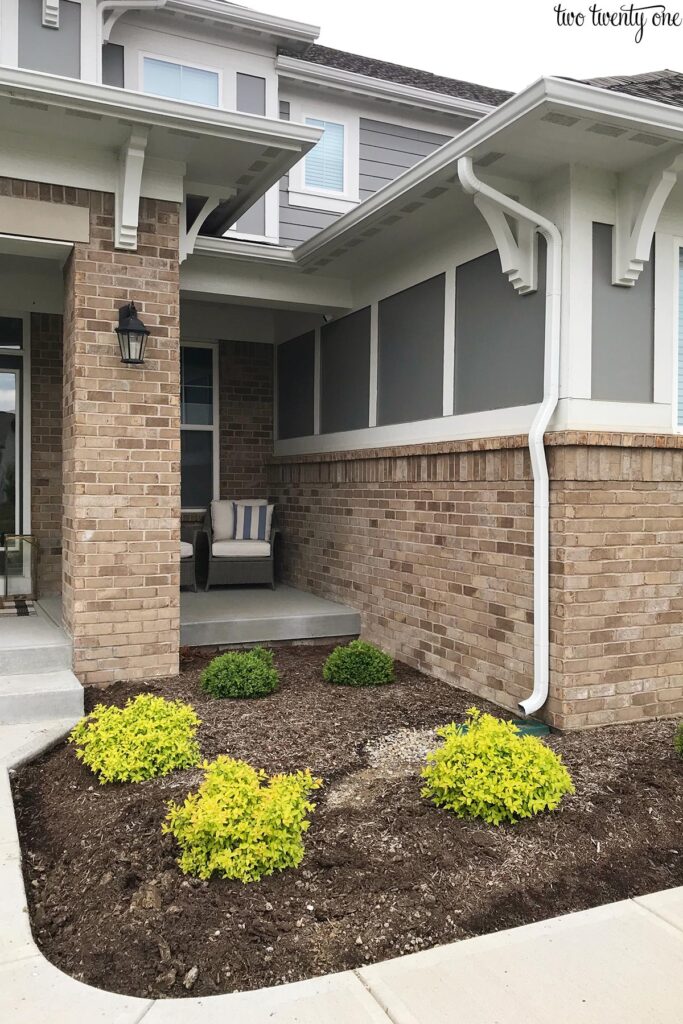
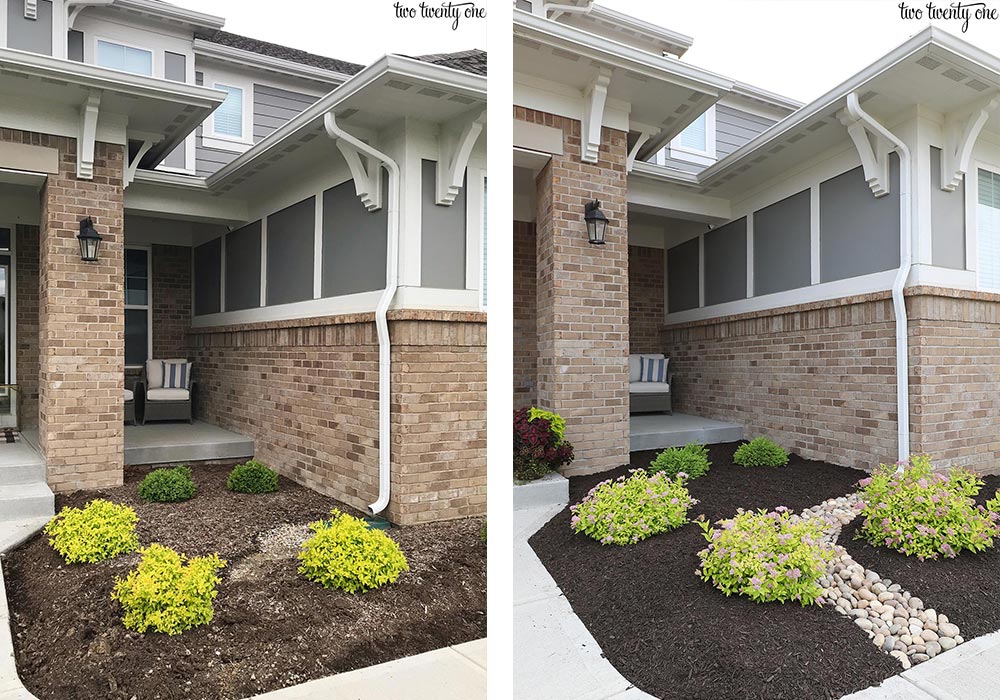
The green plastic downspout splash blocks didn’t serve much purpose, and they’re not very attractive. So we followed the natural curve the water usually takes when leaving the downspout and laid down river rock in the path. This will hopefully keep the mulch from washing away and direct the water away from the house. And the rocks are heavy enough that the water can’t move them. I wrote a tutorial with more details and photos.

Click here for the step-by-step tutorial on making the dry creek bed!
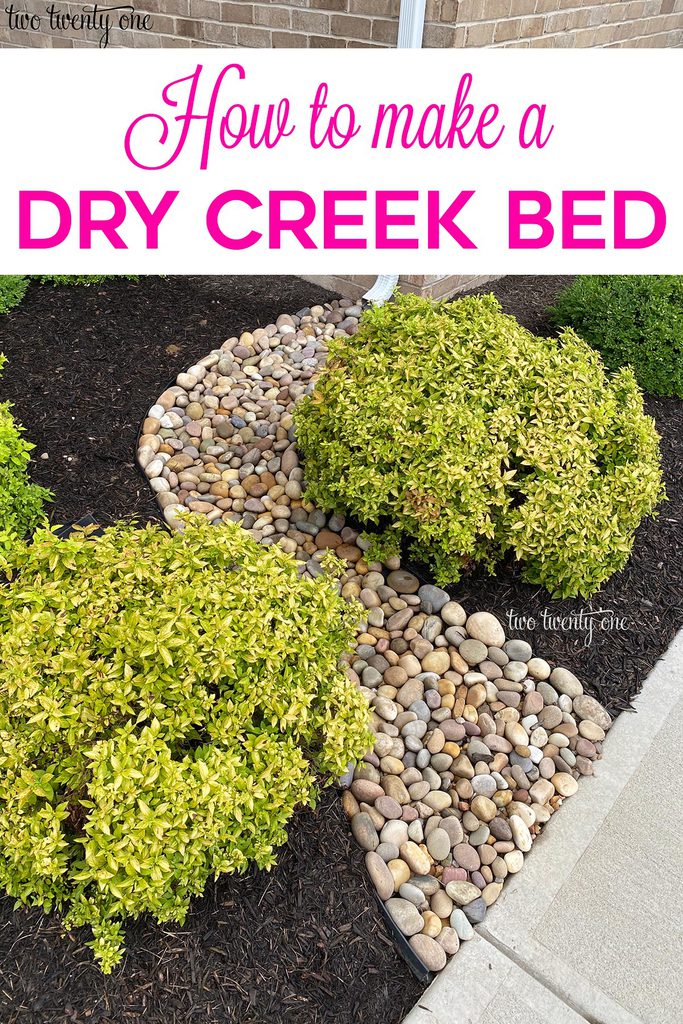
We used the river rock in three downspout locations on the front of the house. For this specific location, we also turned the downspout by replacing the existing end piece that pointed toward the mulch with a curved end piece that pointed toward the front yard.
I’d really like to upgrade the lights on the front porch and by the garage doors. Every house in our neighborhood has these, and they don’t really match the prairie school style of our house.
My Costco hanging baskets turned front porch planters are getting huge. I may transfer them to my self-watering planters though.
And because I know you love a good before and after, here are a couple.
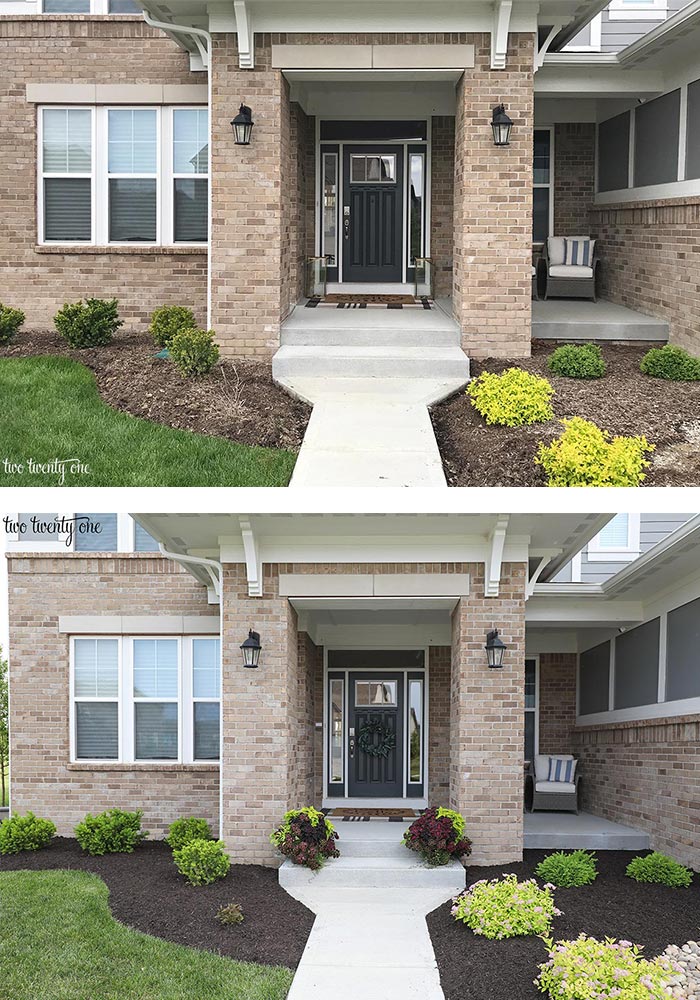
You’re welcome, neighbors!
SOURCES
mulch … I asked our lawn mowing guy to get it for us
front porch planters … Costco
river rock … Home Depot
front porch chairs … Target
front porch pillows … Target
front door wreath … Target
4′ x 5’7″ plaid rug … I can’t find it in stock anywhere but it’s the Safavieh Courtyard rug in black/bone
2’6″ x 4′ hello rug … Wayfair
COST
Since we had the 3 cubic yards of mulch delivered (instead of making multiple trips to the store), it cost about $150. We spent around $95 for 9 bags of rocks, but since rocks last forever, we’ll never have to replace them. So for $250 we were able to give the front of the house a decent face lift.


HI chelsea, This looks great. The addition of the river rock with the mulch. And, I love the mulch tip! Yikes, I just dump it and level it. Oops! Visiting from Everyday Edits dot co
laura
The river rock is such a gorgeous addition!!!
Looks amazing! It’s incredible how much of a difference some mulch can make! I definitely wan to put in new mulch in our yard, but our biggest priority is getting our new fence in, so that’s a back-burner project for now. You’ve got me dreaming about how good it’s going to look though!
This is adorable! Did you have any rain since installing the river rock guide for the downspout? I am wanting to do something similar, but I was thinking that I would need to install some sort of plastic barrier underneath the rocks. I’d love to hear if your method has worked! Thanks!
Great changes to your landscape! As a seasoned gardener, consider carefully your plant selections. Home Depot has good choices, but they don’t always stock plants that work in your area/yard. I’ve made a lot of mistakes over the years that could’ve been avoided, if I had done my research first!