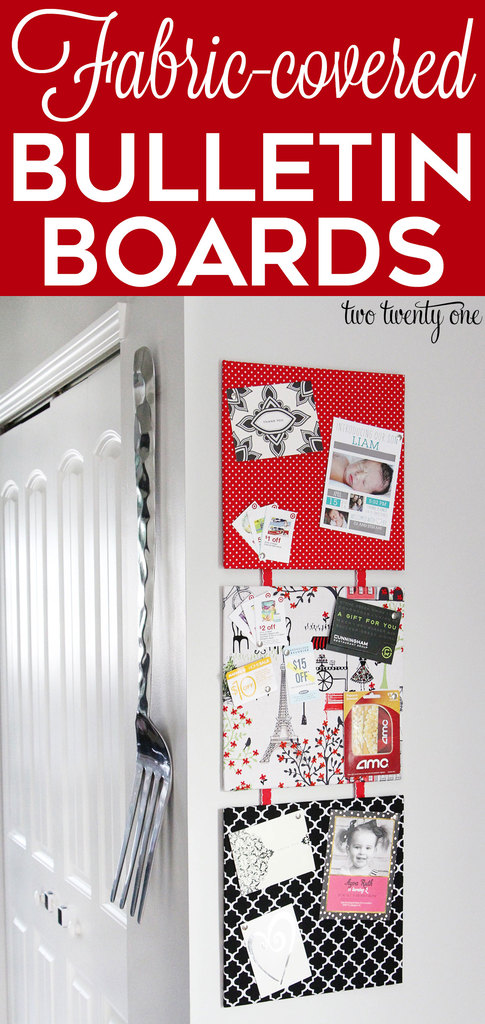
Fabric Covered Bulletin Boards
This post is brought to you by Waverly Inspirations. As always, opinions are 100% my own.
You may recall last month when I filled you in on my partnership with Waverly Inspirations. In case you forgot, here’s the skinny: every month I’ll be challenged to create something with the fabrics, ribbon, paint, and other miscellaneous products I receive. And I’ll also be given a theme to follow.
It’s kind of like Chopped but with crafting supplies.
This month’s theme is Back to School. I obviously don’t have a child in school, but I was talking with a friend who’s eldest daughter is going to preschool, and she said she needed a bulletin board-type mechanism in her kitchen to stay more organized.
So I whipped up these fabric covered bulletin boards for her. Friend of the year right here.
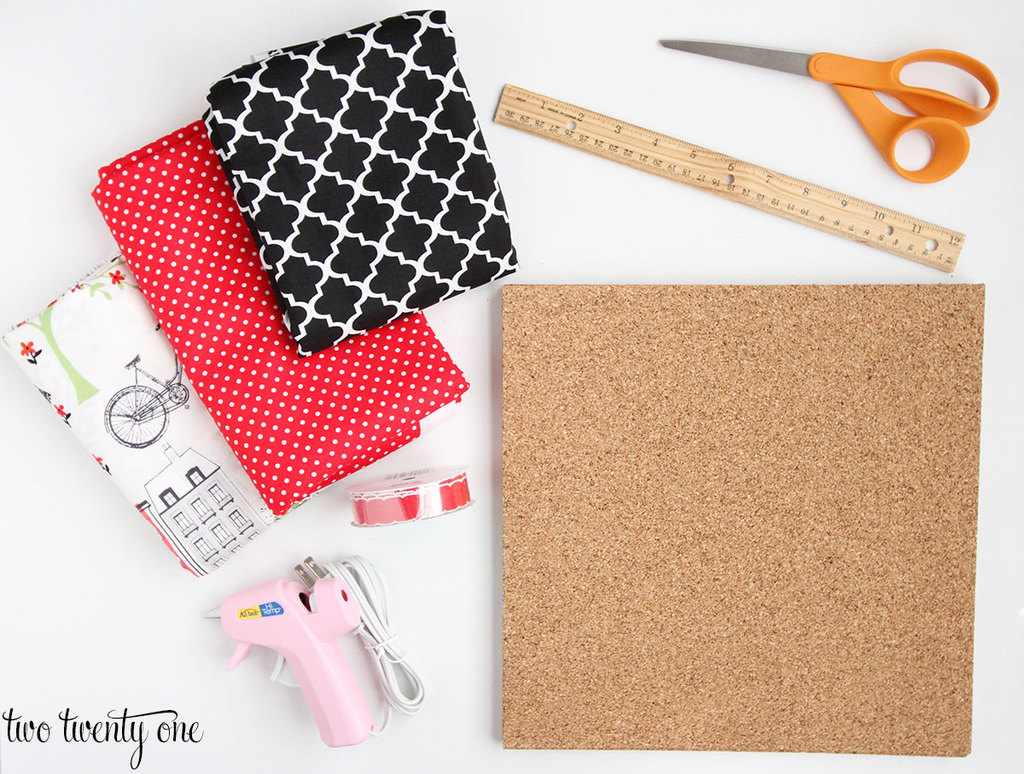
Here’s what you’ll need:
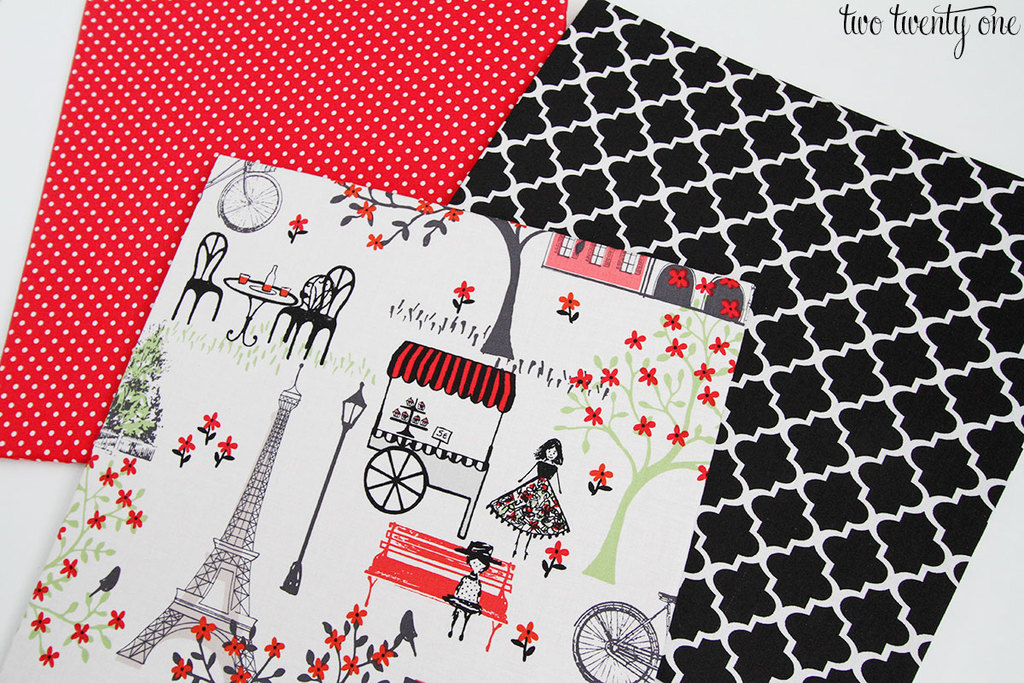
Waverly Inspirations fabric … Walmart
Waverly Inspirations ribbon … Walmart
12″ x 12″ cork tiles … Walmart
ruler … already had
scissors … already had
hot glue gun + glue … already had
Command Brand picture hanging strips … Walmart
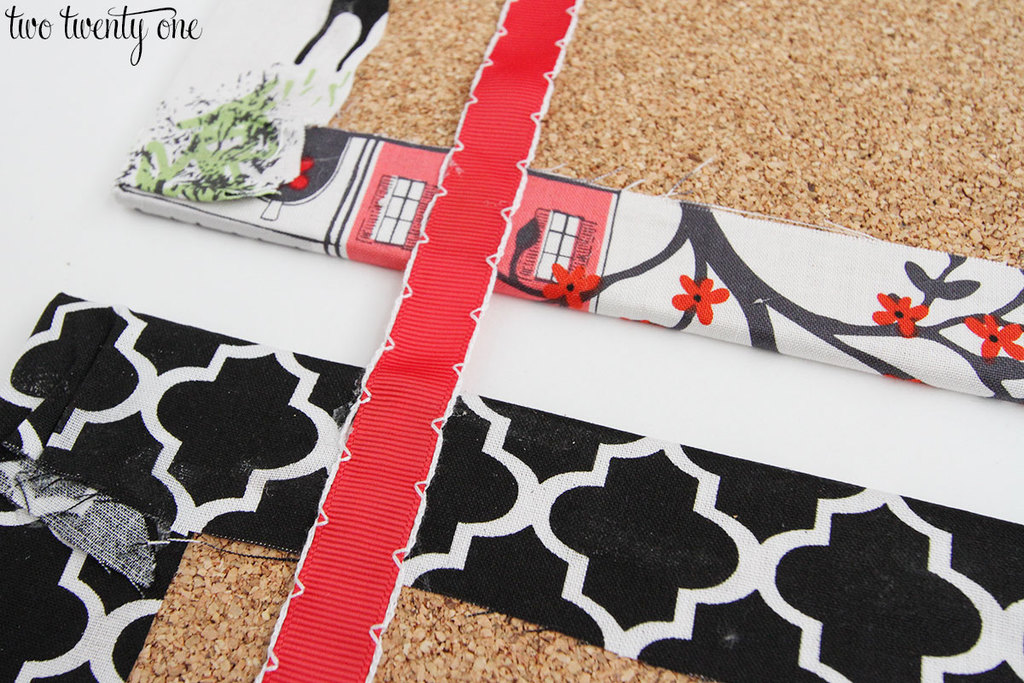
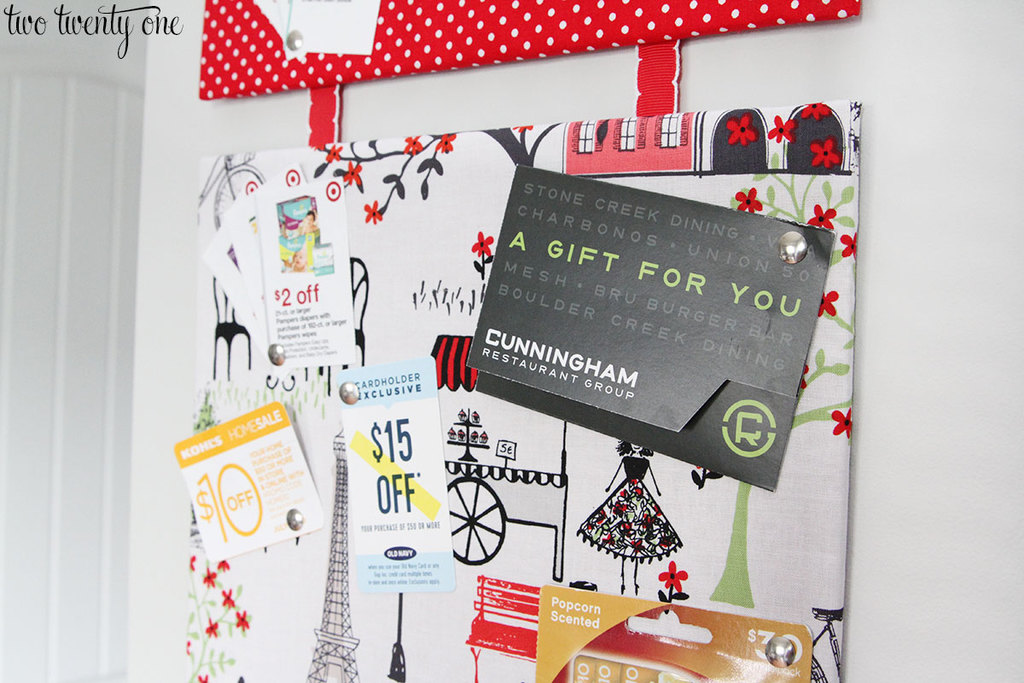
Cut a 15″ x 15″ piece of fabric. Lay it face down and center the cork tile in the middle.
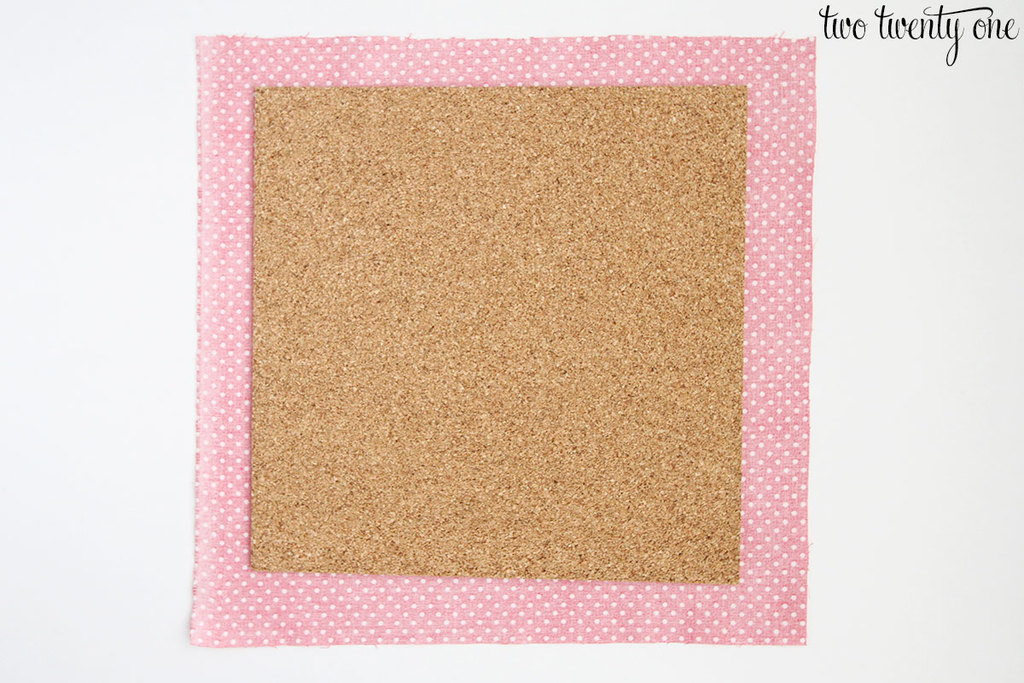
Glue the fabric to the cork tile.
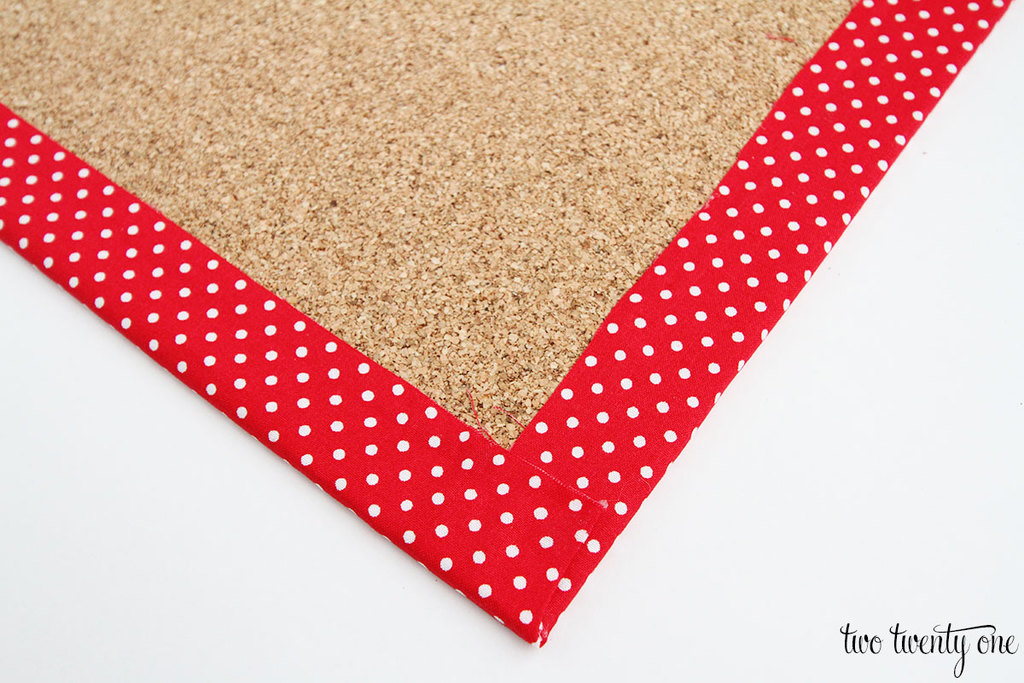
Repeat this process for the other tiles. You can use the same fabric or different fabric– it’s totally up to you.
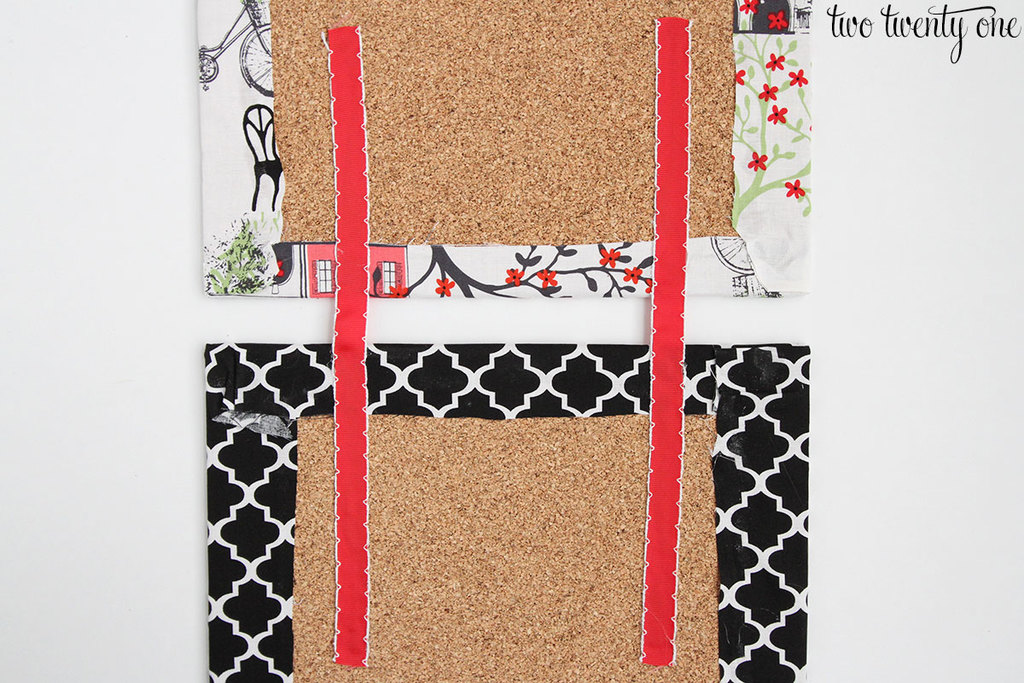
Cut six 12″ pieces of ribbon. Using your ruler, measure in 2.5″ on each side. Glue two pieces of ribbon on both sides of a tile.
Grab another tile and measure in 2.5″ on each side. Position this tile 1″ above the tile with ribbons. Glue the other ends of the ribbons to the other tile.
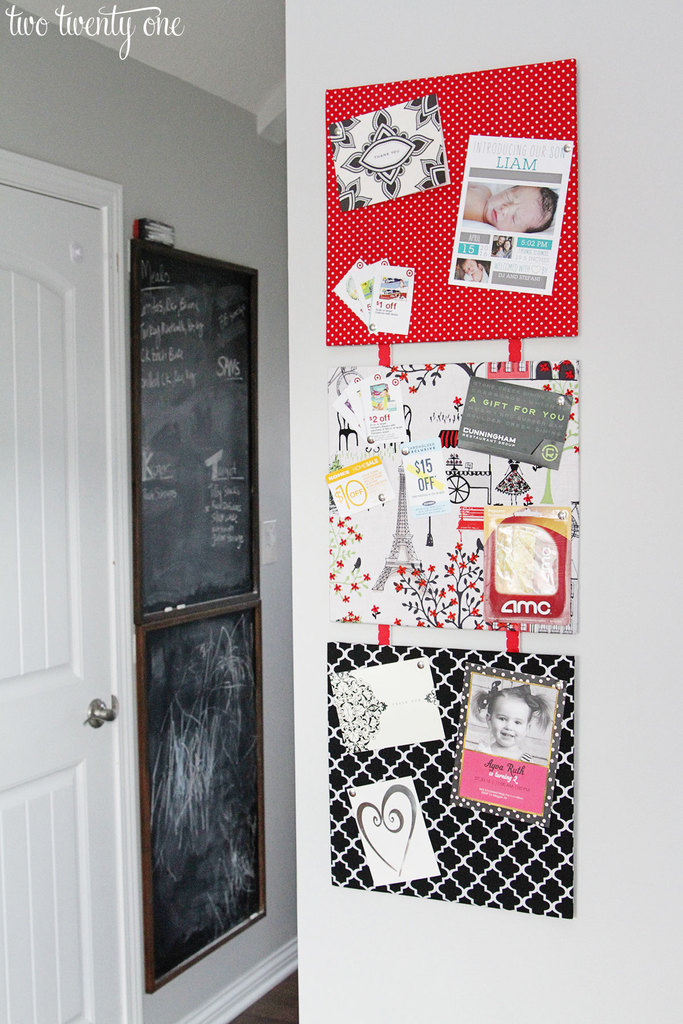
I used Command Brand picture hanging strips to mount the top fabric covered bulletin board to the wall.
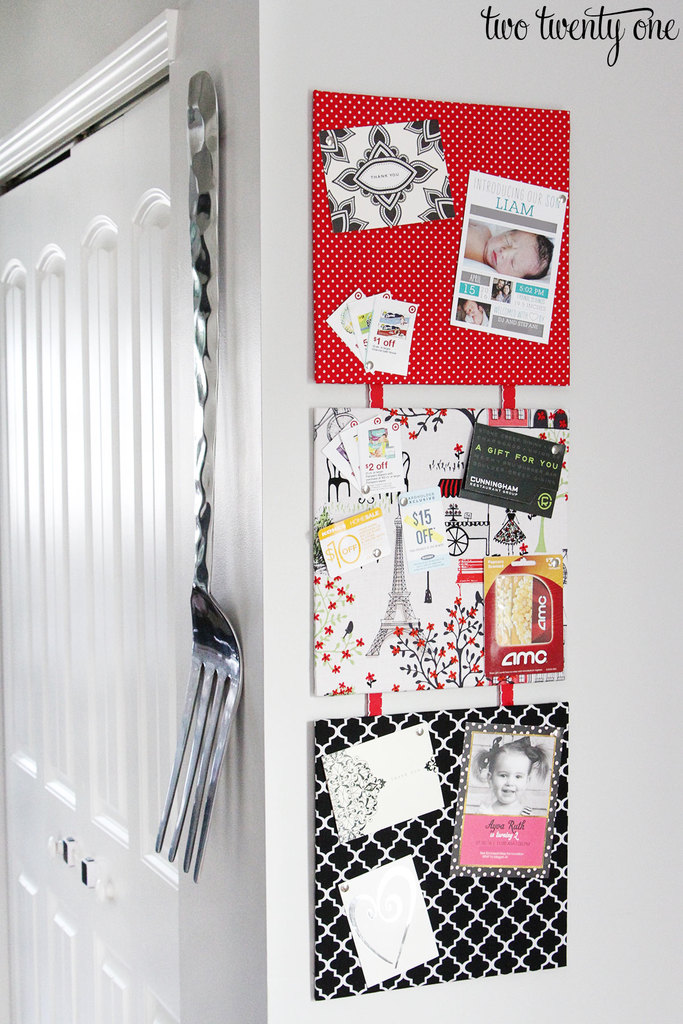
Now my friend has a place to pin all her random birthday invitations, birth announcements, gift cards, and coupons. But I’m sure it’ll start filling up with preschool papers pretty soon.
This post was brought to you by Waverly Inspirations. As always, opinions are 100% my own.


This is so cute!! I love your choice of fabric 🙂 Attaching them with ribbon and glue is scary…are they staying attached?
These are so pretty! My fave is the one with the Parisian theme! Makes a great hostess gift.
What an inspiring idea! I love your fabric choices. Your instructions and photos make it look so easy to put together. And, the best part is that all the supplies can be found at Walmart. That gives me hope that I might actually make this one day.
Love this idea! Simple, but so effective. Also, the idea of Chopped but with craft supplies is amazing 😛 Thanks for linking up with Merry Monday this week!
SO cute, Chelsea! I have a few pieces of fabric that I’ve been wondering what to do with- this is perfect! 🙂 I also feel like it would be great to have at school- something easy to customize for the ‘look’, but would come in so handy!
Awesome idea and I love your fabric choices. This would be the perfect thing to add to my daughter’s room because her artwork overflows everywhere!
Thanks for joining us this week at the Wake Up Wednesday link party! Hope to see you again next week!
Kate | TheOrganizedDream.com
Thanks for sharing this great idea at Inspire Me Monday. Also I wanted to let you know that you are one of my featured picks this week. Come by and check it out at http://www.farmhouse40.com Thanks!
Hi Chelsea!! I wanted to let you know that your post has been chosen as a Feature for the Welcome Home Wednesdays Link Party!! Stop by today and see your post linked up! Don’t forget to grab your Featured Button as well!! 🙂 ~Lisa~