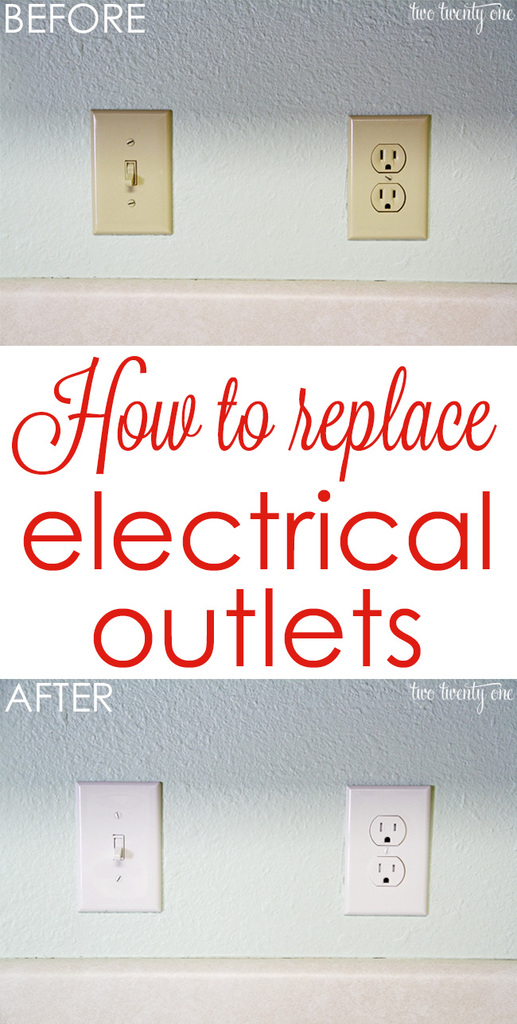
How to Install a USB Wall Outlet {Receptacle Outlet}
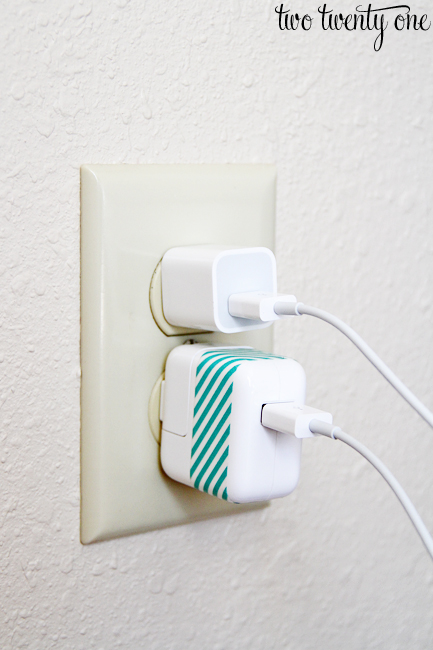
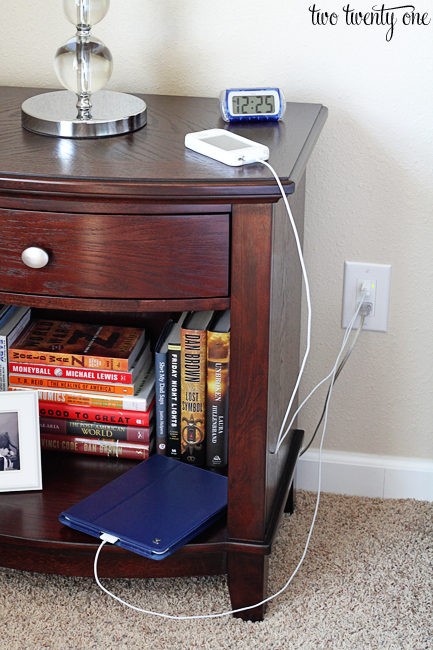
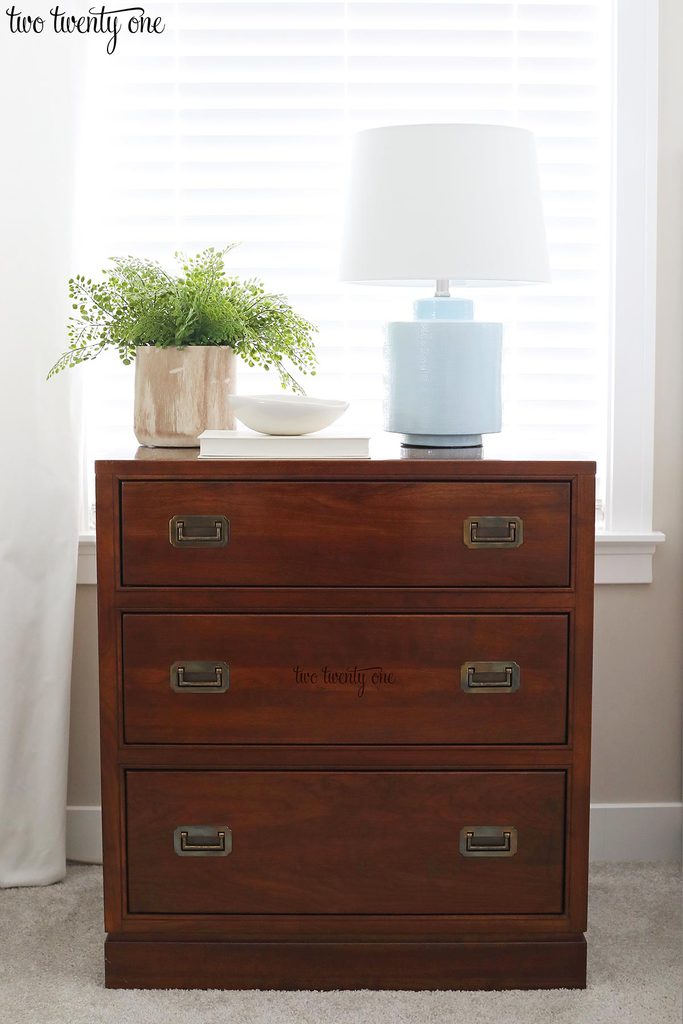
This past weekend Brad and I tackled some electrical work in the kitchen. One thing we decided to do was install a USB wall outlet so we could charge our iPhones and iPad in the kitchen. I posted a photo on Instagram, not thinking it’d be that big of a deal but people went bananas. The only problem? I didn’t take any photos of us installing the USB receptacle. Blogger fail. But Brad mentioned how he wouldn’t mind having a USB outlet next to his side of the bed because when he has to charge his iPhone and our iPad it takes up both outlets, and he has to unplug the lamp.
So without further ado, how to install a USB wall outlet.
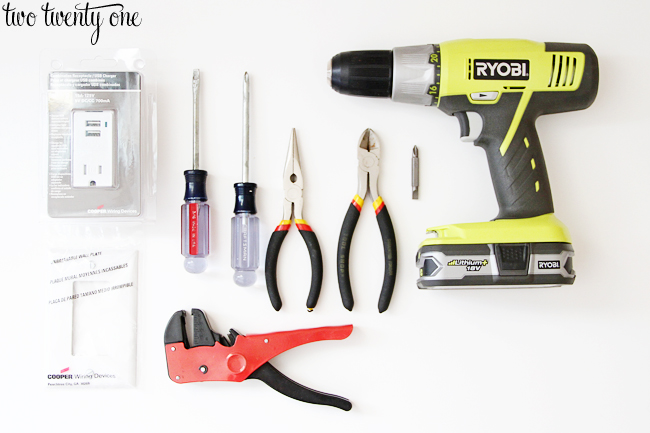
USB Outlet Supplies
USB receptacle
USB receptacle cover
flat head screwdriver
Phillips screwdriver
needle-nose pliers
wire cutters (may be necessary)
cordless drill
wire insulation stripper (may be necessary)
In our case, we went with an outlet with one standard plug and two USB ports, but they make outlets with two standard plugs and two USB ports in case you need two standard plugs.
Begin by TURNING THE POWER OFF to the receptacle you plan to replace. If you’re questioning how you turn the power off you should probably abort this tutorial at this time.
Since our circuit breaker box is so poorly labeled, and to be certain the power is off, we always do a little trick. The trick involves a night light. For this particular project, Brad went out into the garage (where our circuit breaker box is located) with his cell phone and called my cell phone while I watched for the night light to go out.
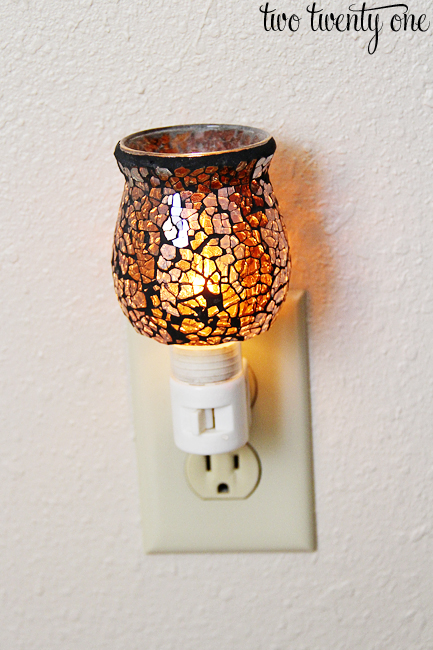
When the night light went out we knew power wasn’t going to the outlet.
Now, remove the original receptacle cover with a flat head screwdriver.
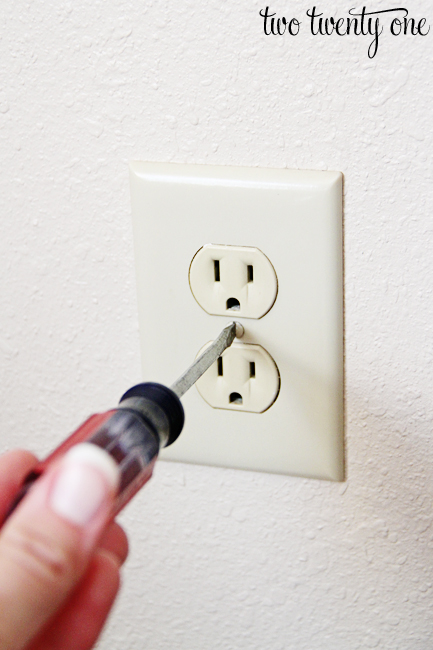
Take the receptacle out of the wall box. There is one screw at the top and one at the bottom.
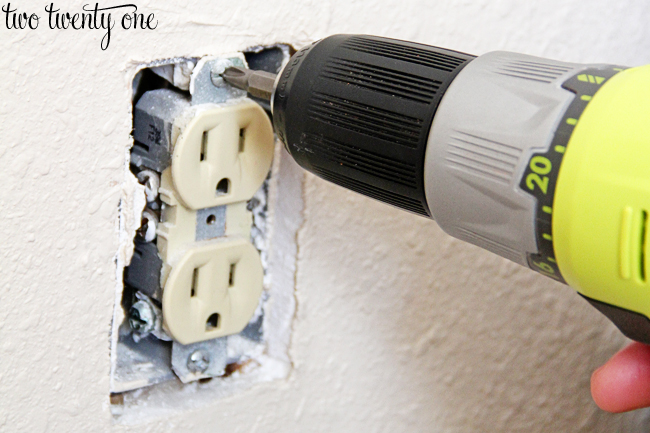
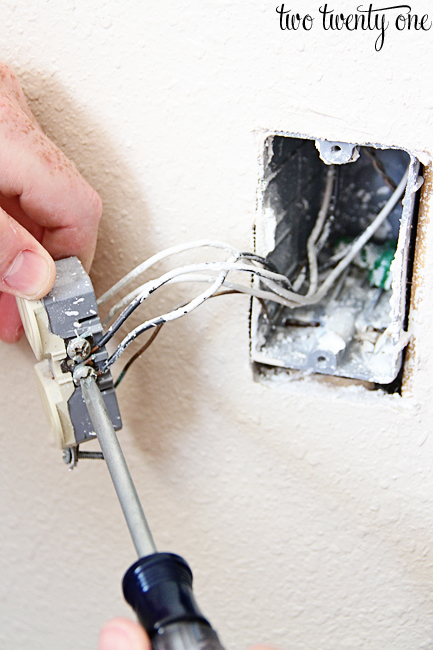
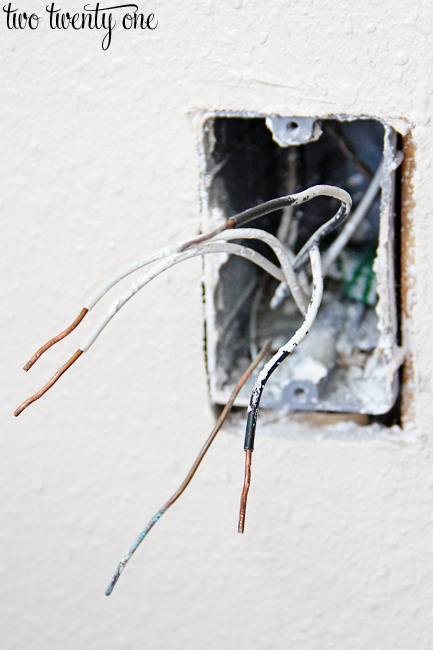
Gently pull the receptacle out of the wall. Grab the Phillips screwdriver and begin disconnecting the five wires (2 black, 2 white, 1 copper) by unscrewing the screws.
Note: there’s no particular order when it comes to disconnecting the wires. We just happened to start with the black wires.
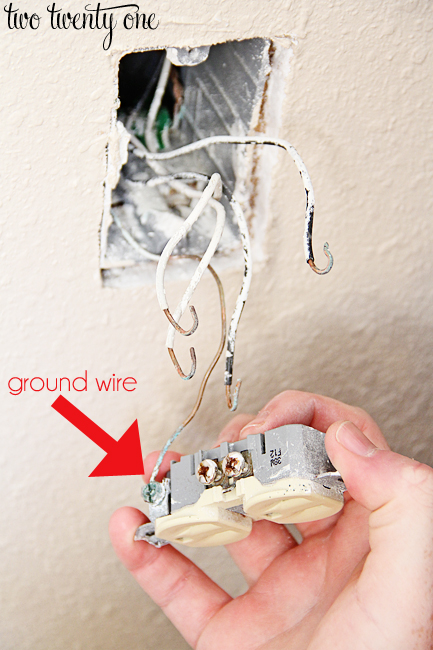
Notice how the wires have colored insulation? The two black wires are the hot wires, which provide 120VAC current sources. And the two white wires are the neutral wires, which provide the return paths for the current provided by the hot wires.

The copper wire without insulation is the ground wire, which is a safety feature in case the hot or neutral wires come in contact with metal parts.
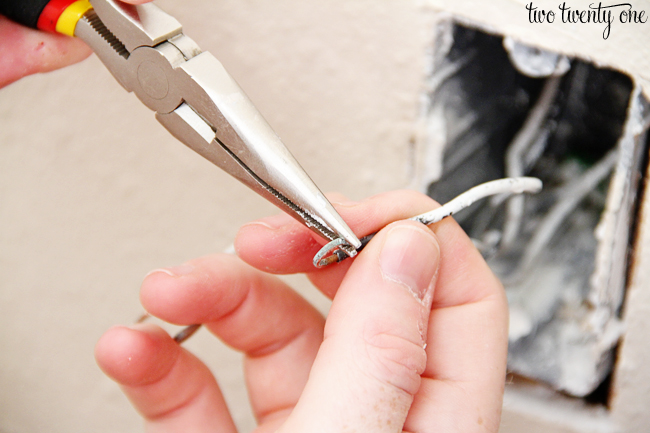
Straighten out the wires with your fingers or needle-nose pliers.
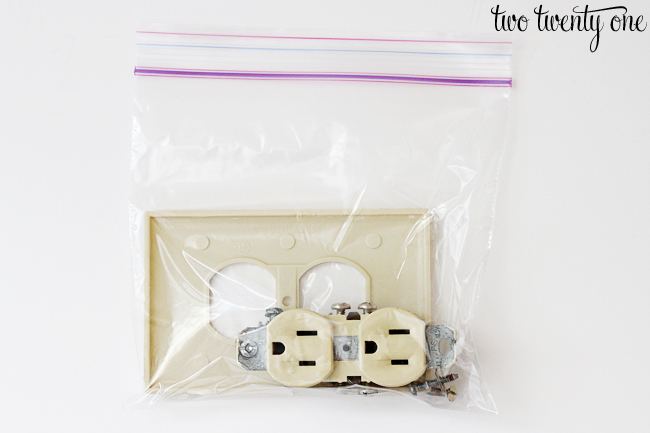
Save the old receptacle and wall plate. We put everything in a plastic zip-loc bag. Since it still works we’ll donate it to our local Habitat for Humanity ReStore so someone else can put it to use.
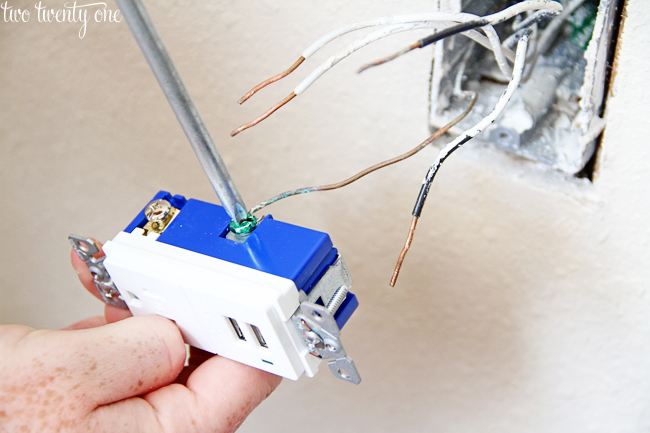
Grab your USB receptacle and start connecting the wires. The receptacle is labeled for which wires go where (there’s also instructions that will come with your receptacle). Also, notice how the screws are different colors.
Note: the picture below is of the specific USB receptacle outlet we used. If you purchase a different outlet yours may not be laid out or labeled like this one.
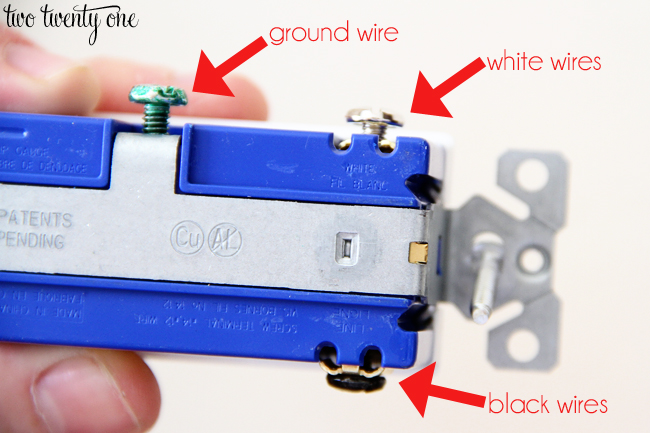
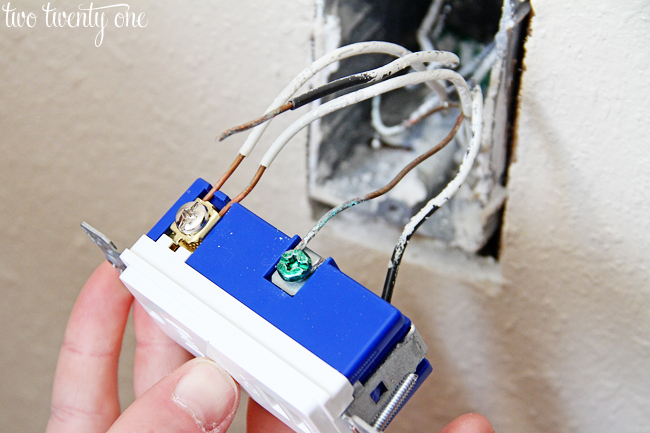
Brad always connects the ground wire first because he thinks it makes connecting the other wires easier. In this case, the ground wire was connected with the green screw.
Connect the white wires by inserting them and then tightening with a screwdriver. In this case, the white wires were connected with the silver screw.
Connect the black wires by inserting them and then tightening with a screwdriver. In this case, the black wires were connected with the black screw.
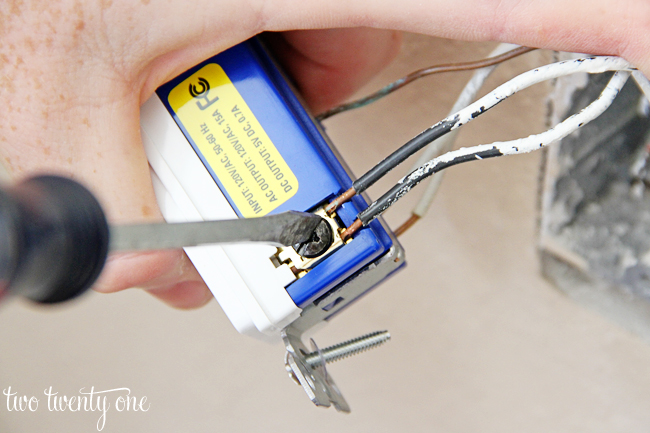
Now, all of the wires should be connected to the receptacle.
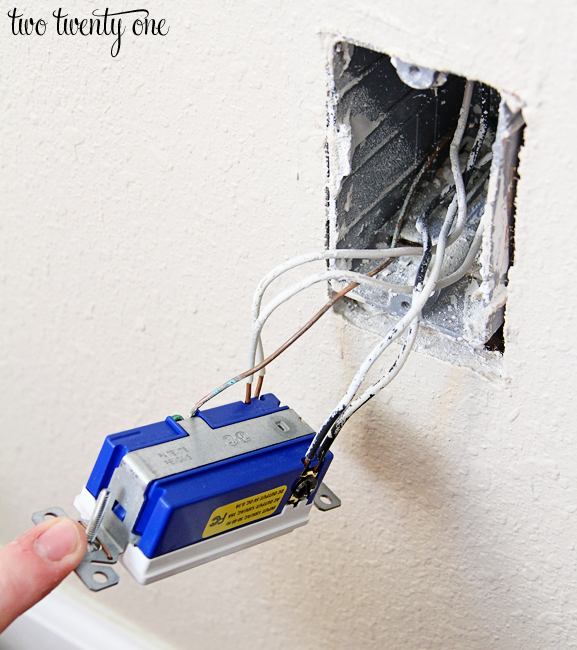
Carefully put the wires and receptacle into the wall box. Attach the receptacle to the wall box with the two screws (top and bottom).
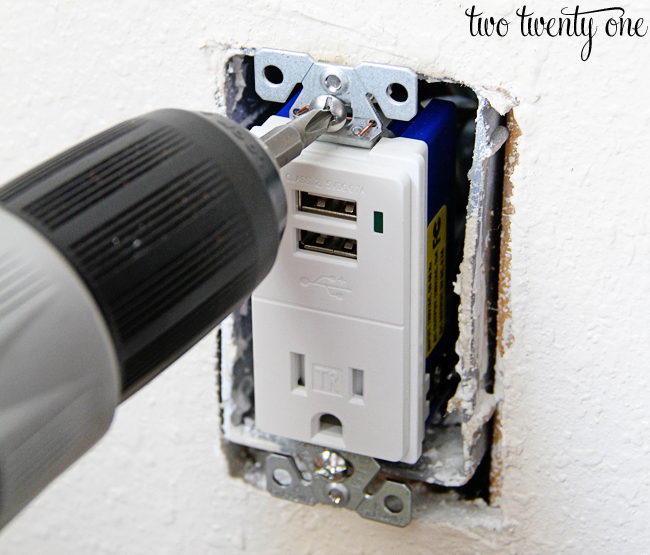
Attach the USB outlet wall plate with a flat head screwdriver.
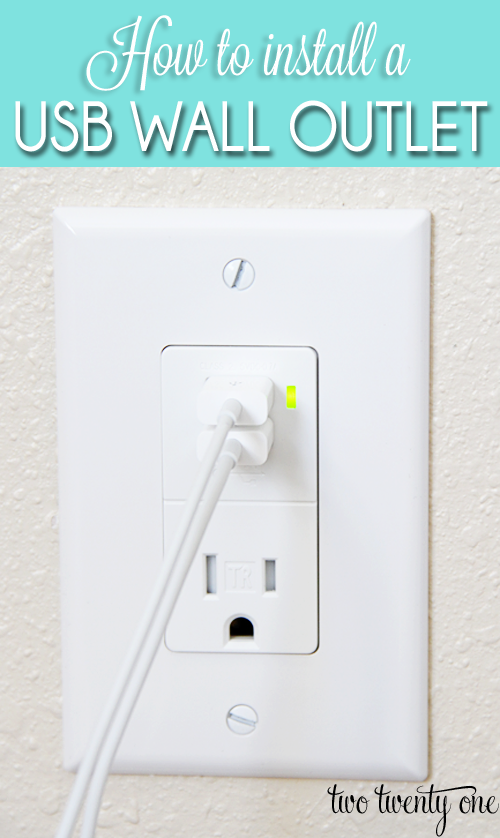
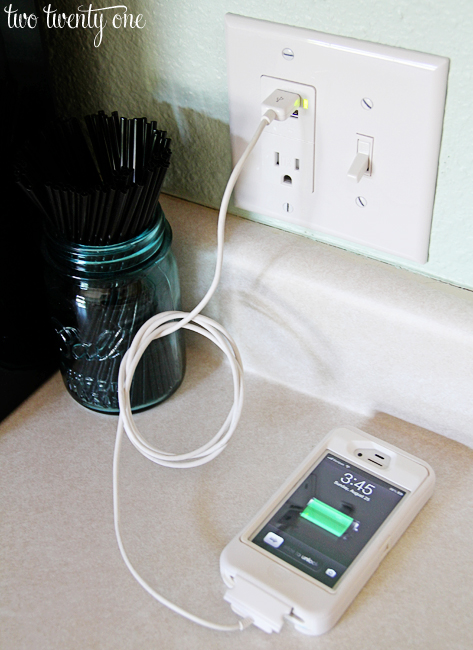
Turn the power back on to the outlet. Plug in a USB cord (or two) and test it out.

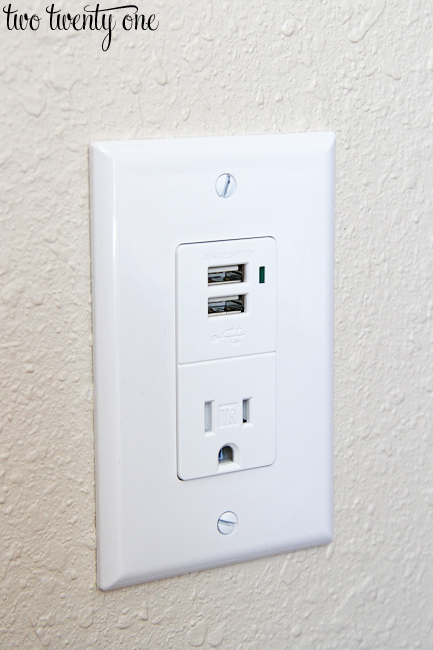
When you plug an electronic device into the USB cord the green LED light on the outlet will turn on, well at least with this particular outlet.

Now Brad is able to charge his iPhone, iPad, and plug the lamp into the wall.
Here’s the outlet we installed in our kitchen.
Did you geek out like me when you realized these outlets existed?
Where would you install a USB wall outlet in your house?
Who’s going to put this tutorial to use and install a USB wall outlet?
Did you like this post? Check out my post on how to install new electrical outlets!
Disclaimer: Complete this DIY project at your own risk. I won’t be held responsible if you don’t read this tutorial carefully or have wonky electric in your house and electrocute yourself or burn your house down.
This post contains affiliate links.
I am so doing this in my kitchen–eventually. It makes so much sense…maybe in the entry area too as a charging station. Great post! Thank you for sharing!
This is so great! We are so technology reliant here…2 iPads, 2 iPhones and never enough charges! This is perfect!
We put the two and two outlet in the kitchen over the weekend. I love it, or I would if we could keep up with enough cords to charge our phones! Soon, I will love it!!
That is handy, is it not. I think we should be reaching a point in our technological world where USB outlets should come as standard as regular outlets.
XO,
Steph
Can I ask why did you not wrap the outlet with electrical tape before screwing it back into the wall? We’ve recently changed all our light switches to white rocker style (they were a mixture of cream and wood flip and rocker switches previously) and a few GFCI outlets in the bathroom and we were told to wrap each one with electrical tape before putting it back into the wall.
Interesting. I’ve never heard of or seen that done. Brad’s dad is an electrician, and he’s never suggested wrapping the receptacles with electrical tape before putting them back into the boxes. Since his dad is working right now (and I don’t want to bug him), I googled it. This is what I found from a master electrician: “There is no real benefit to wrapping receptacles in electrical tape unless the receptacle is to be energized while not secured to the junction box (such as during construction). Wrapping wirenuts is completely unnecessary, except in cases where the connection needs to be further protected from water or chemical infiltration (in such cases, special tapes and sealers are used – not standard electrical tape). Electricians that claim that the tape helps to holds the wirenut in place do not know how wirenuts actually work and are just regurgitating false information taught to them by another misinformed electrician.”
Interesting. Thanks for researching!
this is very old post, but ran across it because doing the same swap out myself. The person suggesting that is probably implying that you were wrap the wire connections in electrical tape to prevent the wires from coming out of the wire nuts, which could be a fire hazard if any strands of the hot wire touch strands of the neutral or ground wire. That would cause a parallel short circuit and arcing (arcing = sparking)
Every time we go into Home Depot Kevin runs up to these (the USB outlets) and points out how awesome they are and how much we need them.
And that’s life being married to an Electrical Engineer.
We’ve looked into these before too! Maybe we’ll get them for our bedroom when we change out our covers. (They’re all cream and we’d really like white in every room one day.)
I’ve been meaning to do this in my master bedroom for a while now, and your links to amazon just made it that much quicker. I’ve already ordered them plus the cover 🙂 I hope to have them installed next week!
I had no idea those existed! That is fantastic! We will definitely be utilizing those in our house soon. I’m sure as soon as the hubby finds out they exist we’ll have them in multiple rooms.
niiiiiiiice – can’t wait to do this! 🙂 Thanks!
Oh man are we ever gonna do this when we move out of the in laws!!!!!
It could be a very nice thing to install one in the room you are using AT your in laws. A small unannounced and unheralded Thank You for the stay. Just tell them when you move out so they know it’s there and can use it..
We love ours! My hubby put one in our kitchen when we remodeled. Yes, I geek out about little things like this, too. We have a Nest thermostat that we have affectionately named “Ernesto”. Lol.
This is genius! And totally do-able! Pinned. Thanks so much for the how-to, Chelsea! Have a great week!
~Abby =)
What a great idea, and great tutorial! I can see a couple of these making their way into home in the near future. Thanks for sharing!
Now THAT is fancy.
Nerd alert. 😛
Nate has been debating one of these but we have approximately 100 phone chargers so not quite top priority. But still nerdy cool!
We recently bought a surge protector that came with a bonus outlet plug type thing – extends a normal wall plug into 6 normal plugs and 2 USB ports – and we love it! We always have stuff plugged in charging there, so I would definitely do these around the house! The only downside (for us) is that we end up feeling like we don’t “need” the plug base that used to connect the USB cord to the normal wall outlet, so we keep losing them haha.
Gallon sized zip lock bag in a central location. ALL charger plugs go in it and MAYBE…… never come out! LOL
Would I have to do anything special to get this to work with 220 volt AC (South Africa)?
I have no idea. You’d have to ask an electrician. The outlet I link to states: “The Cooper Wiring Devices TR7745W-BOX 15-Amp Combination USB Charger is compliant with 2011 NEC Article 406.12 that states that all 15-Amp and 20-Amp, 125-Volt receptacles installed in dwelling units must be tamper resistant.” So I’m guessing you’ll have to find one that’s made for 220 volt receptacles.
We just ordered some of these for our new mudroom. Thanks so much for the idea. I love your blog!
Thanks for posting this. All the other how to’s I found online showed how to wire the device if it had a single AC wire pair running to the original outlet. Mine is like you show, with a dual AC wire configuration.
It’s amazing to pay a visit this web site and reading the views of all friends regarding this article, while I
am also eager of getting familiarity.
Hey there! Do you use Twitter? I’d like to follow you if that would be okay.
I’m absolutely enjoying your blog and look forward to new
updates.
I love you. 🙂 I just moved into a new house and have been looking at the ugly almond switches. I didn’t know it was so easy to change them. I am off to the store tomorrow. You have made me such a happy woman!!!!!
WOW! I just wanted to say thank you for posting this article. I read it last week and loved the idea… so i bought everything through Amazon. Needless to say, it arrived today and it took me literally 5 minutes to install. Your step-by-step pictures guided me through the process of course!! I can’t wait to read your other postings and see what other things I can do!! Thanks again! -David
Their just like you examine my head! You appear to learn a whole lot close to this, such as you wrote the hem ebook in it as well. I believe that you might utilize a few percent for you to demand the material house slightly, having said that in lieu of which, this is fantastic weblog. An excellent read. I most certainly will absolutely return.
Great instructions! The usb outlet charger you linked to from amazon is slightly underpowered though. You may notice longer charging times for iPads with that particular one.
Thank you so much for sharing this! I replaced one usb outlet and 6 switches today
A nice tutorial…well done. I think I’ll get one of these for the beside outlet. My only add to your post would be to make sure you check both plugs on the receptacle with the nightlight. Sometimes these are split (especially in kitchens) and run from two separate circuit breakers. You want to make sure that both are dead before you start unscrewing.
Great post! I just changed all our outlets in our kitchen for color (white to black) but I got stuck on the one for usb because the outlet has two hot wires and the usb outlet only has a screw for one like your posting. I didn’t know it was ok to put both black and both white into the same screw. Just checking that’s ok… right? Thanks!
Over a year late but for anyone else, don’t do this in a kitchen. Usually the 2 wires are 2 different circuits. If the little tab between the two screw was broken then it is 2 different circuits.
sweet guide. popped in a 2xusb 2x outlet in the bedroom, works like a charm!
Loved the post. Why didn’t you run a simple jumper wire for the hot and neutral wires? Or was it easier to do it the way you did?
That’s just how my electrician father-in-law taught my husband how to do it.
I want to install something like this in my outdoor kitchen. Do you know if they make USB outlets for outdoor installation?
cool
Thank you so much for this tutorial – was able to upgrade a couple of outlets today 🙂
Lifesaver! I was mid-project doing this and realized I had 2 white wires and 2 black wires and only one screw on each side. Almost had a panic attack not knowing if I’d already gone too far to put everything back together. Found this and then saw the wire openings. All finished, everything works, no sparks! All I have to do is get the faceplate. Thanks for posting!
When shutting power off to an outlet we found by plugging in a radio and leaving it blaring it can be a one person job. When at the breaker box if the radio shuts off you know the power is off to that outlet. Our home is small enough to do that. If you live in a mega mansion it may not be as easy.
This is what I needed. I’ve been searching the net on how to convert double outlets to single with USB. At the back of my mind, I know, it’s okay to connect the two neutrals together into one terminal in the USB outlet (and two hots in the other terminal), but I need some reassurance. Clear pictures. Clear instructions. Thank you very much.
I bought one of these and didn’t know what to do with 4 wires. The instructions were garbagr. Thanks the detailed pictures.
Can these be installed outside on back of the house ?
This is great. I hope I can find like this in the market because I have been looking for USB wall mount for days now. Where I can find this kind of USB wall charger and if I found one is there anyone who can install kind of device.
https://goo.gl/aXbAWB
Error Authenticating. Either Bad Username/Password Or Your Account Has Outstanding Payments Due