DIY | kitchen | organization
Hidden Kitchen Organizer
If the following is a reoccurring exchange in your house, this project is for you. “Honey, where’s the Chinese takeout menu?” On the fridge. “Honey, where’s the water bill?” On the fridge. “Honey, where’s that wedding invitation?” On the fridge. “Honey, where’s the dog?” On the fridge. Just kidding. Your dog probably shouldn’t be on the fridge.
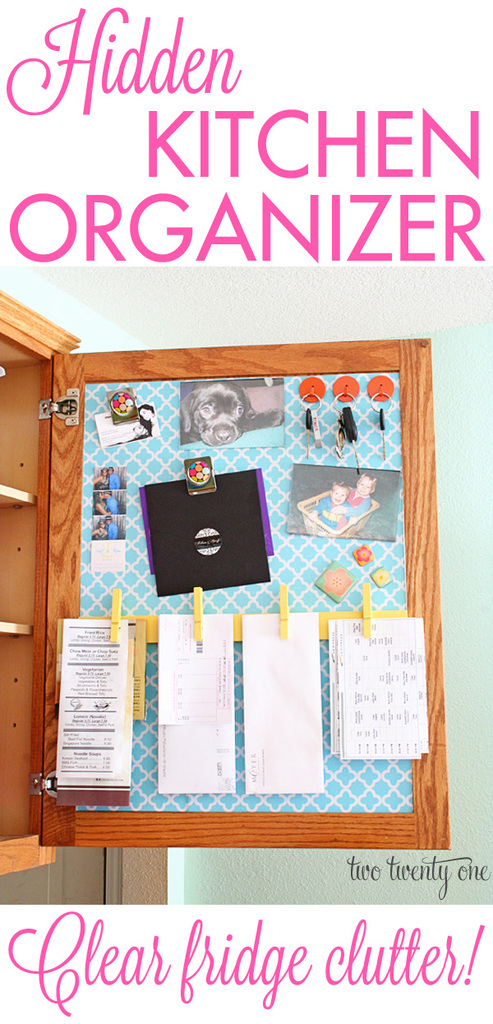
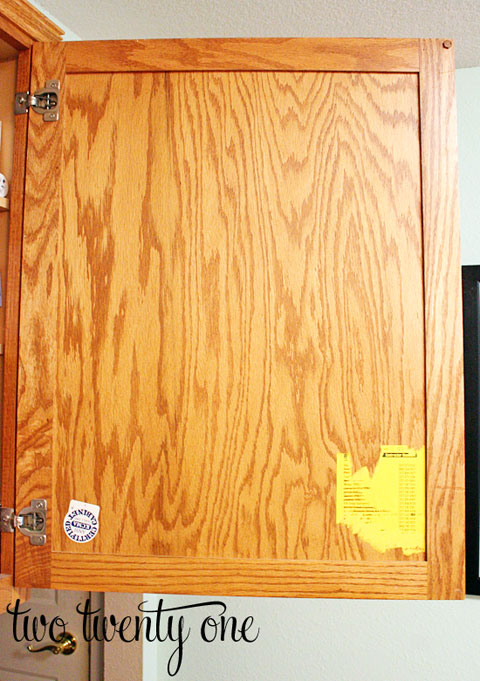
Obviously, the inspiration behind this project started with the monstrosity that was the side of our fridge. I was tired of looking at the mess everyday. It had gotten so out of control that I found coupons that expired in 2010 when I was cleaning everything off of it. Yowza.

I decided that I needed to clean up my act… and find a place to hide the important things we put on the fridge. It dawned on me to use the inside of one of our kitchen cabinets. It wasn’t doing anything special other than hiding the spices and other random things in that cabinet anyway, so I decided to put it to work.
I went to Lowes and purchased two sheets of metal. The inside of the cabinet door measured 18″ x 24″. It was cheaper to purchase two 12″ x 24″ sheets than it was to buy a larger sheet and cut it to size. I took a magnet with me to test the sheet metal.

I used Liquid Nails to secure the sheet metal to the inside of the door.

Instead of cutting one of the pieces of sheet metal to size, I decided to overlap them.


I set some books on top of the sheet metal and left it alone for 24 hours, allowing the Liquid Nails to dry.

While the cabinet door was drying, I worked on the clothespin organizer. When I was at Lowes, I picked up a 24″ piece of pine craft wood and had them cut it down to 18″ so it would fit the width of the door. I grabbed some clothespins and glued them on with E6000 glue. You could use Liquid Nails or wood glue. I used E6000 because it was closer in proximity to me that the Liquid Nails. I mean, who wants to get up and walk an additional 20 feet for glue? Not I. I let the clothespin organizer dry for 24 hours.

After the Liquid Nails had dried, I used leftover shelf liner from my dresser turned TV stand project on the sheet metal to give it some pizzazz.

I gave the clothespin organizer a couple of coats of spray paint. Then I attached three magnetic strips to the back.

The hidden kitchen organizer has been working beautifully for us. We can organize our stuff and hide it at the same time. I think the fridge is a little lonely without all those things on it, but it’ll get over it.
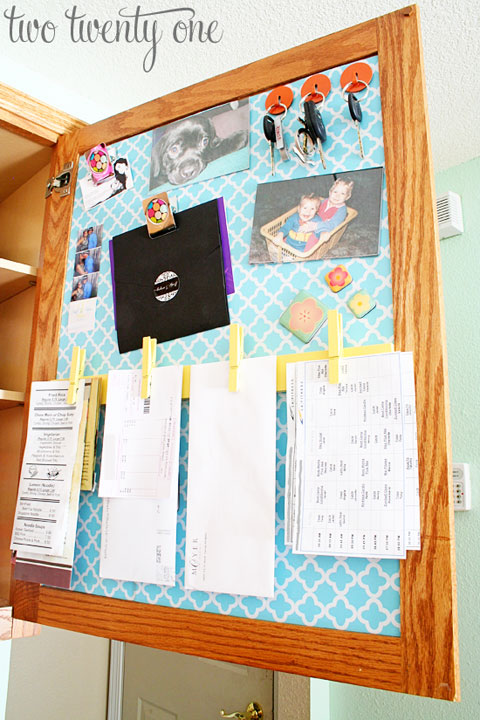
We use the clothespin organizer to corral our take out menus, bills, random important things {i.e. jewelry store gift certificate}, and fitness class schedules.

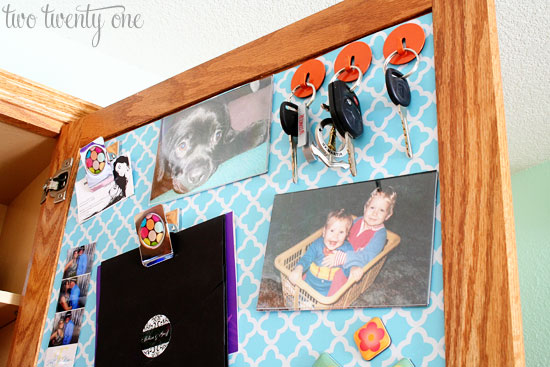
On the top portion, we have important business cards, spare car keys, wedding invitations, some random photos {that’s my brother and me in the laundry basket, circa 1986}, and magnets. If we need the space, we’ll remove the photos, which are in magnetic frames.
One thing I like to do on my personal blog, is share how much I spent on a project. What can I say? I like transparency.
2 pieces of 12″ x 24″ sheet metal: $7.88
24″ piece of pine craft wood: $1.37
Magnetic strips: $1.04
Liquid Nails: already owned
E6000 glue: already owned
Shelf liner: already owned
Spray paint: already owned
Clothespins: already owned
TOTAL: $10.29
24″ piece of pine craft wood: $1.37
Magnetic strips: $1.04
Liquid Nails: already owned
E6000 glue: already owned
Shelf liner: already owned
Spray paint: already owned
Clothespins: already owned
TOTAL: $10.29
If you don’t have the items that I already had, it would probably cost you an additional $10-$15 for this project.
What do you say – do you think you’ll put one of your kitchen cabinet doors to work and give your fridge a break?

I loved the guest post! I have a cabinet in my kitchen begging for something similar. Thanks for sharing how affordable it is!
I’m babysitting for the two year old that lives next door. He saw your bio picture and insisted that it was me. I took it as a major compliment!
Aw, thanks, Steph! 🙂
Great guest post! I need to do something similar since our bills/coupons/etc. keep piling up on the counter!
P.S.: Not to be a stickler but you said “E3000” glue and it’s “E6000” 🙂
Blurg! This is what happens when I write important posts with an audience of millions at midnight.
Hi Chelsea,
I love this project! Could you tell me where you bought your magnets? I have a polka dot clip magnet just like yours (received as part of a gift) and would LOVE to buy more to keep my organization consistent, but I can’t find them anywhere!
Thanks!
Elizabeth
Thanks, Elizabeth! I wish I could tell you where I got them. A co-worker gave them to me a couple years ago. Sorry I’m no help, but if I happen to come across them at a store I’ll definitely let you know!
Thanks anyway! 🙂
I worry about Brad pinching his fingers in the clothes pin. Does this concern you? 😉
I love what you did with your cabinet door. I’m thinking of doing something similar but I can’t reach my cabinets. lol Maybe on a lower cabinet would be good. 🙂
This is genius! So in love with this idea. 🙂
Love this idea! Your “before” picture looks exactly like my kitchen. I NEED to do this! And by the way, love your blog, I just linked over from I Heart Organizing and subscribed!
Hi Chelsea!
I love this idea. Just wanted to let you know that I’m going to pin it to The Home Depot’s storage & organization board if you don’t mind!
Best,
Caroline
Its like you read my mind! You seem to know so much about this, like you wrote the book in it or something.
I think that you could do with a few pics to drive the message
home a little bit, but instead of that, this is fantastic blog.
An excellent read. I will certainly be back.
Where did you get the magnets for the keys???
I am totally putting this on my to do list! I hate the frig clutter (which doesn’t bother the hubs of course lol). You will see this on my blog (linked back to you of course!) since truly any girl can do it!
~Stacy
I have a question for you..What dept. in Lowe’s did you find the sheet metal and how did you adhere the shelf liner or drawer liner to the sheet metal? Did I miss that step? This is a super idea to get all that stuff off the front of the Fridge. You could modpodge your clothespins to make it look finished. Probably be able to attach a small 5×7 whiteboard to write reminders..like grocery list or Dr. appts., important Telephone#. This is old mind is thinking how I could make that work for us.
I bet you could use contact paper. Have it smoothed on before you put the sheet metal on the door.
This is great. I don’t mind the clutter on the fridge, but it has become a game for my 2yo to grab a chair and pull it over to the fridge and tear down everything on it. Maybe if I hide it away in a cabinet he can’t get to it as easily (probably wishful thinking though). Of course, I’m short, so I would want a spot that I could reach to the top, don’t know if I have any cabinets like that in my kitchen.
After going over a handful of the blog articles on your blog,
I truly like your way of writing a blog. I saved as a favorite it to
my bookmark site list and will be checking back
in the near future. Take a look at my website too and tell me your opinion.
What a brilliant idea! Pinning it.
I’d love to do something like this, but I rent my apartment, and could never use anything permanent. Any ideas?
Очень интересные идеи. Большое спасибо.
I really love this idea and I can totally do this project. I would love to get everything off the refrigerator and this is my solution. I plan to check your entire page out. Thanks for sharing
Brillant! I am going to do this!
I’m going to do mine. My frig looks just like that. I love your door.. Will have to find the sheet metal. Great tutorial. I’ll send you a photo when I do it/ Thanks so much Jude
You could also use heavy double stick tape and use a magnetic dry erase board if it fits the door.
Wonder if you could use an old cookie sheet instead of having to go to the store to buy metal sheets? (I’m a lazy senior)
Thanks for finally talking about >Hidden Kitchen Organizer – Two Twenty One <Liked it!