How to Turn a Dresser Into a TV Stand
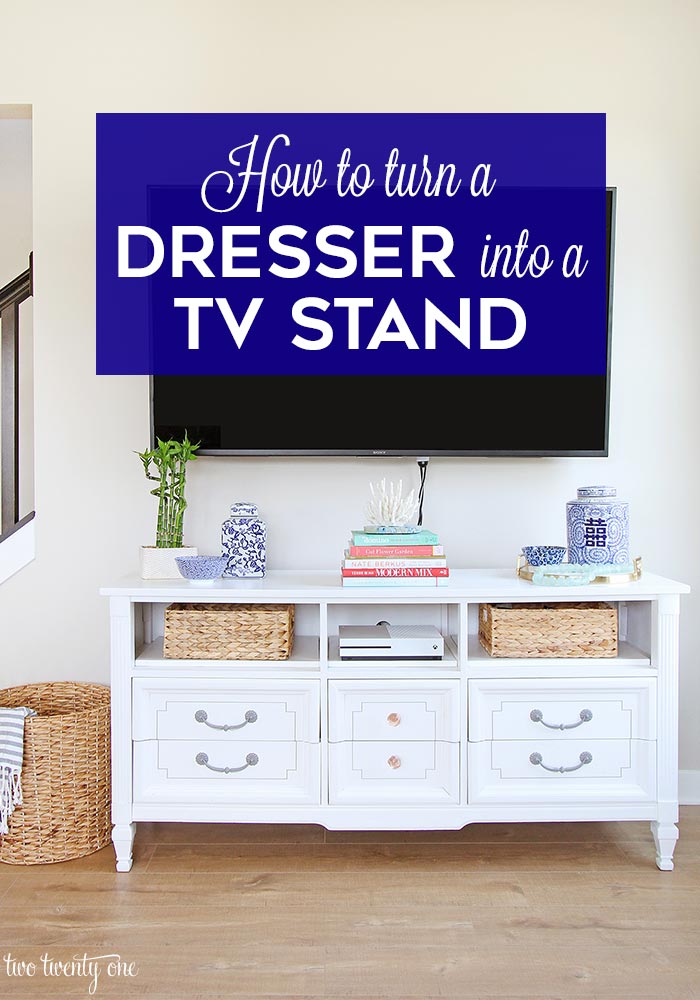
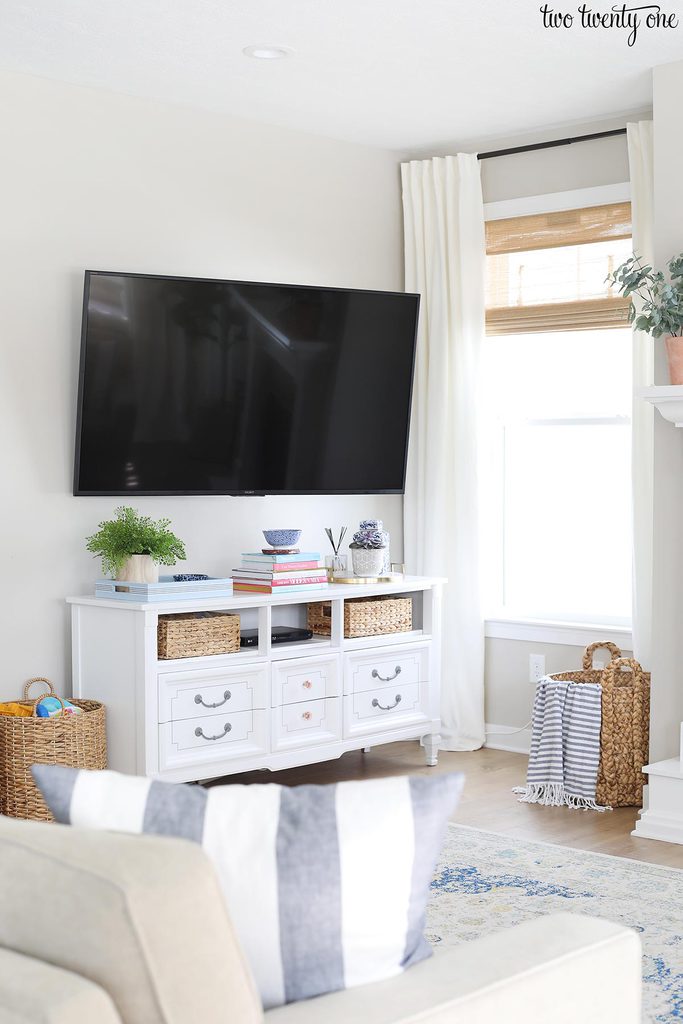
I’m back today to show you how I turned the $50 Craigslist dresser into a fancy schmancy dresser TV stand for our living room. It easily holds our flat screen TV and all of our other home theater electronics. Plus, there’s enough storage space for our DVD collection.
Dresser TV Stand Supplies
Primer: Zinsser Cover Stain Primer
Primer Conditioner: Penetrol
Dresser Paint: Valspar Ultra White semi-gloss latex
Detailing Paint: Valspar “Grey Porch” (sample)
Latex Paint Conditioner: Floetrel
Paintbrushes: Purdy
Spray Primer: Rustoleum
Spray Paint: Krylon “Smoke Gray” gloss
Shelf Liner: Marshalls (The Macbeth Collection)
Pink Knobs: Hobby Lobby (clearance section)
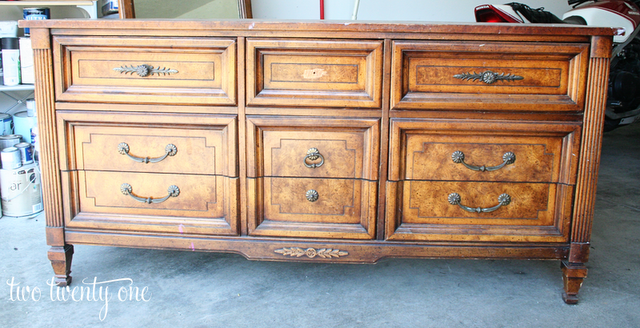
Removing Unnecessary Things
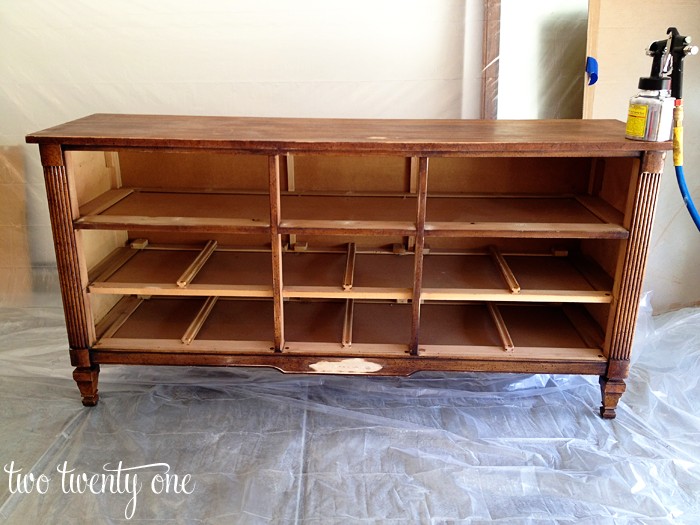
Start by taking out the top row of drawers. Then, remove all the slides and stops. This step can be a little hairy because they can be glued on and/or secured by staples.
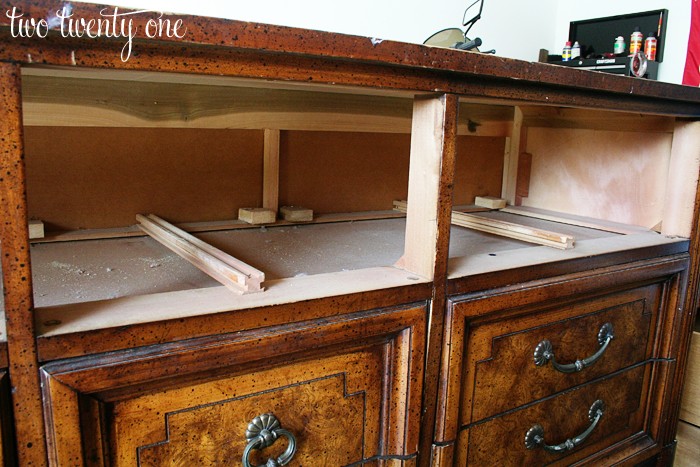
Enter: screwdriver.
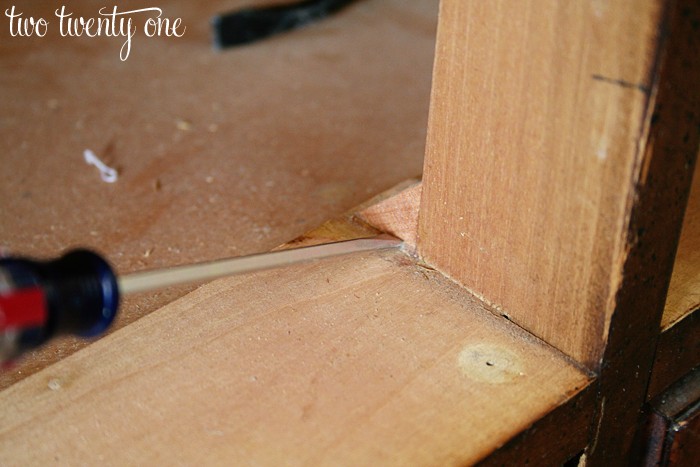
While I was pulling stuff off of the dresser I figured I might as well pull off the decorative thing on the bottom. I didn’t care for it, so gone it was.
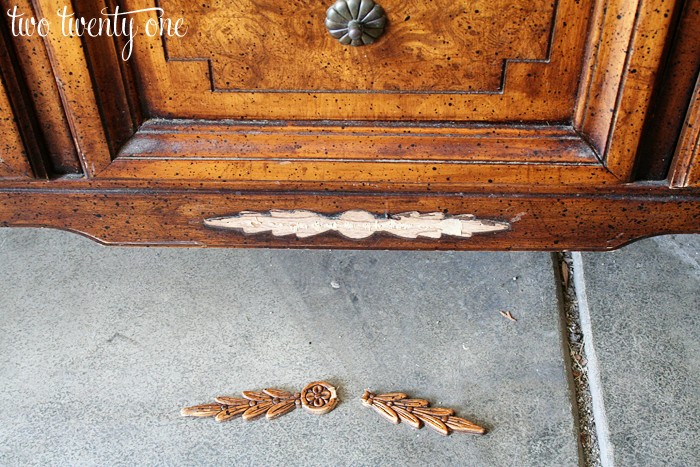
Then, I sanded down the spot where the decorative thing was.
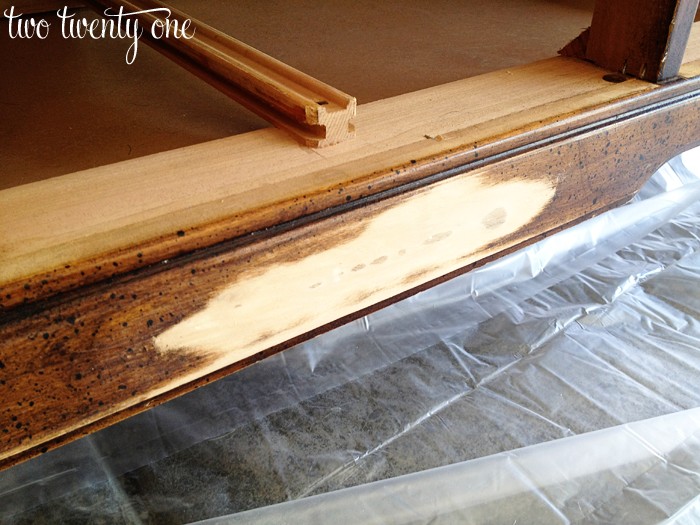
Sanding the Dresser
While I was sanding, I figured I might as well sand down the entire piece. I used a palm sander that Brad brought home from Harbor Freight. Love me some Harbor Freight.
Tip: always look for a coupon before you go.
Use a sanding block on the drawer fronts and for tight spaces. I did have to patch a handful of nail holes with wood filler, so I used some wood filler and sanded the patches when the filler dried.
After sanding it, blow out the dresser with an air compressor because there may be some gross stuff inside. You know, like lint, dust, petrified mouse droppings. Fun stuff.
Priming
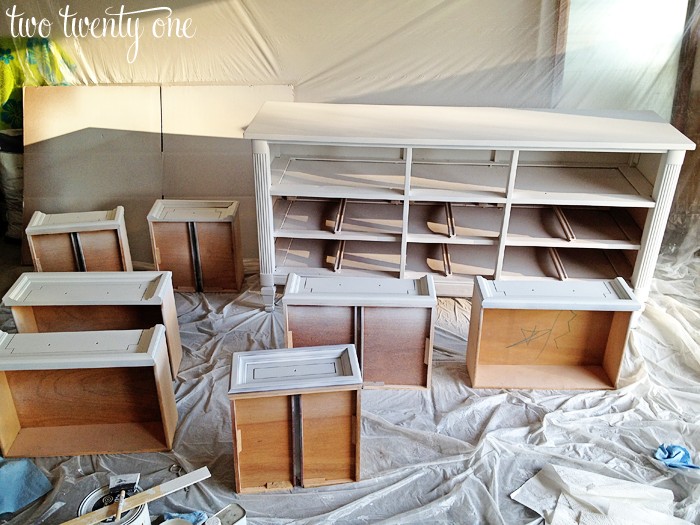
I used a paint sprayer to put on the Zinsser primer (conditioned with Penetrol). I saved hours spraying on the primer rather than painting it on with a brush. Hours.
I suggest two coats of primer, sanding in between each coat. Be prepared — This. Is. Tedious.
Add a Shelf
If you want a shelf for your electronics, you’re going to need to put one in. To do this, I recommend heading to Lowe’s and purchasing a 5/8 inch thick piece of wood. Because you’re going to need to fit the shelf into the dresser, you’re going to want to have it cut into three large sections and two small sections so you can fit them in the dresser. Ask the wood cutting person at Lowe’s to cut your chosen piece of wood according to your measurements.
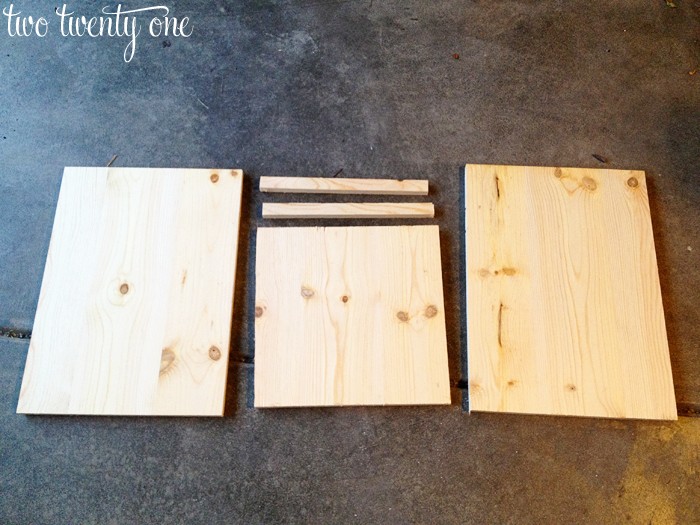
Slide each piece of wood into place. If you measured correctly, everything should fit snuggly.
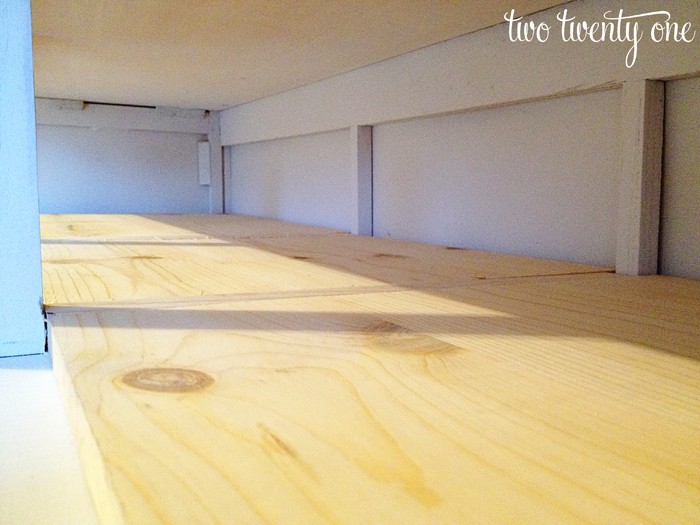
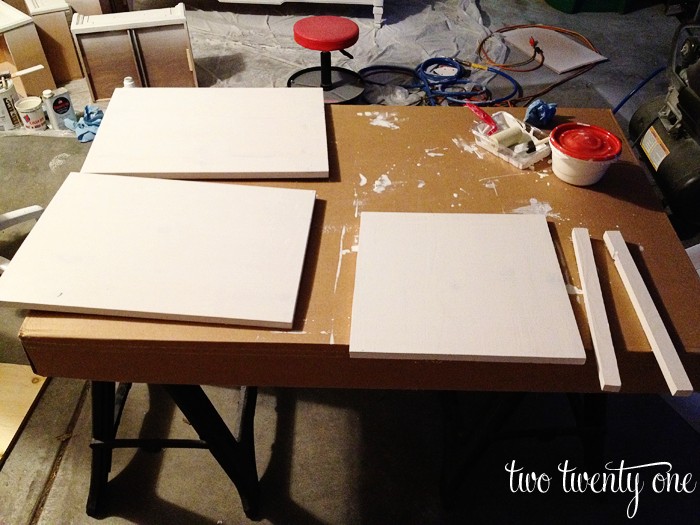
Now it’s time to sand, prime, sand, and prime the pieces on all four sides. I recommend using a cheapo foam roller and brush when using primer. It’s not worth it to use a nice paintbrush.
Painting the Dresser TV Stand
After the sanding and priming marathon, it’s time to paint the dresser, drawers, and shelf pieces. I recommend two coats in all, using another inexpensive roller to roll the paint onto the larger surfaces. Then, I use a quality angled paint brush, like this one, to go over the paint, smoothing it out. On the smaller areas I recommend a smaller angled brush. To minimize brush strokes, I used Valspar ultra white paint conditioned with Floetrel.
I decided not to seal it with Polycrylic like I did with the sewing machine cabinet. And after using the dresser TV stand for almost 8 years, the paint is still holding up.
Painting Detailed Sections
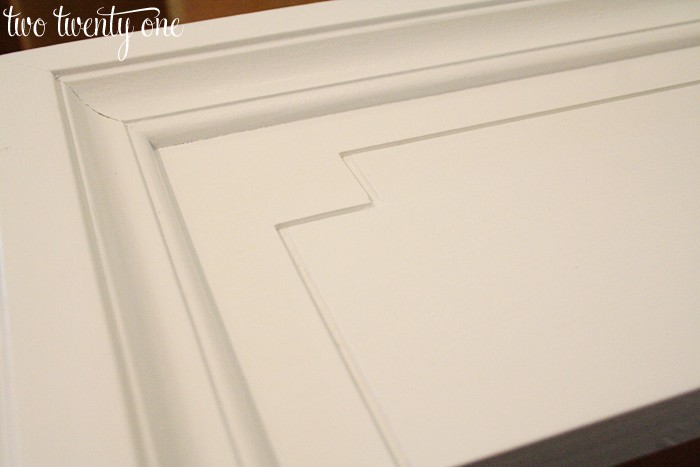
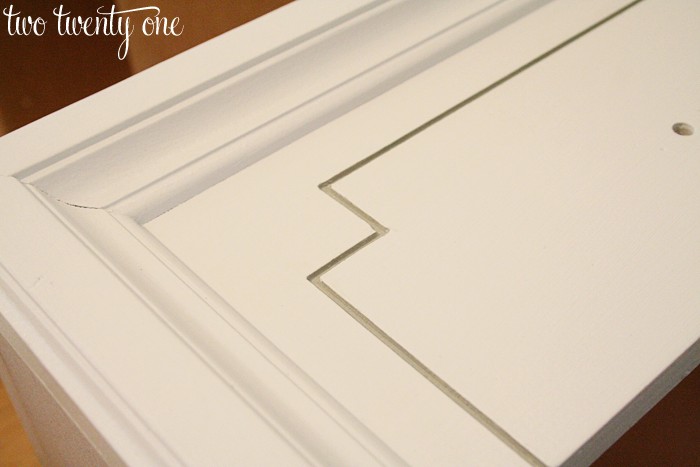
If there are any detailed sections on the piece, go ahead and paint them a different color if you’d like. I used some leftover grey paint (conditioned with Floetrel) from my sewing machine cabinet makeover and a small craft paint brush.
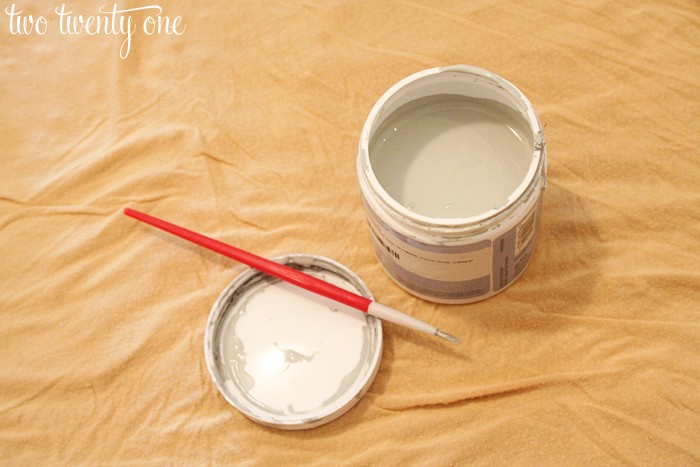
This part is a lot easier than you’d think. Paint the crevices and if any paint went outside the area, use a damp paper towel to wipe it off.
Creating the Electronic Cord Holes
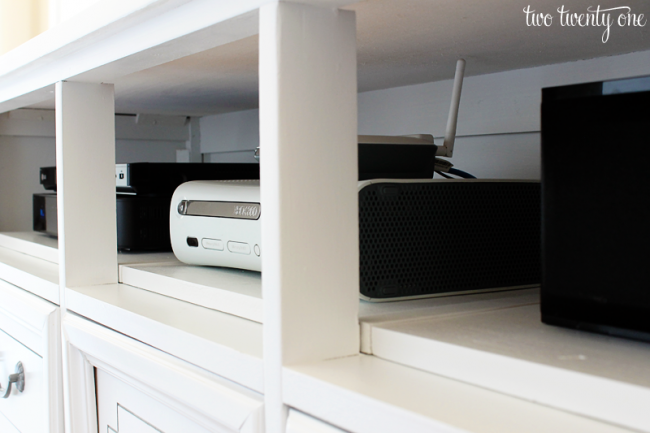
While the paint dries, drill three holes in the back of the dresser for the electronics cords. Don’t go too big because you don’t want to see giant holes when looking at the media console. But you also want to make sure you have plenty of room to fit the cords. I suggest an 1.5″-2″ diameter,
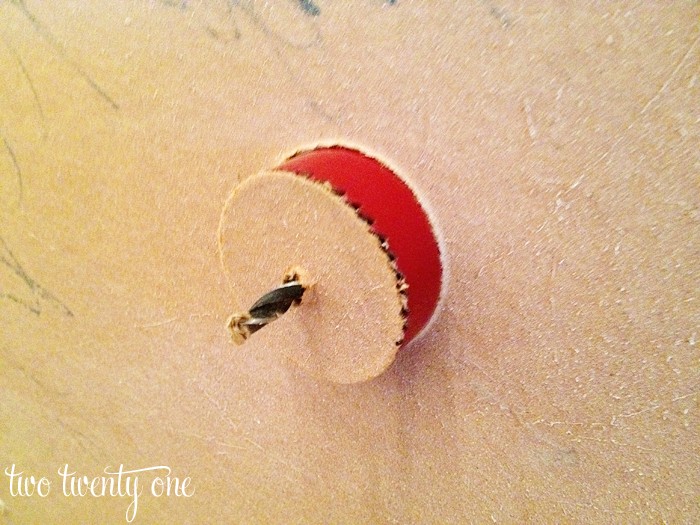
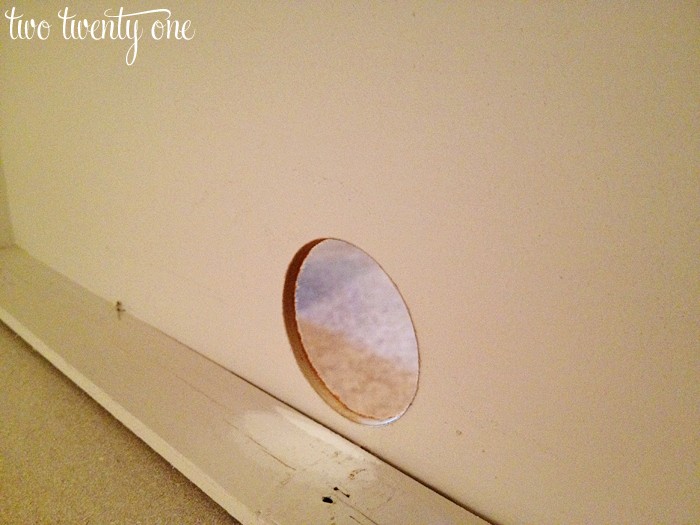
After the holes are drilled, set the shelf pieces inside.
I don’t think there’s a need to secure the pieces into place. Especially if you’re just going to be setting electronic components on top and not really messing with the things on the shelf.
The open shelf allows air to flow around electronics, keeping them from overheating.
Optional: Line the Dresser Drawers
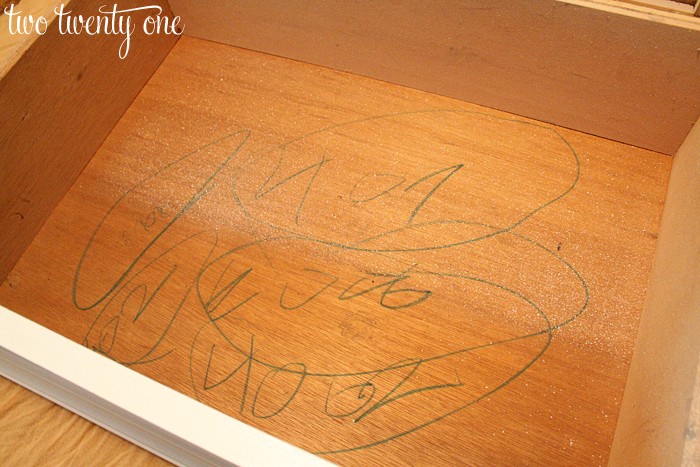
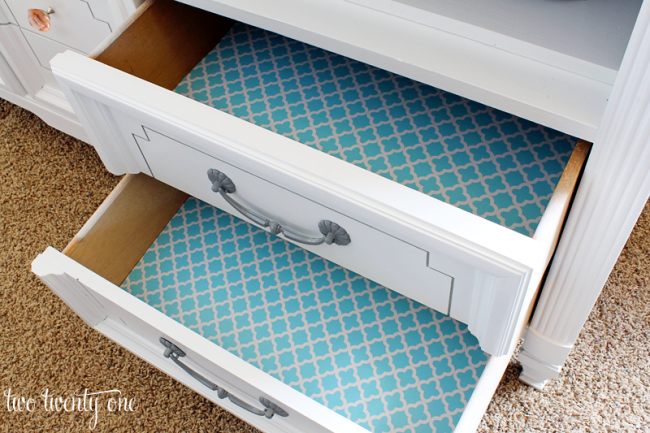
You may decided to line the dresser tv stand drawers for durability. I did this for two reasons. One, a child (probably the owner of Bubbles) decided to get his/her artist on. Two, simply put, I wanted to use pretty shelf liner.
Ahhh, much better.
Painting the Drawer Pull Hardware
If you’d like to give the original dresser drawer handles a make over, I suggest spraying them with a primer, like this one, and then spray painting them. Then I attach them to the chest of drawers. I added the two pink center pulls to mix things up a bit. Keep in mind you can buy new pulls for all the drawers if you’d like.
Looking for unique hardware pulls? Check out ebay, Etsy, or thrift stores.
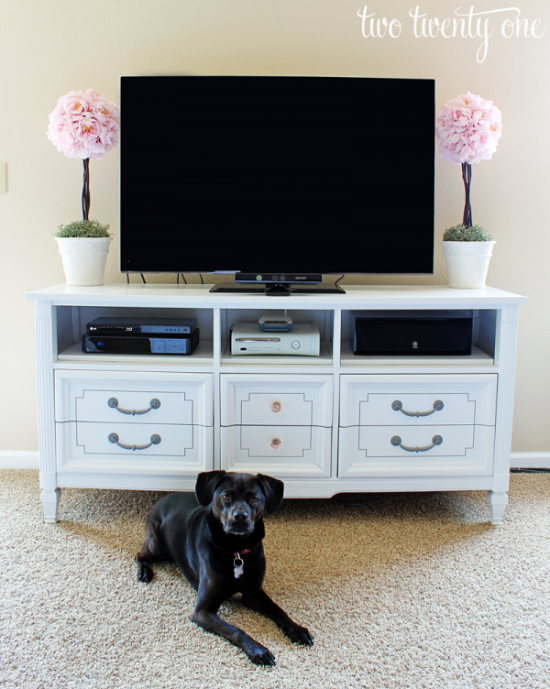
It’s been 8 years, and we’re still using and loving the dresser TV stand as our entertainment center. We love how it’s a unique, one-of-a-kind living room furniture piece. It fits seamlessly into our decor. And while it’s one of my least favorite DIY projects to date, I’m so glad I tackled this beast.


I am impressed by your Craigslist trolling and ability to find (and see past the imperfections) of this dresser in the first place!! I want to do this too… but I am craigslist-afraid.
But… my friend did this to a dresser she found at a flea market and I’m buying it for her – does that count??
It looks amazing! I’m so impressed to see the before and afters! I know there were a lot of steps and work involved but it seems that it was totally worth it!! Love it!
The dresser is gorgeous! I am in love with your gray accents, I never would have thought of that. Also I read your post about Bubbles and the dresser’s previous owner on house arrest, hilarious! I recently sold my first piece of furniture on craigslist, I immediately called my husband saying “hooray I wasn’t murdered!” haha you never know who you will meet on craigslist
Hoping you didn’t cover this elsewhere, but can you talk more about the Penetrol and Floetrel? What do they do and how did you know what to use?
Hey Carly! Penetrol and Floetrel are additives that slow drying time and minimize brush strokes. You use Penetrol in oil-based paints and Floetrel in latex paint. It says on the sides of the bottles how much to use.
Great, thanks!
So did you use Floetrel in your painting? What happened to all of the decorative junk on your dresser? You really should be more clear.
I wonder how many people read my comments and go “Dude. That girl has issues.” I mean, they’d be right on but you get me…I think. 😉
Holy Awesome! I love it!
What are the pros/cons of not sealing?
Hey Brianna! If you have a piece that’s going to get a lot of use like a desk or table, I’d recommend sealing it. We won’t be messing with the TV stand much, so I decided not to seal it. We’ve been using the TV stand for almost 3 weeks now, and I’ve only opened the drawers to take photos.
This looks SO awesome, super classy! I’m very impressed 🙂
What is the height of the dresser? it looks like it was pretty low to begin with. wondering what i should look for…
Hi Kathy! The dresser is 31.5 inches tall and 64 inches wide.
Absolutely amazing, I love it! Thumbs up to you for seeing the potential in that dresser . . . I probably would have scrolled straight past it, but it came out so beautifully. Great job!
So in love with your dresser! I really like the gray accents and those pink knobs are growing on me 🙂
I’m in the middle of my own dresser turned TV stand project right now and all I have to say is polyurethane is the worst! Thank God for spray lacquer haha
Wow! What a stunning transformation I love the end result! xo
Super Cool Project! I keep trying to get one of these at G.W. or the S.A. but everybody is beating me to the punch! I’ll get one though, one day!
JoAnn
sweetpepperrose.blogspot.com
You go girl! Can I ask a quick question? Why did you add Floetrel to the paint?
Love the new cabinet!
blessings,
karianne
Someone needs to read more carefully. 😉
You did an awesome job with this! It seriously looks gorgeous!
This is amazing! I need to start going to thrift stores to find a gem like this! Thanks for sharing!
http://beyondthegradebook.blogspot.com/
looks great! The killer question is what will you actually be watching – the tv show or the actual stand?
This looks amazing. Wow! The finish is fabulous and I love the spaces you turned into shelves from drawers. Such a brilliant idea. Great job!
Such a beautiful find once you spruced it up! I wish I had that sort of creativity!
Fabulous transformations and great pictures.
Chelsea this is fabulous! I love the whole transformation!
I love it, and thanks for the details. I bought a sprayer from Harbor Freight, but haven’t used it yet. I’m chicken =)
I want to do a furniture overhaul so badly! I just don’t have the right space in my little box apartment! Can’t wait to buy a house and go hogwild!!!
which of the sprayer did you get? the 32 oz. Heavy Duty Multi-Purpose Paint Spray Gun? I haven never used a sprayer, but see the beauty and magical things that happen with a sprayer (like what you did)- so I’m an instant fan!
It looks amazing! Especially with your topiaries 🙂
Hi, beautiful project!!!! Question, why did you spray the primer on and roll/brush the paint on? I’m in the beginning of re-haling an old, large wooden desk and have been trying to decide whether I should spray or brush the paint on.
Thanks
Hey Renee! I sprayed on the primer to save time since the piece is so big. Good luck with your desk!
I have a question. What is the easiest way to get droors out of a dresser like this? I bought a similar dresser on Craig’s list and thought I would be able to slide the droors right out, but no such luck. I’m trying to figure out if I have to take the back off of the dresser or if there is some other way.
I am looking to do this soon myself. Thanks for the handy tutorial. It looks fabulous!!
I recently bought a paint gun and would love to paint everything in my path. I know you said that you used your paint gun to prime this piece because it was faster and that you used brushes to apply the paint layers. Is there a reason why you didn’t use the paint gun for the paint? I want to make sure in my joy to use the paint gun that I’m not spraying when I should be brushing for a better outcome!
Found you via the Pinterest Challenge on younghouselove! Glad I found you.
Hey Dana! I didn’t use my paint gun for the latex paint because the paint was coming out too thick. (My husband said that I couldn’t adjust the psi on the air compressor when I asked. But months later my father-in-law told him he could. Gah, husbands.) I was OK with the primer coming out a little thick because I was going to sand it anyway.
Thank you for this! I made one myself by following your simple instructions!
Here’s a picture of it
http://pinterest.com/pin/97108935687001969
Amazing job, Stephanie! It looks awesome! How did the process go for you?
What do you do to keep the roller from bubbling up on the larger surfaces? I’ve tried that once and it came on too thick and bubbly. It made the perfectly smooth surface very rough. Any tips? Thanks!
It’s an amazing article for all the internet visitors; they will take benefit from it I am sure.
Hi, I “garbage-picked a dresser yesterday for this this purpose. I love the outcome of your project and happy to hear Lowe’s will cut the pieces. My question is that I see you have cut the two flat pieces/ for the electronics to sit on, but what are those smaller pieces for? THANK YOU!
Woot! The smaller pieces are part of the shelf. They are behind the two vertical supports. Best of luck with your project!
Thank you, I am so glad I came across your site. I was wondering myself how to balance the wood inserts. I wasn’t sure if those small pieces needed to be surpported. The piece it would be laying on is not very solid or strong. Your thoughts?
Your piece came out awesome, great job.
Love this! I managed to pick up a dresser off of CL for $30 (and a bunch of other stuff too!), and I then converted it into a tv stand. My whole family thought i was crazy when i told them my idea, but they all love it now!
http://25.media.tumblr.com/923115329fcde067011252696b34590c/tumblr_mpfsvcRmh91rse58po1_500.jpg
For the primer- since you put the primer in your paint sprayer, how did you get the primer out of the sprayer when you were finished? Primer is so thick and hard to clean, does it mess the paint sprayer up?
Is it ok to spray both the primer and the white paint color?
Love this project. Currently halfway through finishing a similar one of my own. But where did you get those amazing potted flowers next to the tv?
I used this to do the exact same thing with a dresser I found at Goodwill for $50. It is turning out amazing (still doing the finishing touches on the paint). I don’t think it would have looked anywhere near as good without your tutorial. Sanding and the floetrol made a huge difference and I never would have bothered before reading this. Thank you so much for the tips.
Thank GOODNESS somebody finally wrote how many steps it takes to do a DIY project! I am in the middle of refinishing a giant hutch I found on CL on the cheap, and in my Pinterest searches, they made it sound like it’d be such a quick an easy job. Nooooo! Of course, the end project will be worth it, but it’s not an easy thing. Kudos to you for putting in all of the effort and detailing it step by step. I am a new reader, but will be poking around a LOT more. Thanks!!!
Love this!! Question is did you glue the shelf pieces down? If you did what did you use?
Nope, I set the shelf pieces inside. I didn’t see the need to secure them.
I love it !!! I have to say this is one of my all time favorite dresser makeovers. I’m in the middle of a similar project and was wondering where did you get that beautiful shelf liner ? Thanks !
Marshalls (The Macbeth Collection)
Thank you !!!
I love what you did with the dresser. I’ve been wanting to change up what I use for my tv stand and finally found a good dresser on Craigslist yesterday. Let’s just say I live on the far east side of Indy and drove from my work in Carmel all the way to Danville during evening rush hour to get the dresser. I’m so excited to get started on it and finally get my tv off the coffee table.
Greetyings I am so thrilled I found your web site,
I really found you by accident, while I was searching on Askjeeve
for something else, Anyways I am here now and would just like to say
thank you for a incredible post and a all round interesting
blog (I also lov the theme/design), I don’t have time to read through it all at the moment but I have sved it and also
added in your RSS feeds, so when I have time I wull be back
to read more, Pllease do keep up the superb work.
My weblog webpage
Hi Chelsea,
I was reading your post about your dresser-turned-TV console and I had a few questions. Let me start by saying the piece looks beautiful! I paint a lot of furniture out here in California and wanted to more about the Floetral and Penetral (sp?). Now, I do have Floetral in my “tool kit”, but I have to admit I don’t use it that much. I guess my question is this…When your painting and or primering do you follow the manufacturer’s directions for the additive exactly or do you “eyeball” how much you pour in? For exmaple, I’m currently painting a credenza and I pour my primer into a tray without measuring how much I put in. How exact are you with measuring the additive to the paint/rprimer ratio?
In that same post, I also noticed that you painted the dresser with a sprayer. Me and the sprayer have not been good friends. I bought one from Home Depot to use with our air compressor and had terrible luck with it. Could you tell me a bit more about the Harbor Freight one you have? I have a Harbor Freight right around the corner from me.
Just stumbled onto your blog today and loved looking at all your re-do’s. I will definitely add your blog to the list of blogs I read.
Thank you,
Katherine
Wow, you did an awesome job! Sounds like it was a lot of work but well worth the trouble. Beautiful!
Hi Chelsea-I love your Upcycle. It’s absolutely BEAUTIFUL. I’m starting on a dresser of my own to use in my bedroom. However, I need a little help and a little clarity. Under one picture you say “I always use a cheapo roller and brush when using primer. It’s not worth it to use a nice paint brush. Write that down.” However under another picture you say “I used a paint sprayer (also from Harbor Frieght) to put on the Zinsser primer (conditioned with Penetrol). I saved hours spraying on the primer rather than painting it on with a brush. Hours.” I’m a little confused. Did you used two types of primer, one with a brush and one with the sprayer? I’m not trying to be nitpicky, I just need some understanding because this is one of the more informative tutorials I’ve read, I’d like to follow it and achieve great results like you did. Thanks a Million and Keep Posting.
Thanks, Dezzy! I used the paint sprayer to paint the dresser. I used the cheapo roller to paint the boards that made up the shelf because I had painted the dresser with the sprayer days before and it wasn’t worth it to me to break out the sprayer, mix the paint, and use the sprayer so I opted for the cheapo roller. I used the same primer and thinner (Penetrol). Hope that makes sense!
i wont be using palm sander. =( what size or grain (sorry not much of a handy person) of sanding i could use for this?
Are you going to hand sand the dresser? I think I used a medium grit with my sander.
You are a girl after my own heart I hope your new Husband knows how lucky he is.Beautiful job.
I’ll pass that along to him! 🙂 Thanks so much!
That looks great, I can’t wait to re-purpose my son’s dresser
Thank you so much for this! Hubby and I just made our own over the weekend and we are in LOVE! 🙂
Great idea. I have a dresser in our garage just waiting for this. I just need to get on it!
I went yesterday to our local Salvation Army Store and found a dresser I thought I could transform into a TV stand. My measurements of one particular piece would work out for me, but I noticed that they have a 25% off sale on Fridays (the day following my visit!) It was marked at $29 So, when I left to visit the next shop, I took a moment to get some Pinterest ideas for what I had in mind. Your piece was the third one I viewed. I started skimming through, but then – WAIT!! Back up, isn’t that the VERY SAME PIECE I just saw at Salvation Army?????? I couldn’t believe my eyes! I had other errands to run, but thought I’d be back the next morning to get it. Of course, I couldn’t sleep much at all, worrying that someone would snag it from underneath me before I could get back. Yippeeee! It was there again this morning, so I bought it and brought it home, but first it needs an “airing out” because it smells strongly of cigarette smoke, and I’m allergic to it! I am so anxious to get started, but it will need to sit for a day or two with coffee beans inside to try to get rid of the smell before I can get started. I imagine the refinishing process will help a lot with that, but the raw wood inside will need some help.
That’s crazy, Pam! I’d strongly recommend using the Kilz primer to help seal in the cigarette smoke. Best of luck painting it!
I have been told that you should prime every inch of the inside and outside of both the body and the drawers and that will seal in the smoke odor.
I am actually going to forgo the primer step and use some DIY chalk paint because I want a really vintage look. I read all the posts and noticed that you answered my question – what are those 2 extra pieces of wood for? But I still don’t get where they actually go… I have 2 beautiful antique oak dressers that I got at a yard sale for $5 each because they have missing top drawers! I am going to put baskets in those spots. But I am still confused about how to measure for the replacement shelves. My dressers have only 2 drawers missing side by side. I feel like a real dunce! And those 2 extra pieces seem to be a little shorter than the other pieces. In my experience Lowes usually only makes straight cuts. Did they cut each of those pieces for you or did you have to tweak them at home?
You can see where I put the 2 small pieces in this photo (http://staging.twotwentyone.net/wp-content/uploads/blogger/-w-qbu00_Nc8/T_zYQUg3dwI/AAAAAAAAD6U/NiyP0uKU8DY/s1600/tv%2Bstand%2Bturned%2Bdresser%2B2.png). Look at the wood grain and you can see them where the support wood pieces stick out (the two in the front and two in the back). They’re the same width as all the other pieces.
Thanks sooooo much for the speedy reply! I see it now! And I now realize that having only 2 top drawers I’ll only have to have one piece cut… I am new to Pinterest. I was holding out because I had a sneaking suspicion that I would become addicted… and I AM! But I just have to thank you for your very specific instructions. I looked at dozens of these but none actually described HOW they installed the shelves! Thanks so much!
Just a curious question…what did you do with the drawers you removed? I have a really beat up dresser in my garage (picture three boys growing up using this poor thing) and i was thinking of turning it into an entertainment dresser like yours. But I just cant see getting rid of all the drawers. My boys (and humidity while out in the garage have destroyed the thin board stuff they use as shelves inside the dresser. Not to mention all the runners are hanging off one end or the other! My biggest problem is that the top is laminate. How would you deal with that?
Hi I wanted to know what size boards did use for the top shelves.I am currently turning a dresser into a tv stand using your steps. I love the way yours turned out!!
Thanks! Unless you have the same exact dresser as me the measurements won’t be the same. You’re going to have to measure your dresser to determine what size of wood you get for the top shelf.
Just wanted to say a huge thank you! We had a flood in our basement last summer and ended up needing a new entertainment unit (along with everything else). My husband was very skeptical, but liked the idea of free, since we already owned a perfect dresser and used left over paint and materials from our renovation. The results were fantastic! My once skeptical husband now shows it off to everyone who comes over. Thanks a million for the inspiration!!
Thanks very much for detailed instructions. I see someone else asked but didn’t see a reply about if you turned the unused drawers into another project or simply disposed of?
Thanks!
Amy A
I found a great dresser for really cheap on Craigslist to refurbish.So I decided to check out pinterest for some ideas and what do I find?! The exact same dresser with step by step instructions on how to refinish it! Thanks for cutting out all the guess work for me I’m so excited to get started on my project!
You’re welcome! Have fun!
This is awesome great job!
Hi,
Did you remove old varnish before you primed it ?
No, just sanded lightly.
Love this 🙂 I’m in the market for a new toddler friendly tv stand, was looking online at new pieces. … holy cow upwards of $900!! I’ve redone a bunch of furniture so I don’t know why I hadn’t thought of this sooner; you’ve inspired me!! You made it look so easy I’m positive I can do this.
My question is,
How many gallons is your air compressor? We have one but I’m worried it won’t have enough juice for pray painting! !
Love this!!!
I have a china cabinet with the same sort of finish on the front and on the shelves as your drawers had. This post gives me hope that one day when I have a few days to spare (huge cabinet) it can end up looking pretty good actually. Your tv console looks awesome. Great tutorial, thank you.
Gorgeous and ingenious! Absolutely love it!
It may be the way the camera took the picture, but the center seems to be bowing just a tad bit. You may want to consider reinforcing the back with stronger material. Again it may just be the angle, but better safe than sorry.
Hi Chelsea,
A great project and VERY on trend I think!
Shared in our latest post http://www.renocompare.com/2015/12/interior-design-trends
Hope you like it, Greca
Beautiful !!! 🙂 Thank you for the step by step … Have a dresser with a couple of wonky drawers … So this is perfect !!! 🙂
Would it be okay to use chalk paint for a project like this? I don’t have a ton of experience and i’ve heard chalk paint is very easy!
Thank you! Such a great idea!!!
Hi! I love what you have done. I have a piece that I think would look amazing if I did this!
My concern is that when I pull out the top drawers for the areas where the cable box would go, there isn’t any wood board/shelving to rest the new cuts of wood on they way you did.
What am I supposed to do? Sorry if this is obvious. I’m new to this!
Thanks!!
I like the DIY for the media shelf portion, but it is a CRIME to paint a piece like this! The wood is gorgeous, I would never ever cover that stain up with some white paint. You can get a “painted” media cabinet at any Target that looks convincing enough, but real, true wood with beautiful lines can cost a fortune. This makes a $1000 piece look like a $200 piece.
Trust me, this piece was never $1000. It’s veneer. I don’t believe in covering up all good wood, like with my late grandparents’ antique buffet (http://staging.twotwentyone.net/re-coating-the-buffet/). But I had no problem painting this dresser I paid $50 for.
It’s amazing how a little time and effort can turn an old dresser into that! Really love that white paint finish its really captivating, but my favorite is how you did the grooves in the drawers. It really brings it all together, looks like a piece you would buy at a store!
What did you use the Smokey Gray Gloss for?
All of the pictures are missing now 🙁 😔
Thanks for letting me know! Are you seeing them now?