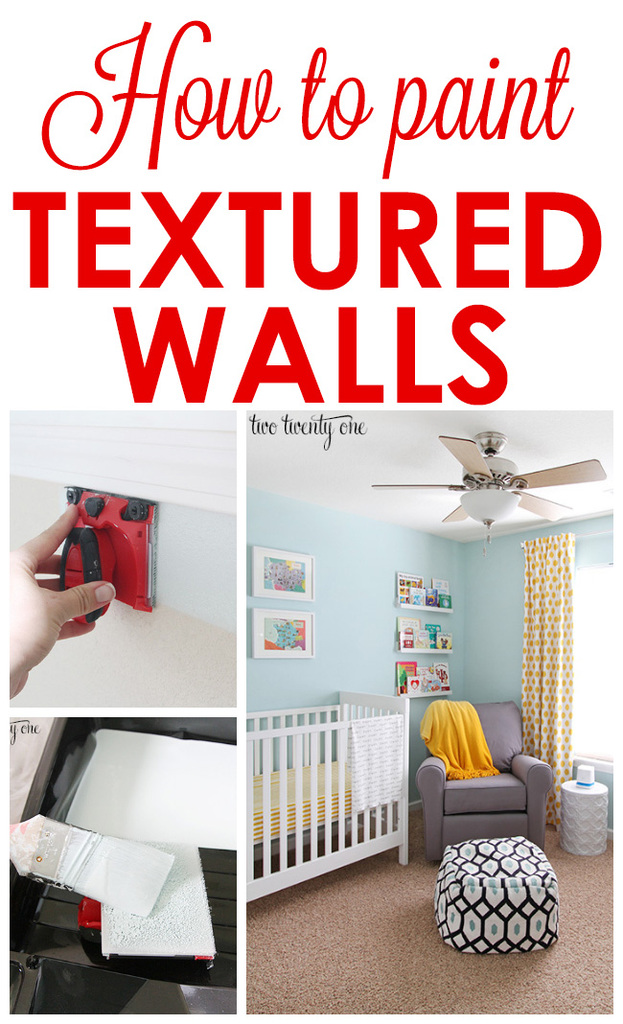
How To Paint Textured Walls
Today I thought I would share some tips on how to paint textured walls. I’ve added it up and I’ve painted rooms in our house 8 times. That includes painting the kitchen and my home office twice. I’ve learned some things along the way so I thought I’d share my textured wall painting wisdom with you.
To be clear, our walls are an orange peel type finish. And to be perfectly honest, I don’t really want to have a house with textured walls in the future. While there are pros to have textured walls, like you don’t see scuffs and marks as easily, I’m just not a fan of the look of them.

First, I’m going to share step by step how I paint a room. And then at the end I’ll share some general tips.
1. Fill Holes
When it comes to filling holes, I like to use this spackle. It turns white once it’s dry.
2. Remove Outlet & Switch Plates
Remove electric outlet and light switch plates. Use a plastic zippered bag or small plastic container to keep all the screws together.
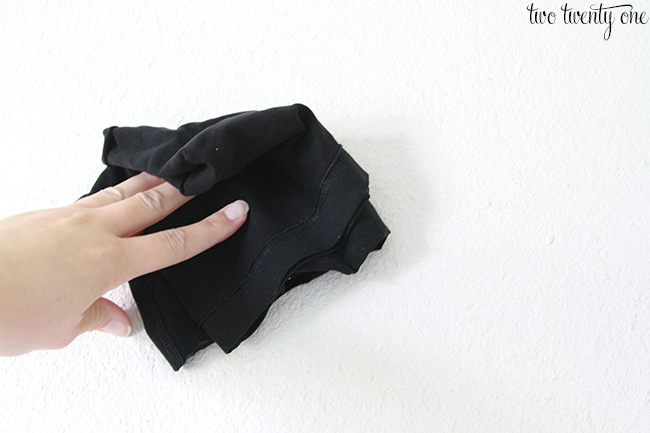
3. Wash the Walls
I feel like dust tends to settle on textured walls more because of all the little grooves. So I use a damp rag to wipe down the walls before I paint. Make sure your walls are dry before you apply the paint.
4. Tape Off Baseboards
This just helps with any paint specks that may fling off your roller. And it really doesn’t take that long. If I can crawl around the floor taping off the baseboards and paint a room in 4 hours while 7 months pregnant anyone can do it. This is my all-time favorite painters tape.
5. Edge the Room
I paint around the baseboards, ceiling, around closets and windows with an edger. And I tackle the corners of the room with a paintbrush. See Tip #4 below on how to apply paint to the edger.
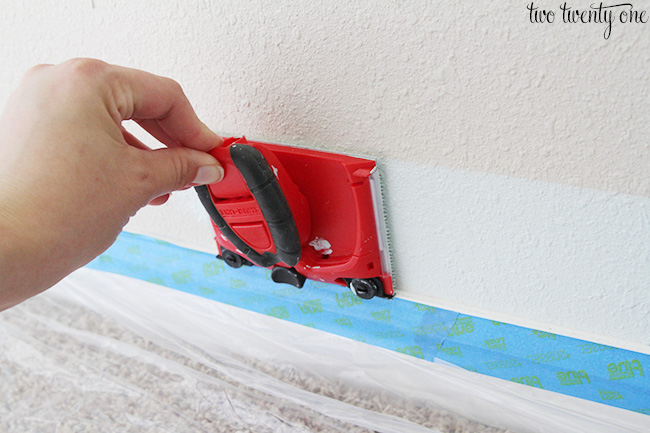

When I edge, I move the edger back and forth to get full coverage since the walls are textured. So I’ll drag the edger a couple feet to the left, then go back a couple feet to the right, and repeat one more time or until none the old paint is showing through.
Note: I was pregnant and lazy so I didn’t remove that electric outlet cover until it was time to paint around it. We ended up replacing the outlets altogether to update them from ugly almond to white.
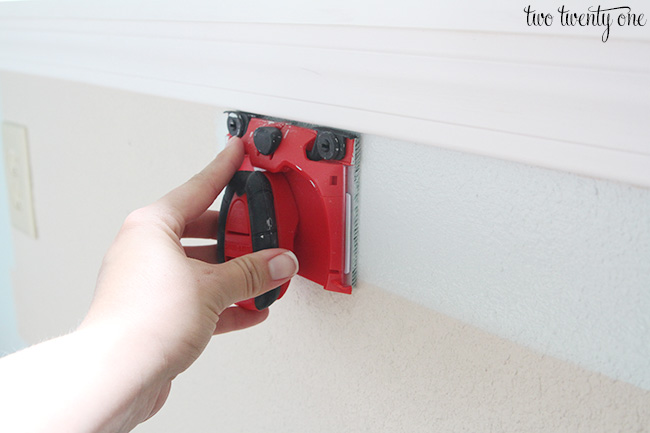
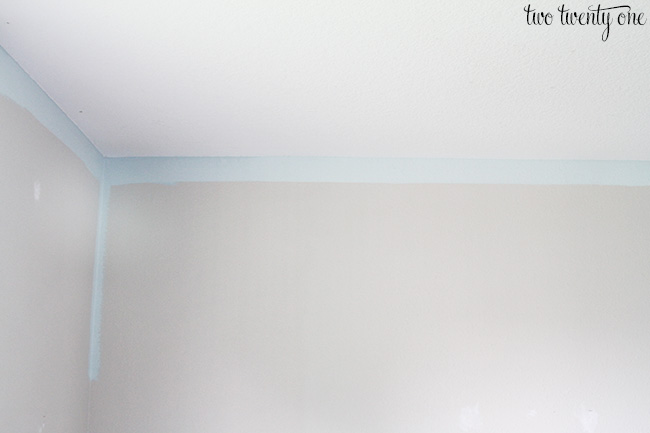
In this photo below you can see where I edged around the ceiling. You can also see where I used my paintbrush to get the corner.
6. Paint Remainder of Room with a Roller
Paint the rest of the room with the roller.
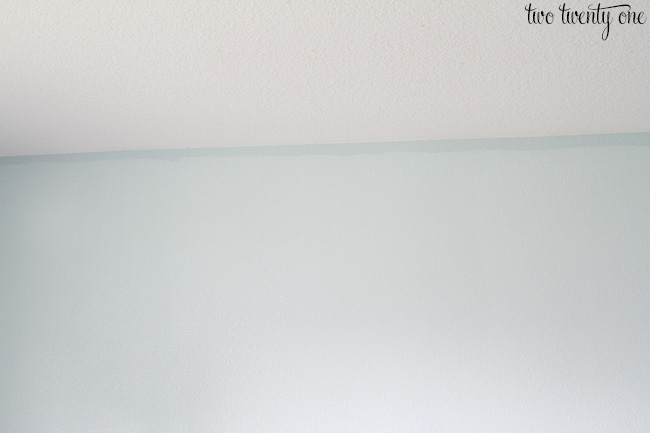
In the photo below you can see the dried paint I applied with the edger at the top of the wall, and the lighter, wet paint I had just applied with the roller.
I’m tall enough that I don’t need a paint roller extension pole, but if you can’t reach the top of the walls with a roller you may want to invest in one.
7. Remove Tape and Tarp
Remove painters tape and plastic tarp.
8. Replace Covers
Replace electric outlet and light switch covers.
Tip #1
If you want to minimize the look of the texture, get flat/matte paint. I finally wised up to this a couple years ago. Our kitchen, guest bedroom, and nursery are all done in flat paint. The only drawback to flat paint is that it can be a little harder to clean, but I haven’t had an issue with it, especially in the kitchen. I highly recommend checking out Sherwin Williams Emerald flat paint. It’s flat but very easy to clean.
Tip #2
When painting textured walls, use a thick nap paint roller cover. I’m talking 3/4 inch to 1 inch thick. This will result in better coverage, allowing the paint to get into all the little grooves. However, don’t use a thick nap roller cover if your walls are smooth.
Tip #3
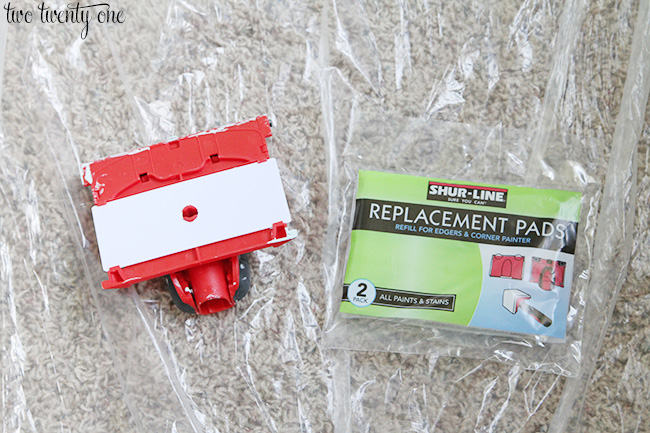
Invest in an edger. Cutting in with a paintbrush is unnerving to me so I LOVE this little thing. Plus, it saves me so much time when it comes to edging.
Tip #4
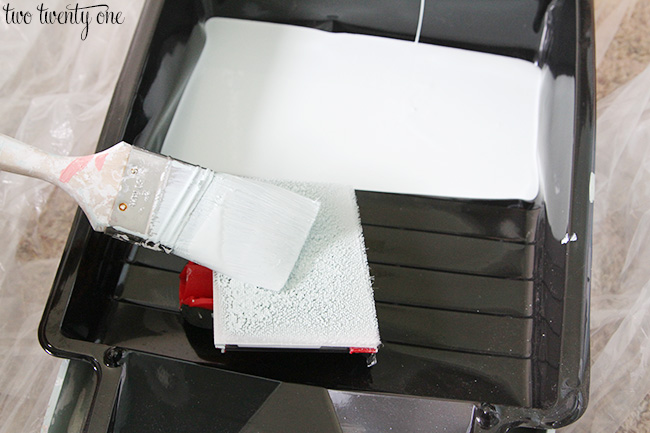
Use a paintbrush to apply the paint to the edger. The instructions on the edger say to dip it into the paint. Don’t do that. Control how much paint goes on the edger by painting it on. And it’s best to put too little on and add more than to put too much on and have paint drip.
Tip #5
Paint in a W motion– make W’s with the paint roller as you paint. This results in better coverage.
Tip #6
Invest in good paint. I used Sherwin-Williams Harmony paint in our guest bedroom and Owen’s nursery. The coverage is amazing and it has zero VOCS. One coat in each room is all it took.
In case you’re wondering, the paint color in the nursery is Sherwin-Williams Tidewater.
Happy textured wall painting!

Thanks for the great tips! I would have to agree with buying a paint edger. These things are amazing and cheap! I used my first one to paint around our new window trim and it was 10 times faster then using a paint brush. My new favorite painting tool.
My husband and I used a paint edger for a while but we were terribly at dipping it too much in the paint. Thankfully, I have learned how to cut in pretty good with just a paint brush now.
How do you fill holes/ spackle the textured walls? Wouldn’t it leave the patch smooth? We have smooth walls with just a hint of texture and I can tell when I’ve filled holes. Super annoying!!
I have always used an edger. To apply the paint I drag it across a roller prepared for painting a wall. You are right dipping it does not work.
Hi, thanks for the tips! I don’t like the splatter texture that is on the walls in our new to us home. The walls are also painted with a semi-gloss finish. What type of colors do best to disguise the texture?
helo guyz….
best wall painting idea
Amazing work Chelsea! Only having the right tools is not enough, but to know how to use them is what makes a project precise and you have just done that. My husband also belongs to construction industry and I can tell may be I am his second love.
Wow! Amazing! Thank you for this post!
thanks for the tips.. i have been painting with a brush on the walls, and a small art prncil yo do edges. it is taking forever.I’m running out and buying an edger right now.
I have a lightly textured wall which I wish to repaint. It has marker scribbles on it. Do u need to sand my wall first? Or just go ahead and paint?
I have the same question. What do you do with repainting textured wall please….☺️