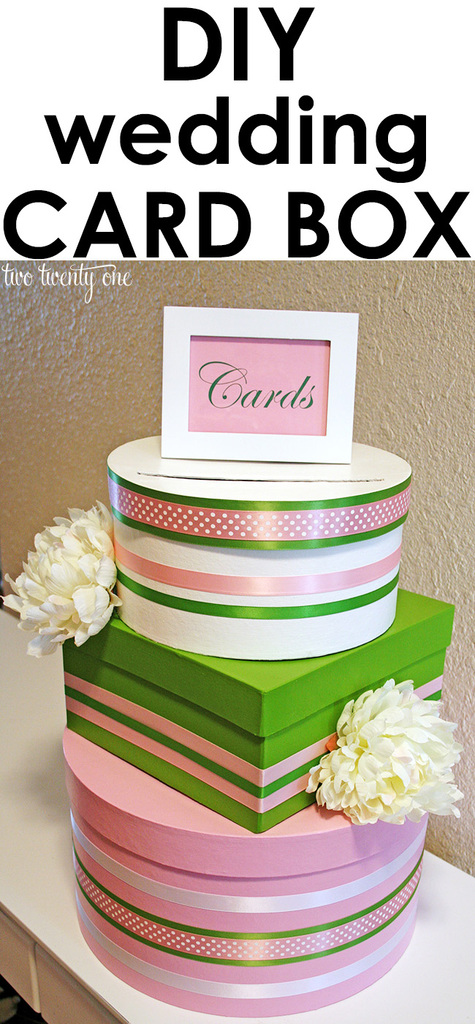
• Home
  • Home Tours
    • Home Tour – Current House
      • Paint Colors & Sources
      • Full House Tour
      • front porch
      • Entryway
      • living room
      • kitchen
      • Dining Area
      • playroom
      • nursery
      • bonus room / loft
      • basement
      • deck
    • Home Tour – First House
      • Full House Tour
      • front porch
      • entryway
      • kitchen
      • home office
      • living room
      • dining room
      • great room
      • nursery
      • master bedroom
      • master bathroom
      • guest bedroom
      • guest bathroom
      • laundry room
      • pantry
      • Closets
      • outdoor
  • Lifestyle
    • organization
    • gardening
    • hair & beauty
    • christmas
    • travel
    • tips and tricks
    • stories
    • party
    • Gift Ideas
    • wedding anniversary gift ideas
    • debt free
    • blogging
    • photography
    • personal
    • podcast
  • baby
    • pregnancy
    • baby & kid organization
    • nursery
    • Tips & Tricks
    • Travel Tips
    • Favorite Products
    • child safety
    • Holiday
  • Projects
    • Home Decor
    • organization
    • outdoor
    • furniture
    • christmas
    • holiday
    • wreaths
    • printables
    • sewing
    • wedding
    • car series
  • recipes
    • desserts
    • appetizer
    • meals
    • holiday foods
    • drink
    • kid
  • Shop
    • Amazon Storefront
    • Affiliate Links
    • Shop My House
    • Shop My Closet
    • Shop Gift Guides
    • Shop Baby & Kid
    • Shop Toys
    • Shop My Favorites
    • Shop Holiday
  • About
    • Meet Chelsea
    • FAQ
    • Advertise
    • Press
  • Contact
    • Advertise
    • Email
    • Facebook
    • Instagram
    • Pinterest
    • Twitter

Two Twenty One

Wedding Card Box

49 shares
  • Share
  • Tweet

Today sharing how to make a DIY wedding card box.

One of my favorite things I made for our wedding was the wedding card box– a place for guests to drop their wedding cards at our reception. It worked out perfectly. We sat the card box on the gift table and guests could easily see where to leave their cards. To be sure they knew exactly where to put the cards, I made a “Cards” sign and put it on top of the box behind the card slot. You can never be too obvious with things like this, especially when serving alcohol.

DIY wedding card box

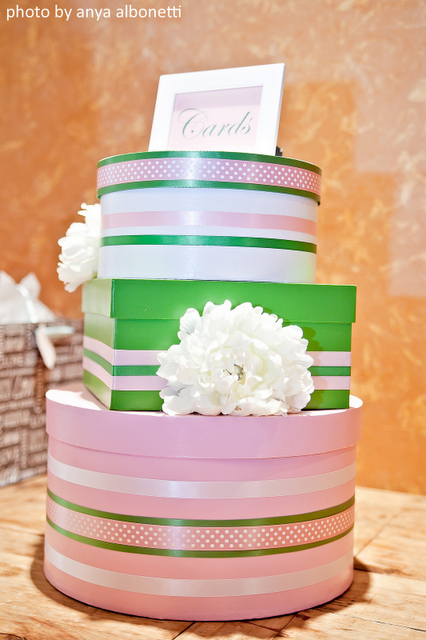
We had around 125 guests at our wedding and this three-tiered card box worked out perfectly.

Now, remember this project was from back in the day so it’s lacking step-by-step photos. I made a one-tiered wedding card box last year– check out the tutorial here for a couple more detailed photos.
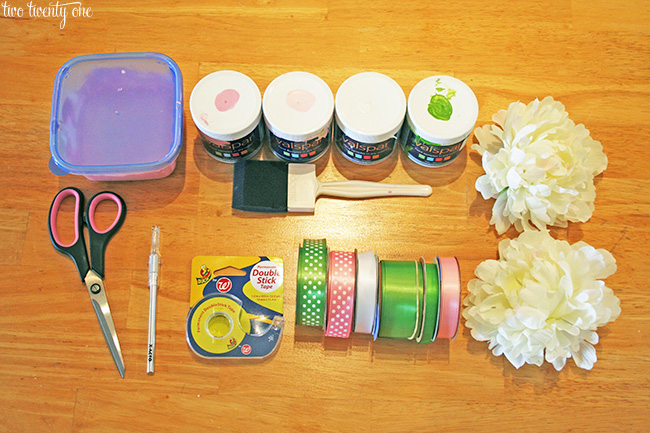
SUPPLIES
paper mache boxes– 14-inch round, 10-inch square, 10-inch round (purchased at JoAnn Fabric and Michael’s, but also available here)
paint … craft store (Michael’s, JoAnn Fabric, Hobby Lobby)
sponge brush
scissors
Xacto knife
double-sided tape
ribbon
silk flowers
hot glue gun & glue
scrapbook paper
picture frame

TIP: Buy your supplies with coupons! This is how I saved a boatload of money on wedding DIY projects. I never bought anything without a coupon. Use coupons for the paper mache boxes, ribbon, hot glue gun, hot glue, paint brush, Xacto knife, silk flowers. Most craft stores take competitor coupons too.

card box supplies

Instructions for wedding card box:
1. Paint the paper mache boxes using your paint and sponge brush. Two coats are best. Allow for ample drying time in between coats.

2. After the paint has dried, begin cutting out the tops and bottoms of the boxes.

3. Begin with the middle box. With a pencil, draw a square 1 inch inside the edge of the bottom of the box. With the Xacto knife, cut along the pencil line.

4. Use the medium box as a guide– place it how you want it on top of the large box lid. With the pencil, trace along the cut-out edge. With the Xacto knife, cut along the pencil line.

5. Moving on to small box. With the pencil, draw a circle 1 inch inside the edge of bottom of the box. With the Xacto knife, cut along the pencil line.

6. Use the small box as a guide– place it how you want it on top of the medium box lid. With the pencil, trace along the cut-out edge. With the Xacto knife, cut along the pencil line.

7. Decorate the boxes as you wish. (I used ribbon and silk peonies.)

8. If decorating with ribbon, use double-sided to secure the ribbon to the boxes. If double sided tape worries you, use hot glue.

9. When finished decorating the boxes, secure the boxes to each other by applying a thin bead of hot glue from the glue gun to the inside edge of the bottom of each box.

10. If decorating with silk flowers, attach with glue gun and glue.

Instructions for “Cards” sign:
1. Print the word “Cards” on colored scrapbook paper.

2. Cut out to fit 3.5″ by 5″ picture frame.

3. Insert into picture frame.

TOTAL COST: ~$35. I can’t remember exactly but I want to say it cost around $35, which is a definite money-saver if you look at the prices of three-tiered, custom wedding card boxes on Etsy (we’re talking $100-200).

Here was the wedding card box in action at our wedding.

wedding+card+box

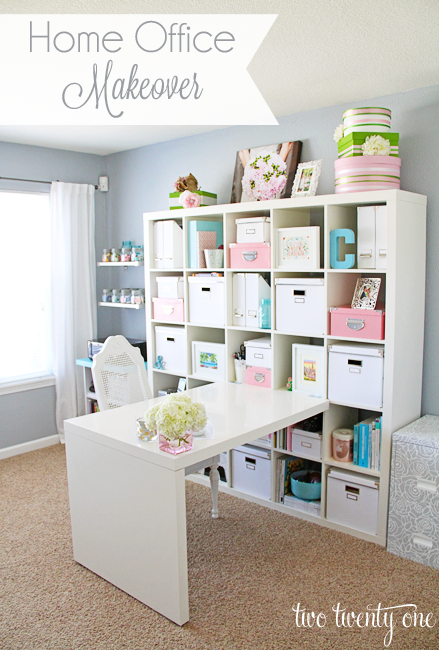
I tried to sell the card box after our wedding but it didn’t work out, so it now lives in my home office on top of my work station with the program box I also DIYed for our wedding.

home office makeover

In case you’re curious, you can read about our wedding and see the photos here:

Before the Ceremony
Ceremony
Reception
The Details

Filed Under: DIY, wedding

Never miss a post from Two Twenty One!

Get the latest DIY projects, organization ideas, tips & tricks and more delivered to your inbox!
Your information will *never* be shared or sold to a 3rd party.
« DIY Flower Girl Basket – Wedding Tutorial
Guest Bathroom Vanity Organization »

Comments

  1. [email protected] says

    January 30, 2014 at 12:42 PM

    Cute! What a clever idea with stacking the boxes on top of each other! 🙂

    Reply
  2. Diana says

    February 3, 2014 at 7:49 PM

    Jealous of your office/workspace!!

    Reply
  3. Anna Fein says

    September 1, 2017 at 3:39 AM

    This is a great post. I particularly loved the tips you have provided. Thanks for the detailed instructions.

    Reply
  4. Dora Hagerman says

    April 17, 2019 at 5:53 PM

    So cute..! I love your creative Idea, thanks for sharing with us.

    Reply

Leave a Reply Cancel reply

Your email address will not be published. Required fields are marked *

Recipe Rating


  • Email
  • Facebook
  • Instagram
  • Pinterest
  • Twitter

Never miss a post from Two Twenty One!

Get the latest DIY projects, organization ideas, tips & tricks and more delivered to your inbox!
Your information will *never* be shared or sold to a 3rd party.
This blog accepts forms of cash advertising, sponsorship, paid insertions or other forms of compensation. The compensation received may influence the advertising content, topics or posts made in this blog. That content, advertising space or post may not always be identified as paid or sponsored content.

The owner(s) of this blog is compensated to provide opinion on products, services, websites and various other topics. Even though the owner(s) of this blog receives compensation for our posts or advertisements, we always give our honest opinions, findings, beliefs, or experiences on those topics or products. The views and opinions expressed on this blog are purely the bloggers’ own. Any product claim, statistic, quote or other representation about a product or service should be verified with the manufacturer, provider or party in question.

Two Twenty One is a participant in the Amazon Services LLC Associates Program, an affiliate advertising program designed to provide a means for sites to earn advertising fees by advertising and linking to amazon.com.

Blog Policy

© Two Twenty One, 2011-2020. Unauthorized use and/or duplication of this material without express and written permission from this blog’s author is strictly prohibited.

Privacy

Copyright © 2023 · glam theme by Restored 316 · Design by Stephanie Jones

Copyright © 2023 · Glam Theme on Genesis Framework · WordPress · Log in

49 shares