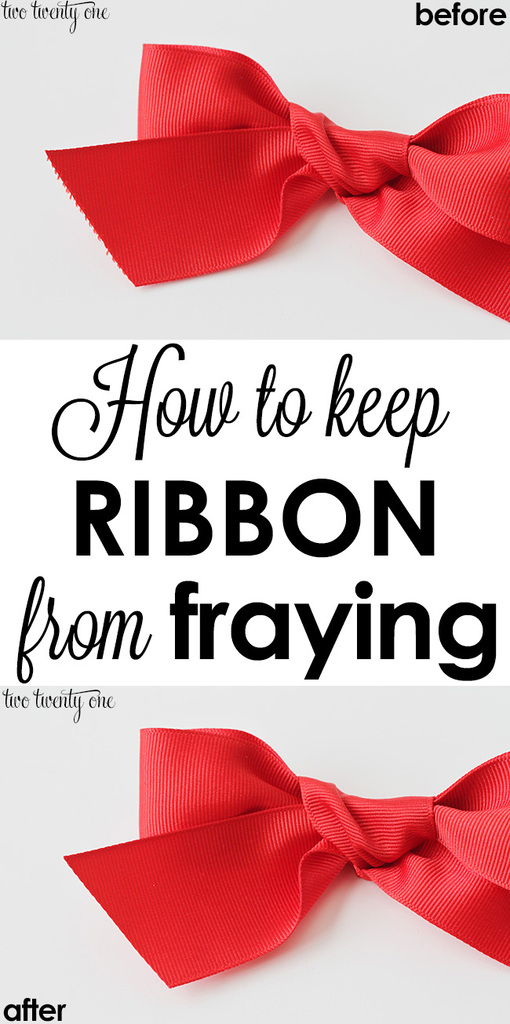
How To Keep Ribbon From Fraying
Ever spend a good 5 to 10 minutes wrapping a present? You want it to look perfect because it’s for someone special. You use pretty wrapping paper and ribbon. Real ribbon, not some cheapo plastic ribbon. But after you cut the ribbon it frays. So you cut it and it frays again. Finally you give up and are like, “Whatever, the recipient can deal with frayed ribbon.”
Well, today I’m sharing one of my secrets– how to keep ribbon from fraying. Ground-breaking stuff right here, folks.
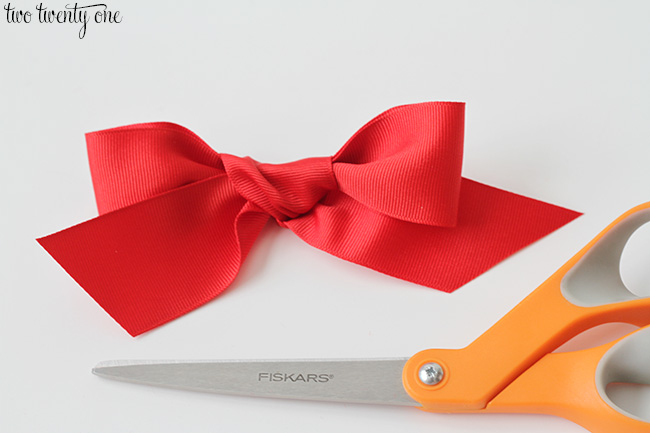
Okay, so let’s say you cut your ribbon and it frays. Cut it again so there’s a clean line.
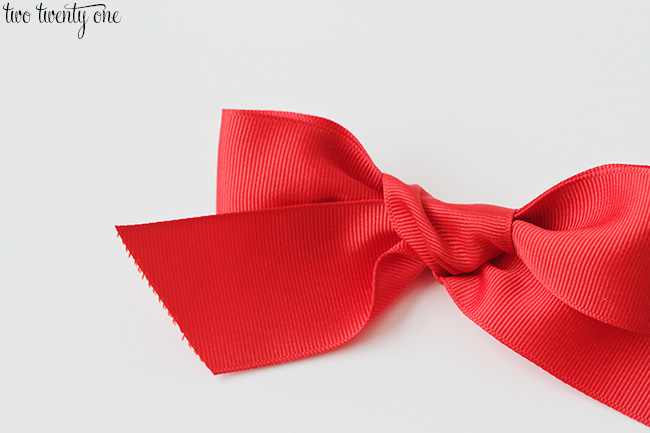
Note: I always use my fabric shears to cut ribbon. Regular dollar store scissors don’t just don’t cut it. Hah, see what I did there?
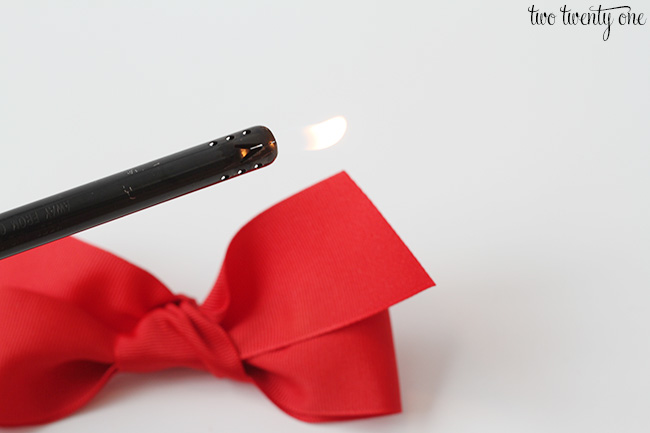
Then, grab what I deem my secret weapon– a lighter. I know. Your mind is blown.
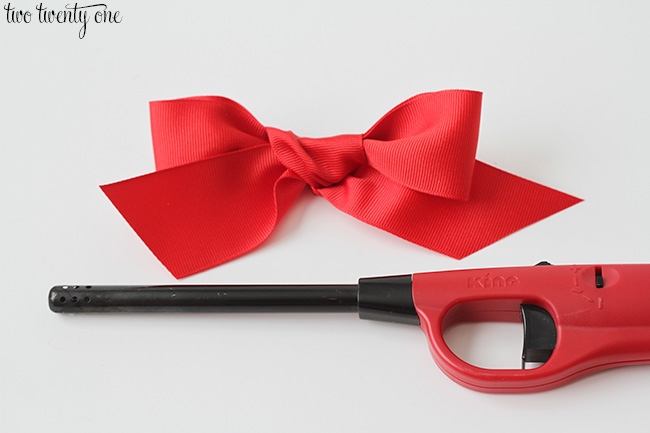
Lightly and somewhat quickly run the lighter along the edge of the ribbon. If you go too hard or too slow you’ll melt the ribbon too much, and it’ll cause the ribbon to look wavy.
It’s best to practice on a piece of scrap ribbon before you use this on a project you’re working on. Just so you get the hang of it.
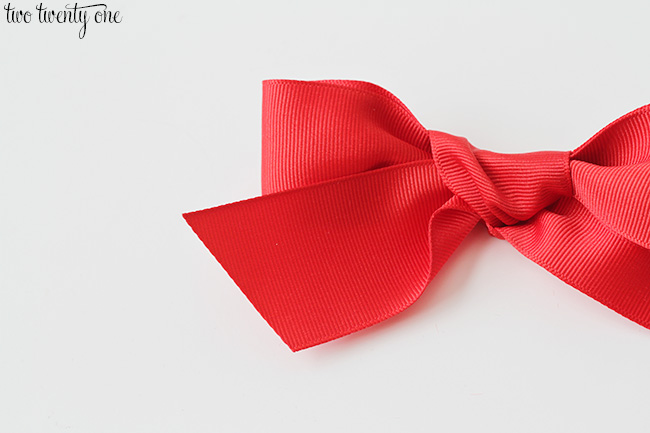
And that’s it! The flame from the lighter lightly melts the edges, making them harder to fray.
Now go get some ribbon, scissors, and a lighter, you pyro. I know you’re dying to try this.


As simple as that? Who would have thought! Thank you for sharing and saving me the frustration!
xo Rachel
Just remember that you can only use this trick with synthetic ribbon. Ribbons made of organic material (like cotton) will burn instead of melt! 🙂
So smart! Though I’m a klutz and I feel like I could some how manage to hurt myself. I feel like this is a task for my pyro loving craft assistant/husband 🙂
This is excellent! Thank you so much for sharing 🙂
http://neatly-packaged.com/
Great tip! When I had my own business, creating hair bows, I found that using a woodburning tool (purchased from any craft store) did just the same thing, only quicker and easier. I used a metal ruler to ensure the line was straight. This might be beneficial to someone creating multiple bows at a time.
Great tip! I should have figured this one out…as a floral designer I have been using this method for years on the frayed edges of silk flowers. It works great with a little practice.
Thanks!!