• Home
  • Home Tours
    • Home Tour – Current House
      • Paint Colors & Sources
      • Full House Tour
      • front porch
      • Entryway
      • living room
      • kitchen
      • Dining Area
      • playroom
      • nursery
      • bonus room / loft
      • basement
      • deck
    • Home Tour – First House
      • Full House Tour
      • front porch
      • entryway
      • kitchen
      • home office
      • living room
      • dining room
      • great room
      • nursery
      • master bedroom
      • master bathroom
      • guest bedroom
      • guest bathroom
      • laundry room
      • pantry
      • Closets
      • outdoor
  • Lifestyle
    • organization
    • gardening
    • hair & beauty
    • christmas
    • travel
    • tips and tricks
    • stories
    • party
    • Gift Ideas
    • wedding anniversary gift ideas
    • debt free
    • blogging
    • photography
    • personal
    • podcast
  • baby
    • pregnancy
    • baby & kid organization
    • nursery
    • Tips & Tricks
    • Travel Tips
    • Favorite Products
    • child safety
    • Holiday
  • Projects
    • Home Decor
    • organization
    • outdoor
    • furniture
    • christmas
    • holiday
    • wreaths
    • printables
    • sewing
    • wedding
    • car series
  • recipes
    • desserts
    • appetizer
    • meals
    • holiday foods
    • drink
    • kid
  • Shop
    • Amazon Storefront
    • Affiliate Links
    • Shop My House
    • Shop My Closet
    • Shop Gift Guides
    • Shop Baby & Kid
    • Shop Toys
    • Shop My Favorites
    • Shop Holiday
  • About
    • Meet Chelsea
    • FAQ
    • Advertise
    • Press
  • Contact
    • Advertise
    • Email
    • Facebook
    • Instagram
    • Pinterest
    • Twitter

Two Twenty One

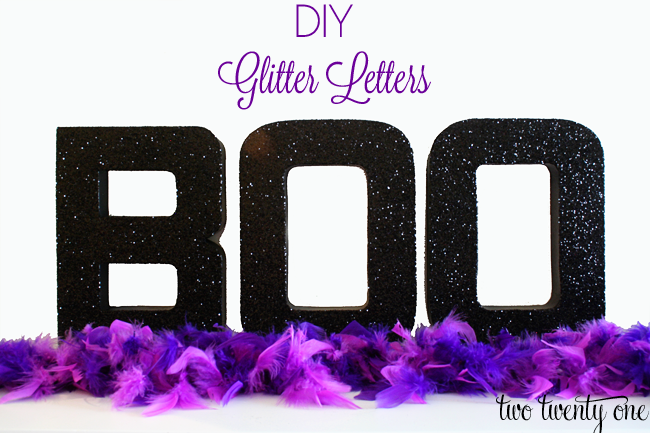
DIY Glitter Letters {Mod Podge}

525 shares
  • Share
  • Tweet
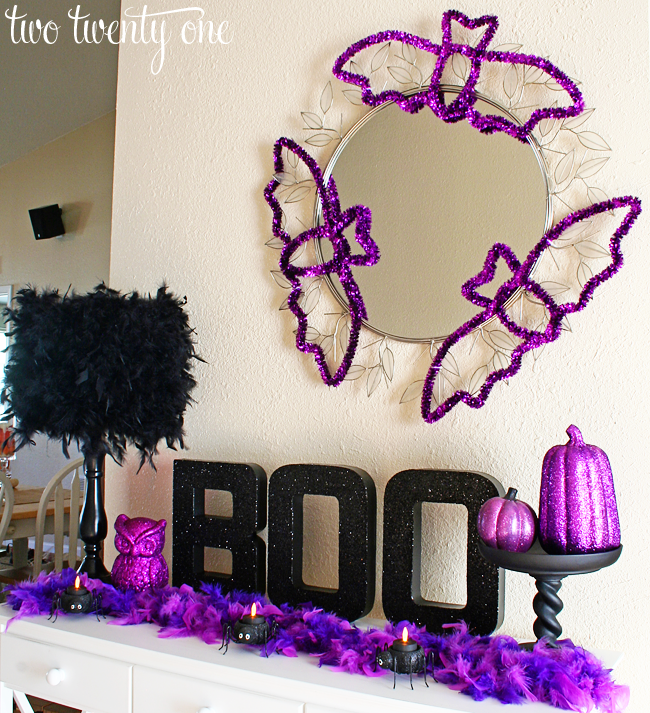
Last week I shared my Halloween vignette, which included the “BOO” glitterific letters I made. Today I’m back to show you how I made the letters, and what I used to keep the majority of glitter on the letters.
 
 
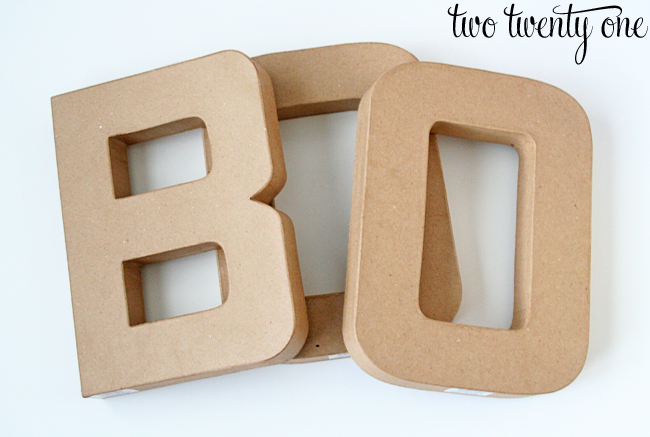
Start with paper mache letters. I used 12″ letters that I purchased from JoAnn Fabric.
 
 
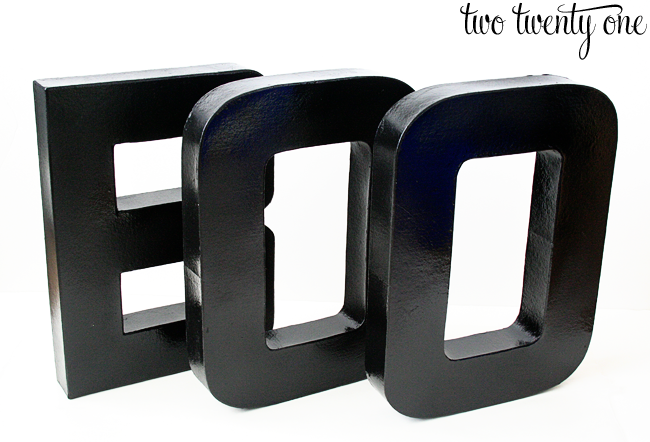
Spray paint the letters. I used grey Rustoleum spray primer, and black gloss spray paint. I’m a devoted Rustoleum girl. I never have issues with their spray paint.
 
 
Grab some Mod Podge and a foam brush. Liberally brush the Mod Podge onto the letters.
 
 
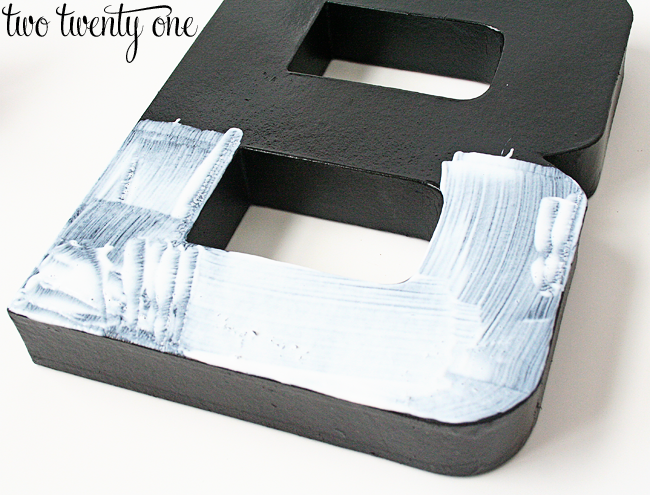
Pour your glitter onto the Mod Podge. Go ahead and put the Mod Podge on the entire face of the letter, and then pour the glitter on. I did this with the O’s and they turned out fine. Doing the B half and half worked fine, but it was easier to do the entire face of the letter.
 
 
Allow the Mod Podge to dry. I left my letters alone for a couple hours. When the Mod Podge is dry, gently shake off the excess glitter.
 
Now, onto “sealing” the glitter. I used Rustoleum clear gloss for this step.
 
 
In order to figure out how much I would need to use, I practiced on a small piece of cardboard that I Mod Podged and glittered. I recommend doing this if it’s your first time. I found it best to spray from about 2 feet away and to not go overboard. Allow the spray to dry. Test a small spot on a letter to see if the glitter will still easily flake off. Spray a little more on if the glitter comes off.
 
I think the letters look great in my Cher-esque Halloween vignette.
Are you pro-glitter?
Have you tried this method before? How’d it work for you?

Filed Under: DIY, halloween, holiday

Never miss a post from Two Twenty One!

Get the latest DIY projects, organization ideas, tips & tricks and more delivered to your inbox!
Your information will *never* be shared or sold to a 3rd party.
« Halloween Printables {Halloween Prints}
Laundry Drying Tips »

Comments

  1. Erin @ His and Hers says

    October 8, 2012 at 1:30 PM

    I love glitter! I’ve used a sealer before and agree, it’s best when you spray from far away–otherwise it dulls the glitter.

    Reply
  2. Amanda says

    October 8, 2012 at 1:40 PM

    Do you find that it is cheaper to buy these letters at Jo Ann Fabrics as opposed to Hobby Lobby? I am pregnant with twin boys and want to do something similar to this with their names for the nursery. I’m going to need 7 letters, so buying them one at a time at Hobby Lobby with a coupon will take me forever.

    Reply
    • Chelsea @ two twenty one says

      October 8, 2012 at 6:03 PM

      I always buy my paper mache letters at JoAnn. These were $1 off (each letter) when I purchased them, and I had a 20% off coupon.

      Reply
  3. Erin @ Keep Calm and Sparkle says

    October 8, 2012 at 1:46 PM

    LOVE this idea!!! Can’t wait to try this out!!

    Reply
  4. lmcniff says

    October 8, 2012 at 4:03 PM

    omg this is so fun!!! I’m totally pro-glitter for any Fall/Winter holidays…Halloween, Thanksgiving, Christmas, New Years…all totally glitter appropriate. I need to make something like this!

    Reply
  5. Ash @ HumberHomeProject says

    October 8, 2012 at 4:14 PM

    Too funny, when I first saw your display, I remember thinking “man, she’s gonna have glitter everywhere after Halloween is over!”
    But, of course, you’ve outsmarted the glitter – what a great tip. I totally want to go buy glitter and bling out everything now. haha 😉

    Reply
  6. Caitlin @ Desert Domicile says

    October 8, 2012 at 5:22 PM

    Love those letters! I’m pro-glitter but my boyfriend hatttes it! I can’t even stress hate enough. It’s kind of hilarious to watch a grown man lose his mind if a little glitter touches him though haha

    Reply
    • alana nicole says

      October 18, 2012 at 3:58 AM

      haha that just made me laugh out loud!

      Reply
  7. DecorandtheDog says

    October 8, 2012 at 5:45 PM

    Shaking and glitter makes me think of Katy Perry. Good tips!

    Reply
  8. Rachel says

    October 8, 2012 at 6:05 PM

    I read “liberally apply mod podge” as “literally apply mod podge” and very intelligently thought, well how else would you do it? I once wrote an entire 10-page college essay on the origins of the misuse of the word ‘literally’ in literature. I WAS REALLY COOL. I shouldn’t tell people things like this. Please still be my friend.

    (Love the letters, by the way–you’ll have to post an update next year on if the glitter survives a year in storage!)

    Reply
  9. Brooke says

    October 8, 2012 at 6:34 PM

    Love it! I am going to try these 🙂

    Reply
  10. [email protected] says

    October 8, 2012 at 6:41 PM

    I love these! They are so cute!

    PS- I had a weird dream the other night that I met you at the VA state fair. It was totally random and strange haha.

    Reply
    • Chelsea @ two twenty one says

      October 8, 2012 at 6:47 PM

      HAH! Was I a corn dog eating carnie?

      Reply
  11. iheartorganizing says

    October 9, 2012 at 1:13 AM

    Too cute! Such a fun touch to the display!

    xo,
    Jen

    Reply
  12. Kelly says

    October 9, 2012 at 10:02 PM

    I love this. I think some glittery mod podge letters are in my near future.

    -Kelly @ View Along the Way
    http://www.viewalongtheway.com

    Reply
  13. Jessica says

    October 13, 2012 at 2:29 AM

    Cute idea! I’ve recently gotten into using Mod Podge for projects…so nice! Just wish they could get the glitter to stay on the thousands of projects that come home from school. Maybe I should send a bottle of the sealer spray to school!

    Reply
  14. Kim @ NewlyWoodwards says

    October 15, 2012 at 2:57 PM

    This turned out really cute. I’m trying to decide what to glitter next.

    Reply
  15. Jennifer Tran says

    October 10, 2013 at 2:13 PM

    I bought black wooden letters but plan to put pink glitter on it. Do you think I should spray paint it pink before modge podging it? Or will it be fine & I won’t see the black under the glitter?

    Reply
  16. Kelsey Scarbrough says

    November 6, 2013 at 10:01 AM

    Thank you SO much for your tutorial! I am so glad I found this a few weeks ago. I had purchased big letters from the craft store on sale several months ago, and I could not find a way to use them for our wedding shower, and eventually wedding. I knew this was it! They turned out great, and our guests loved them!

    Reply
  17. Emma says

    January 25, 2014 at 10:58 AM

    Very cute! How much did these end up costing you with all the supplies?

    Reply
  18. Misty says

    September 26, 2014 at 12:41 AM

    I used mod podge and glitter on ornaments, sealed it with hair spray, and when it dried it didn’t flake off and was still shiny.

    Reply
  19. Allison says

    November 21, 2014 at 4:48 PM

    What kind of glitter did you use?

    Reply
  20. Gail says

    January 3, 2015 at 1:59 AM

    Thank you for sharing how to! I just made this for my son’s candle lighting ceremony and they came out AMAZING! Only question I need to add/attach these letters to a styrofoam board. Any suggestions on how so they will be secure? Thank you!!!

    Reply
    • Chelsea @ two twenty one says

      January 3, 2015 at 11:17 AM

      You’re welcome! I’d use an ample amount of hot glue to attach the letters to a Styrofoam board. Hope that helps!

      Reply
  21. Danielle says

    February 1, 2015 at 3:48 AM

    Hi there. I recently started customizing/blinging shoes(heels and sneakers). Have you ever “glittered” any shoes? Also, once you seal the glitter with the sealant spray, does the surface feel smooth to the touch or does it feel rough?

    Reply
  22. courtney hasegawa says

    April 15, 2015 at 2:49 PM

    Where did you get the clear gloss from?

    Reply
    • Chelsea @ two twenty one says

      April 18, 2015 at 1:53 PM

      If you click on the product name (in blue) it will take you to where you can purchase it.

      Reply
  23. bradlyn rock says

    November 28, 2016 at 2:54 AM

    Thoughtful ideas – I am thankful for the analysis . Does anyone know where my company could possibly access a sample Partners Healthcare 0600938 version to fill out ?

    Reply
  24. Anne Helton says

    September 13, 2017 at 11:16 PM

    Would this be a good way to glitter a wooden 32 inch tall wooden letter for the wall ?

    Reply

Leave a Reply Cancel reply

Your email address will not be published. Required fields are marked *

Recipe Rating


  • Email
  • Facebook
  • Instagram
  • Pinterest
  • Twitter

Never miss a post from Two Twenty One!

Get the latest DIY projects, organization ideas, tips & tricks and more delivered to your inbox!
Your information will *never* be shared or sold to a 3rd party.
This blog accepts forms of cash advertising, sponsorship, paid insertions or other forms of compensation. The compensation received may influence the advertising content, topics or posts made in this blog. That content, advertising space or post may not always be identified as paid or sponsored content.

The owner(s) of this blog is compensated to provide opinion on products, services, websites and various other topics. Even though the owner(s) of this blog receives compensation for our posts or advertisements, we always give our honest opinions, findings, beliefs, or experiences on those topics or products. The views and opinions expressed on this blog are purely the bloggers’ own. Any product claim, statistic, quote or other representation about a product or service should be verified with the manufacturer, provider or party in question.

Two Twenty One is a participant in the Amazon Services LLC Associates Program, an affiliate advertising program designed to provide a means for sites to earn advertising fees by advertising and linking to amazon.com.

Blog Policy

© Two Twenty One, 2011-2020. Unauthorized use and/or duplication of this material without express and written permission from this blog’s author is strictly prohibited.

Privacy

Copyright © 2022 · glam theme by Restored 316 · Design by Stephanie Jones

Copyright © 2022 · Glam Theme on Genesis Framework · WordPress · Log in

525 shares